Project: Push/Pull

Digging Into the Details
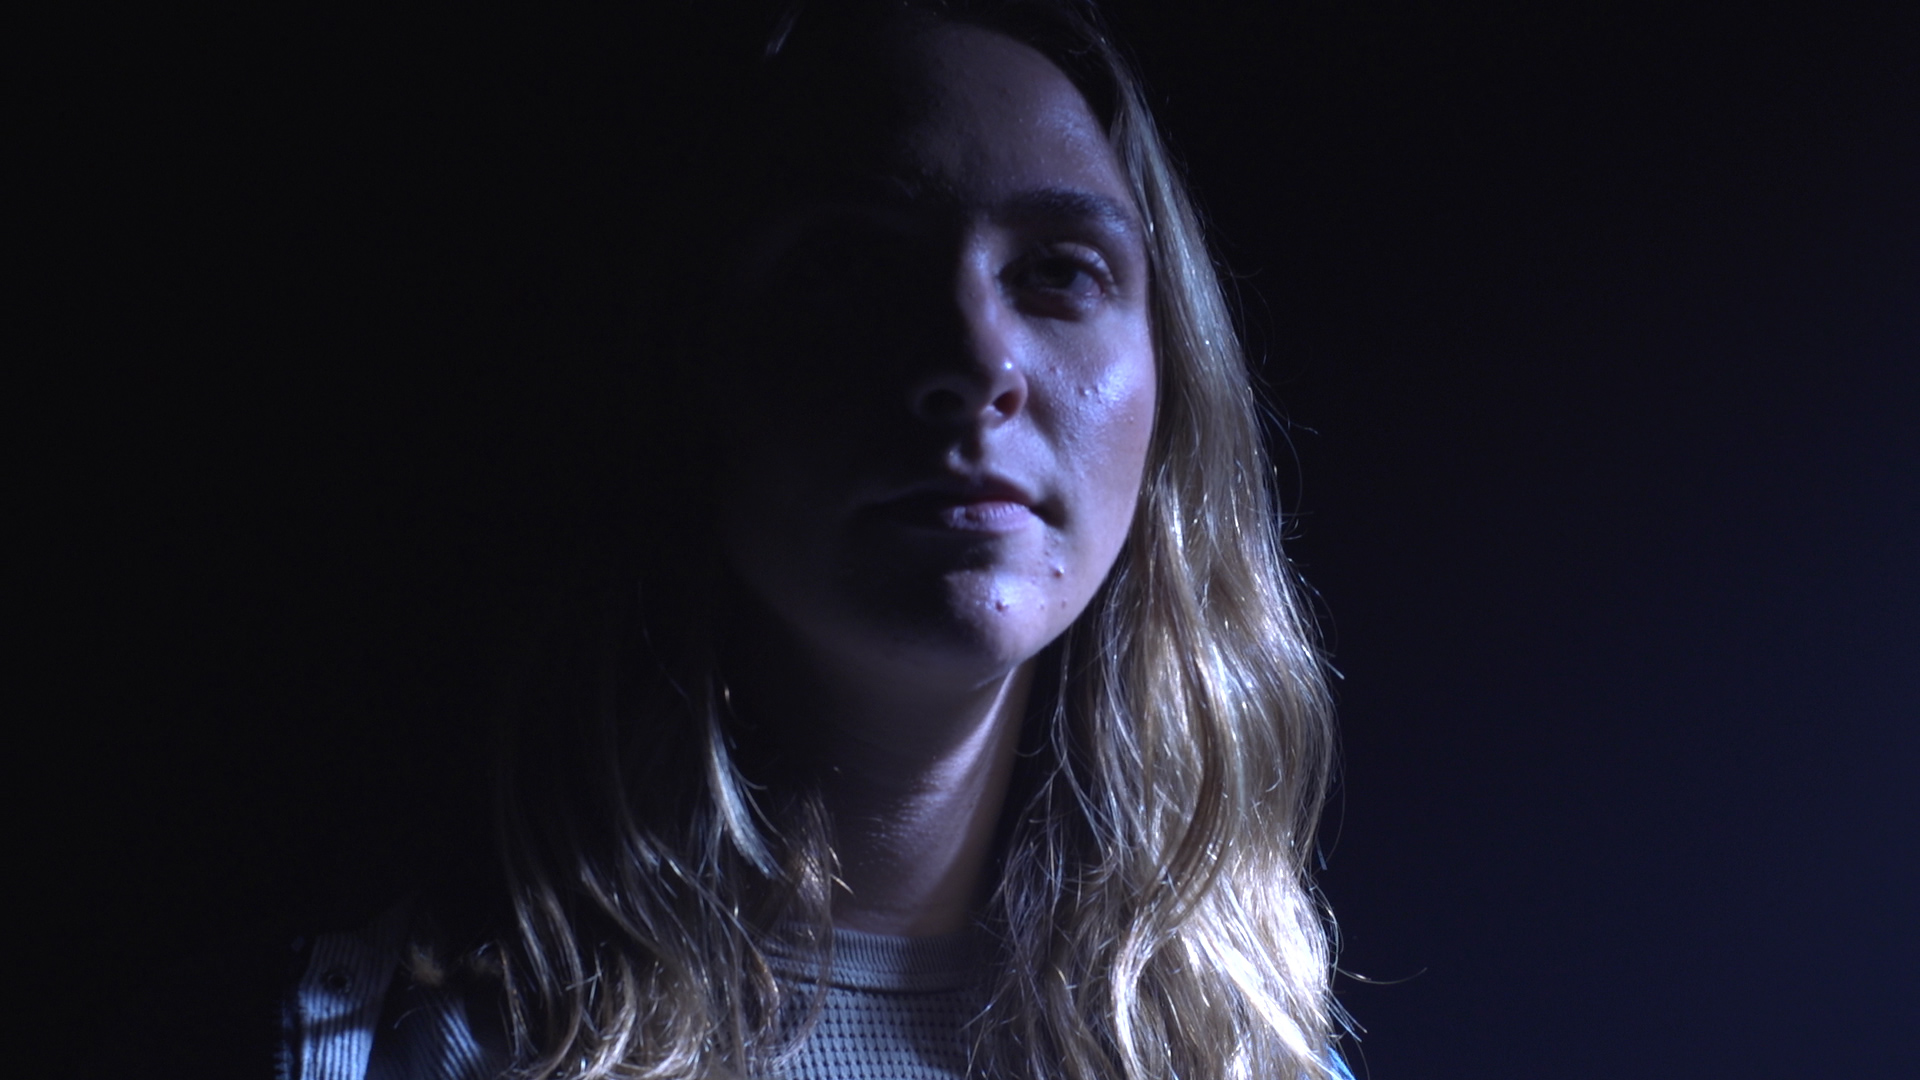
Here are a few more videos that explore David Fincher’s extraordinarily precise camera movement, his use of special effects, and his unique style.
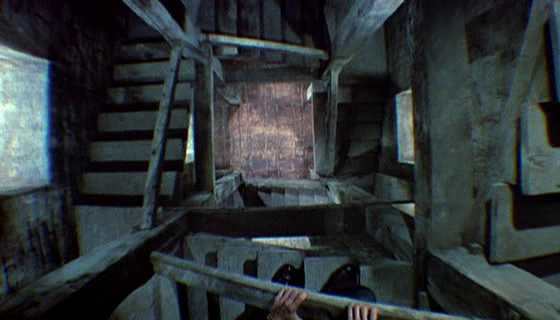
Project 6 – Replicating Famous Moves
Over the next few weeks, we’re going to be doing some in-class exercises designed around the signature camera moves of famous directors. We’ll start with the “Spielberg face,” as described by Kevin B. Lee’s video essay; then we’ll tackle the infamous dolly zoom, made famous by Alfred Hitchcock.
Movement with Feeling
We’ve now used cameras on tripods, handheld, and on shoulder rigs. This week, we’re going to play with some bigger toys to create camera movement that is – dare I say it – more cinematic. Filmmakers like David Lynch use a static camera to create dramatic tension; filmmakers like Alfonso Cuaron use a handheld camera to create intimacy and engagement. When a camera is mounted onto a track or moving platform, the result is somewhere in between, yet entirely unique.

As we previously discussed, moving the camera helps insert the audience into the scene, because a handheld camera approximates the way we actually see the world. However, when a camera moves forward on a dolly or floats sideways on a slider, that is movement that we don’t usually experience in life. It is deliberately artificial. That’s not a negative thing – it’s simply using the artifice of film to its potential. The smooth movement and the composition of the frame guide our eyes in an almost irresistible way.
Pushing in, pulling back, tracking from side to side – these are essential parts of the “classic Hollywood” style. Sometimes this movement is utilitarian – following an actor, exploring the geography of the set, drawing the audience’s attention to part of the scene. Few directors do this in a more deliberate, exacting way than David Fincher. Fincher’s camera follows his subjects with mathematical precision. These are motivated camera moves that lock the audience into the movement of the characters. Check out this video essay from Nerdwriter for some insightful examples:
Other times, this movement is overtly stylistic. Spike Lee often uses shots where both the camera and the actor are moved through an environment on a dolly. The result is floaty and dreamlike; it separates the actor from the world and creates a kind of collage.
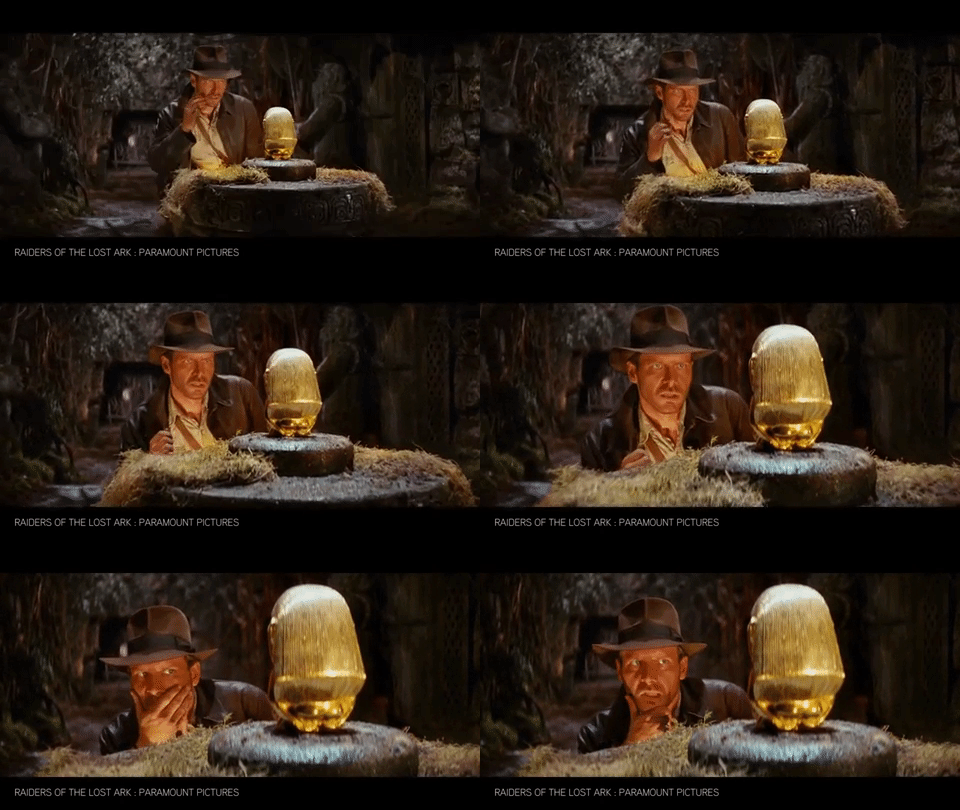
If Spike Lee uses movement with style and David Fincher uses it with precision, Steven Spielberg uses camera movement with emotion. Spielberg has always been a director who understands the emotional power of camera movement – and he isn’t afraid to use it. Spielberg is often considered a “sentimental” filmmaker and I think that his camera movement is a big part of that. In the following scene from Close Encounters of the Third Kind, the camera is almost constantly moving, highlighting the mounting fear and strangeness of the sequence.
However, the best examples of Spielberg’s style of movement are probably his shots of faces. Spielberg understood the expressive power of the human face early in his career and his filmography is full of these shots. Here’s an excellent video essay from Kevin B. Lee examining how Spielberg uses – and eventually subverts – a simple dolly move towards an actor’s face.
Dolly Zoom
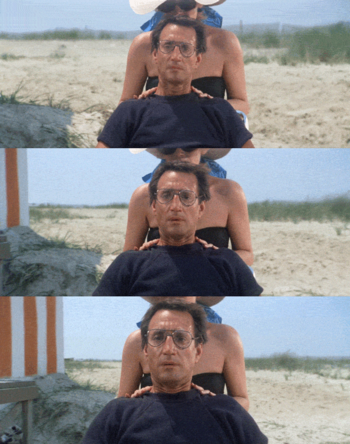
The dolly zoom is known by many names: the push/pull, the trombone shot, the Vertigo effect, and others. We’ve discussed how this effect is achieved a bit already: as the camera moves closer or further away from the subject, the lens zooms in or out in the opposite direction. In the resulting shot, the subject stays roughly the same size, but the perspective of the background changes, creating an unsettling effect. It can be used to emphasize isolation, build tension, or illustrate a sense of panic. I’d argue that all three are happening in this famous shot from Jaws.
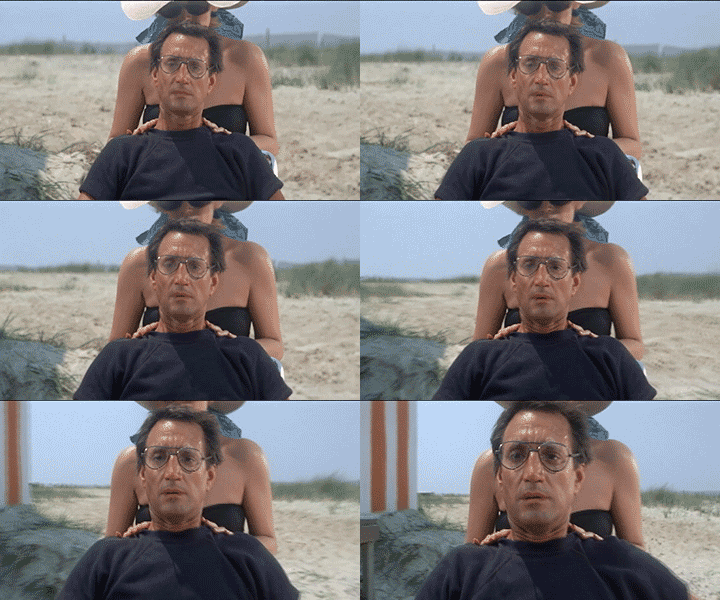

Dolly zooms are difficult to film – you need to move the camera and change the focal length of the lens smoothly and simultaneously. If the camera drifts to one side or the other during the movement, the shot won’t work. If the zoom goes in or out too far, or at the wrong speed, or unevenly, the shot won’t work. You also have a limited amount of space and time to play with – it takes a large, complex setup to move a camera dramatically towards or away from an actor and you need a lens with a long zoom – remember, most cinema lenses are primes – to mirror it. For these reasons, dolly zooms are usually only a few seconds long.

Moving That Camera
Here are some of the tools we have in our collection for smoothly moving a camera forwards, backwards, and side to side.
Tripod Dolly
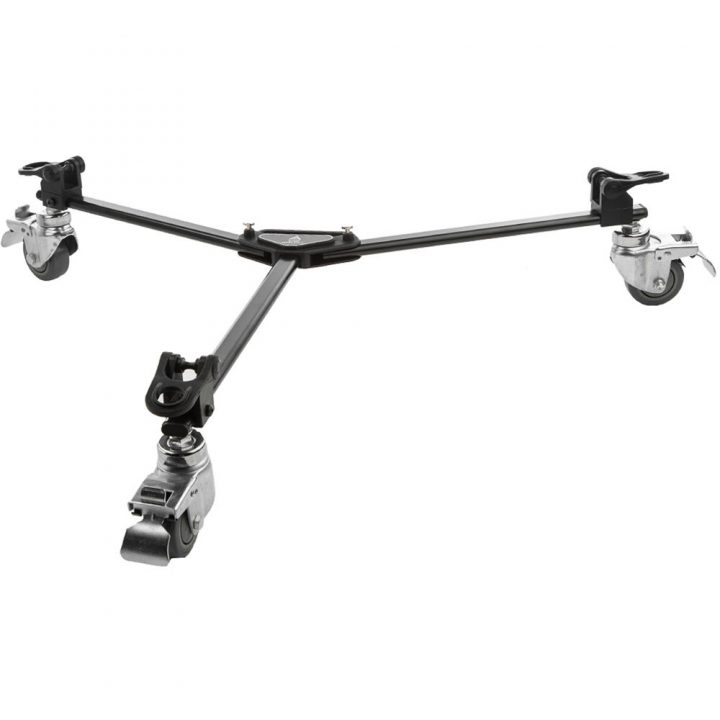
We’ve used the tripod dolly several times already – it’s a simple wheeled platform that allows a tripod to be moved quickly. The wheels can be locked in place to prevent movement. While the tripod dolly is very convenient, it doesn’t provide very smooth movement; the wheels are fairly small and don’t spin evenly. The tripod dolly is really a tool designed for moving the camera between shots, not during shots. However, if you are on a very smooth surface (such as a linoleum floor) and you use the tripod dolly carefully, you can get relatively smooth shots.
Doorway Dolly
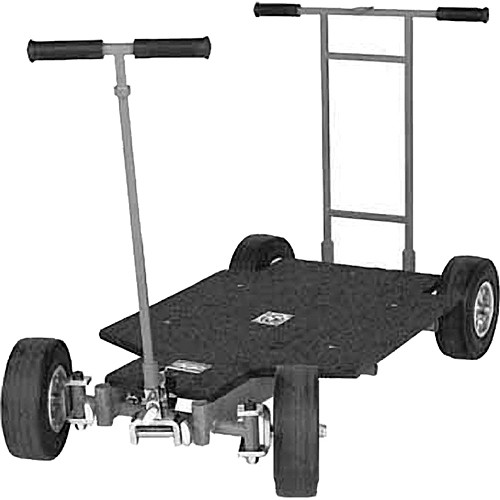
The “doorway dolly” is a large wheeled platform that can handle a good deal of weight. It’s designed to fit through an average-sized doorway (hence the name). There are handles on the front and back, a steering column, and platforms that can be attached to the side for a larger base. The wheels are large and soft, which makes the movement much smoother.
The best way to use the doorway dolly is probably with a camera on a tripod and a camera operator on the unit itself. One or more other person can carefully move the dolly. This obviously requires a good deal of coordination, but it gives you a large smoothly moving platform that doesn’t require a track.
Ladder Dolly
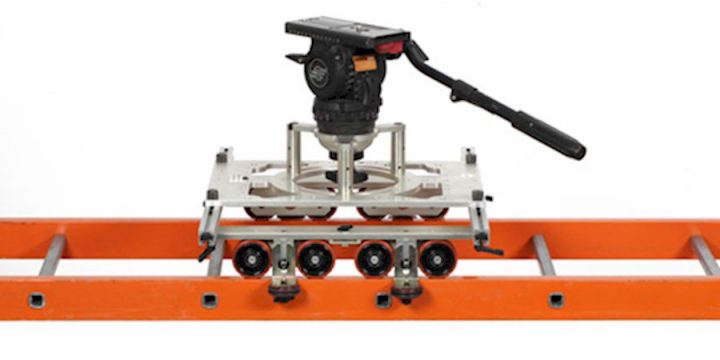
The ladder dolly is large slider that mounts to a horizontal ladder. As long as the ladder is well-secured, the platform is very stable and can take a lot of weight. The ladder dolly that we use has a bowl mount for easy leveling – we use the same mount on our small crane.
The ladder dolly is a large and cumbersome piece of equipment, but it’s probably the best way to smoothly truck a heavy camera along a fixed track.
Track Slider
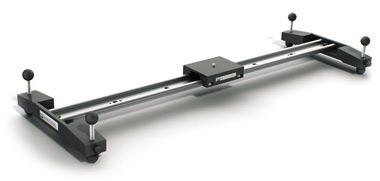
Our large slider is a pretty simple device – a long track with a base that slides along it. It can be set on the ground or mounted on a pair of tripods or light stands. Because it’s so long, getting this slider level can be a challenge. You also need to be careful not to put too much weight on the track, as it could start to bow in the middle.
The long track slider is a powerful tool, but it can be challenging to use. Since the mounting platform is moved by hand, you need to carefully control how much force you put on it.
Slider with Flywheel
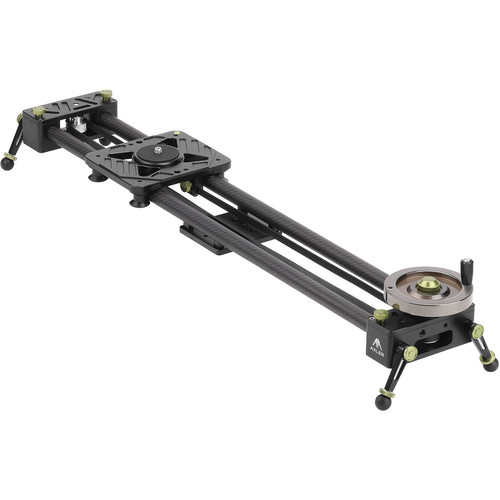
Our Axler flywheel slider is pretty short – less than three feet – but it can really add some cinematic movement to your footage. The great thing about this slider is that it uses a rubber chain for movement instead of just friction. This is looped around a weighted flywheel, which controls and dampens the movement – it smooths everything out.
Because you have a smaller track, you need to be thoughtful about how you arrange your shot – some movements just won’t be very obvious. However, if you get close to your subject or put objects in the immediate foreground, you can get a dramatic effect.
This slider is small enough to be mounted to a single large tripod, but just barely. It can also be set on the ground or mounted to a pair of light stands or smaller tripods.
DIY Solutions
In addition to the kinds of professional equipment we have in our collection, there are lots of homemade solutions for this kind of camera movement. A wheelchair is actually a very versatile piece of kit – the camera operator can sit in it and a second person can move them across a smooth floor. The large wheels provide a smooth, stable base, and the operator can point the camera in any direction. It works a lot like the doorway dolly, but it’s smaller and lighter.
There are also lots of instructions out there for building your own slider. Some of these use PVC pipes and other hardware store finds. I’ve even seen filmmakers put a shirt or other piece of fabric on a table and use that for slider moves – it works better than you might think.
Whatever the case, remember that you don’t necessarily need the best, most expensive equipment in order to get dynamic moving shots. It just takes creativity and persistence.
Fabulous Prizes!
Want to try out your filmmaking skills? Check out this one minute short film competition from the fine folks at Film Riot.
Project 5 – One Film Three Ways
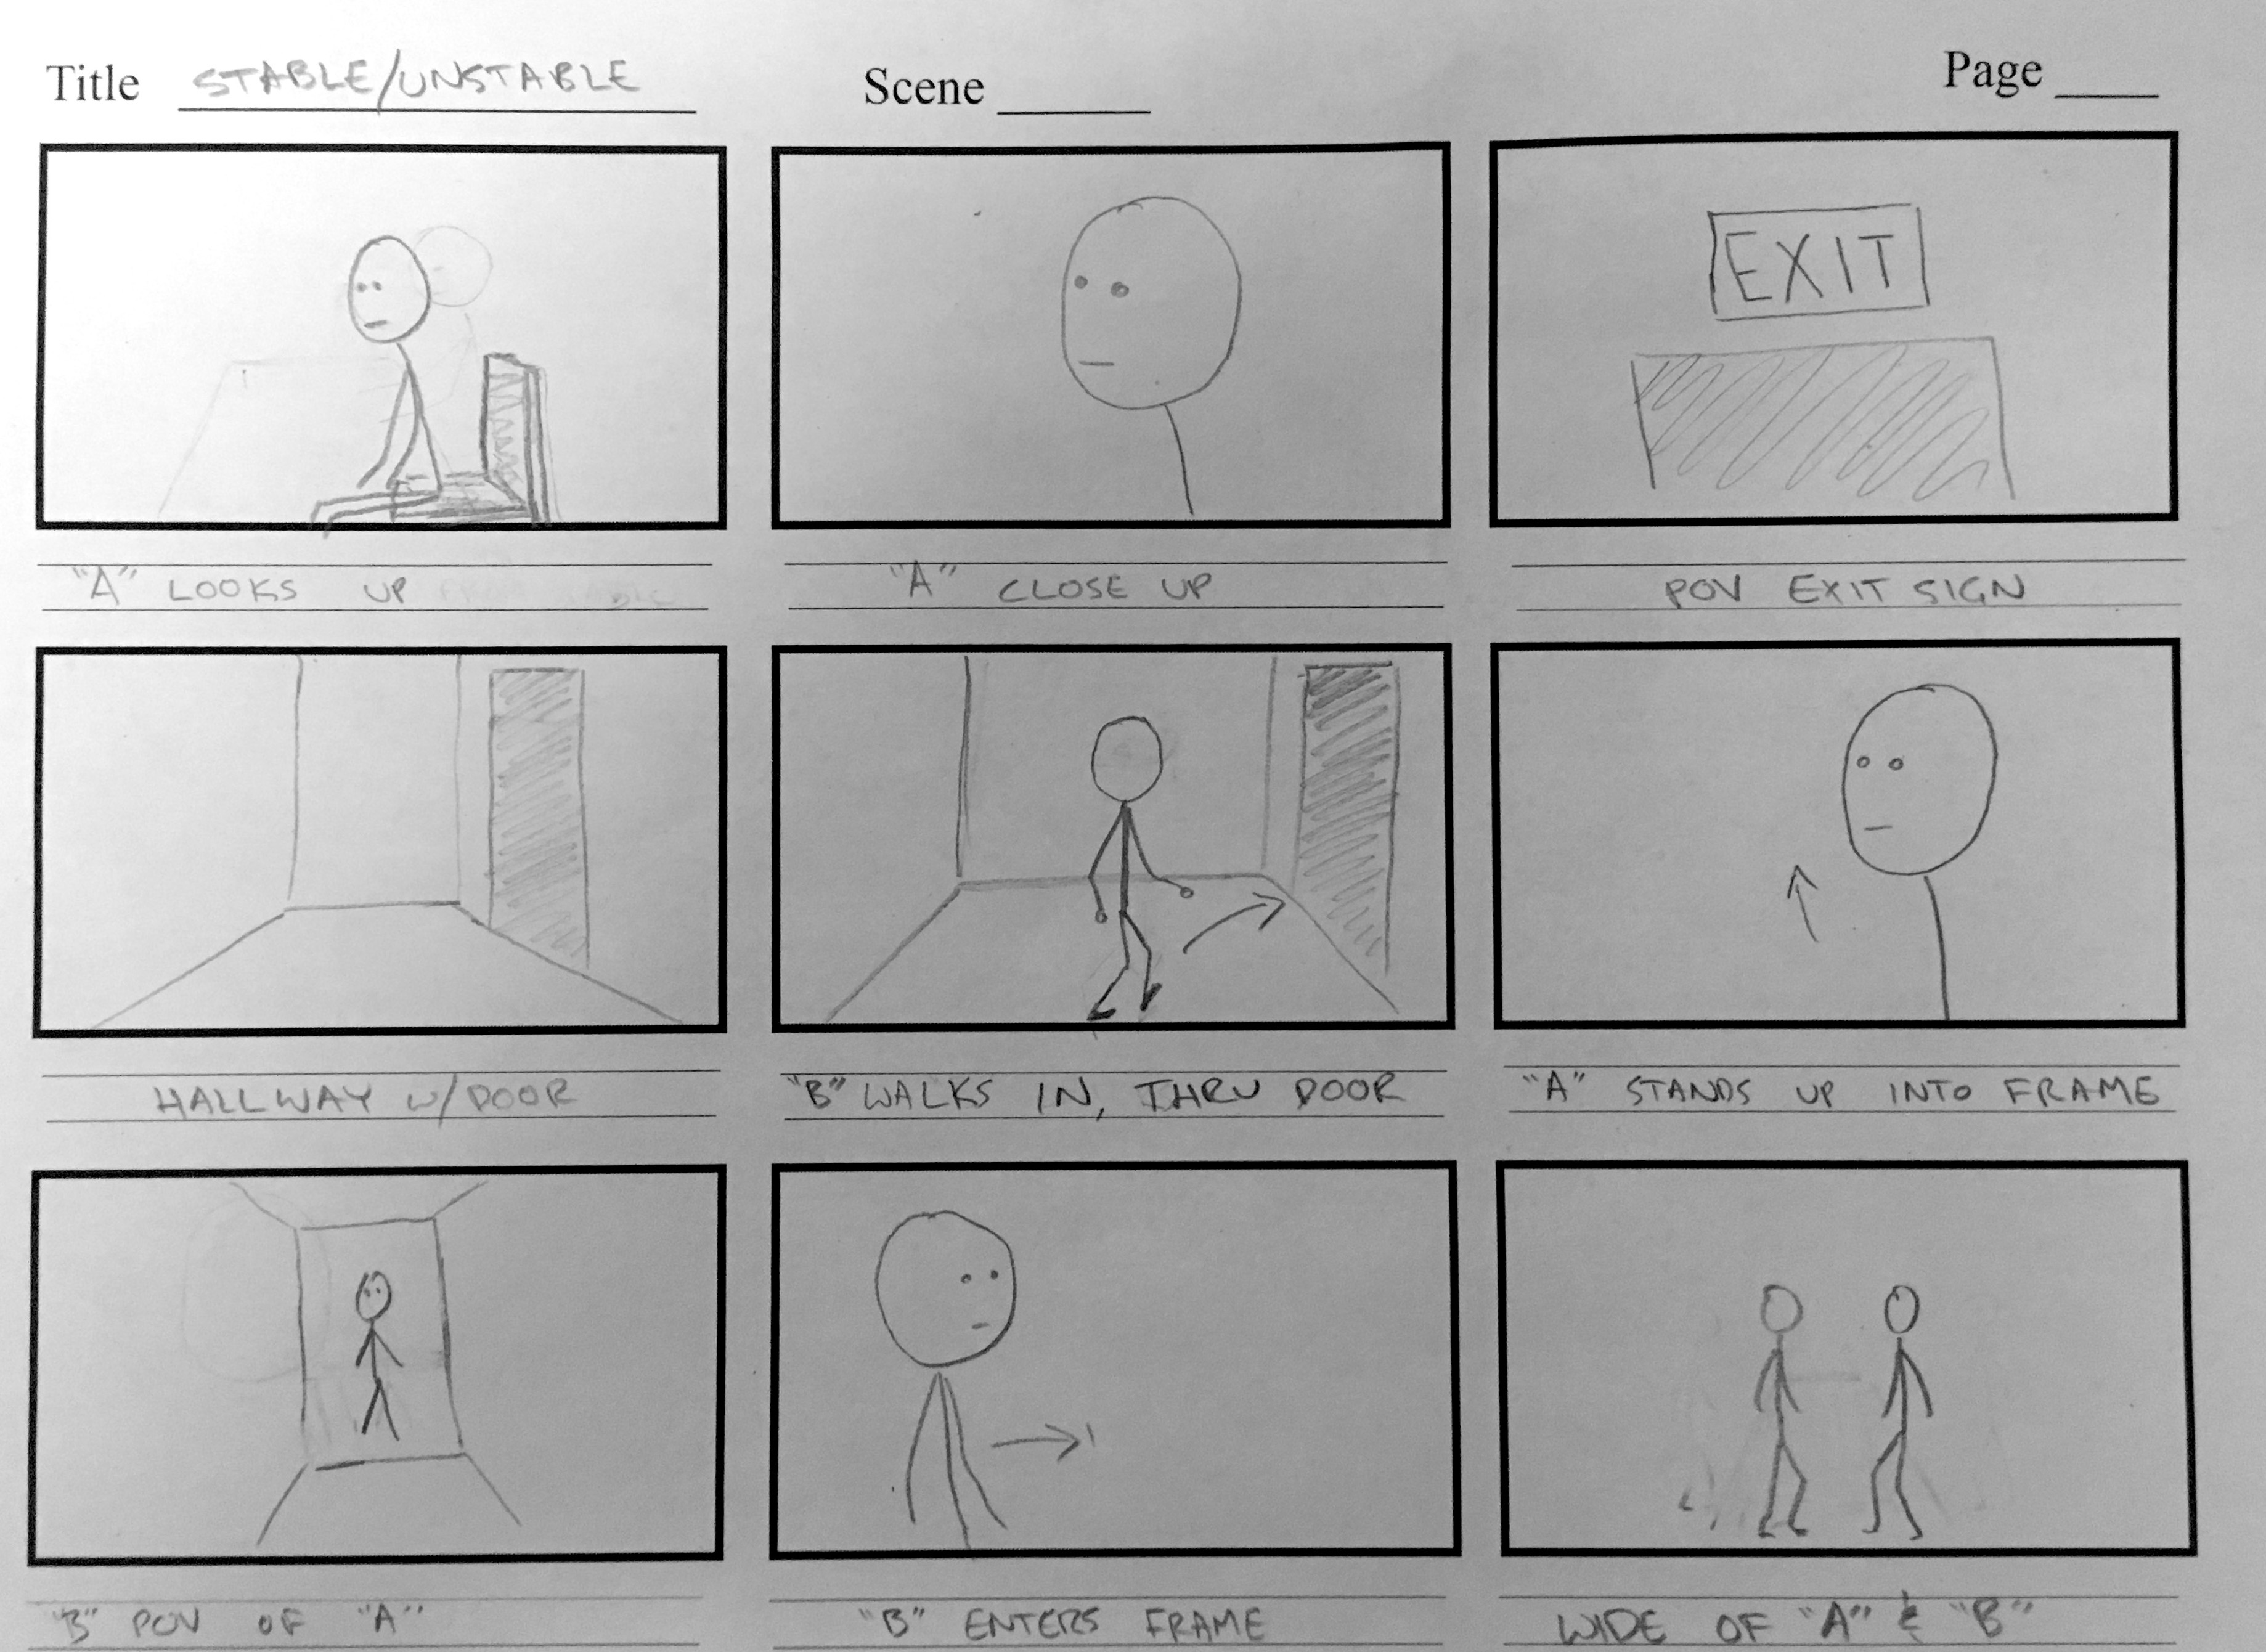
To illustrate how handheld movement affects cinematography, we’re going to do a very short film as a class. Each shot will be filmed three ways: first, locked off on a tripod; then with the camera handheld but not moving otherwise; and finally, following the action with the camera on a shoulder rig.
The film itself is only a handful of shots – one character is waiting for another. The second character approaches through a hallway and enters the room. That’s it. The idea here is (obviously) not a brilliant narrative – it’s just some generic shots that should play in different ways, depending on the amount of movement.
Here are the storyboards for the sequence:
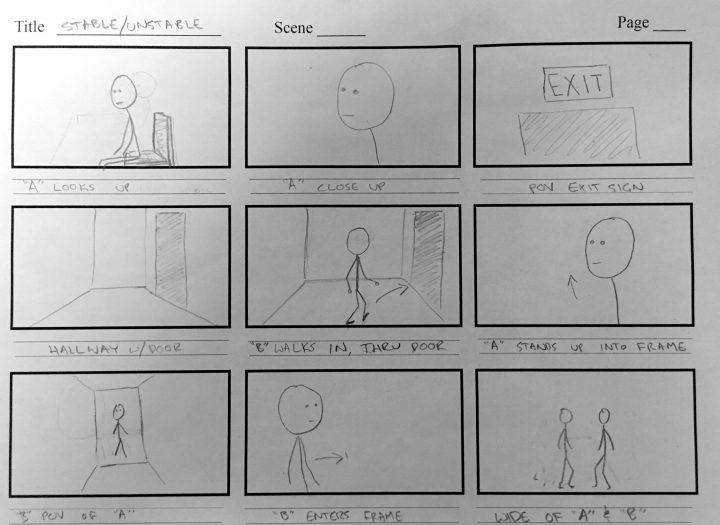
The filming for this project will be completed during class – I’ll edit the three versions and put them online for us to check out.
Need a Hand?
Want some additional tips for shooting handheld footage? Check out these videos for some more techniques.
Accessorize with Caution
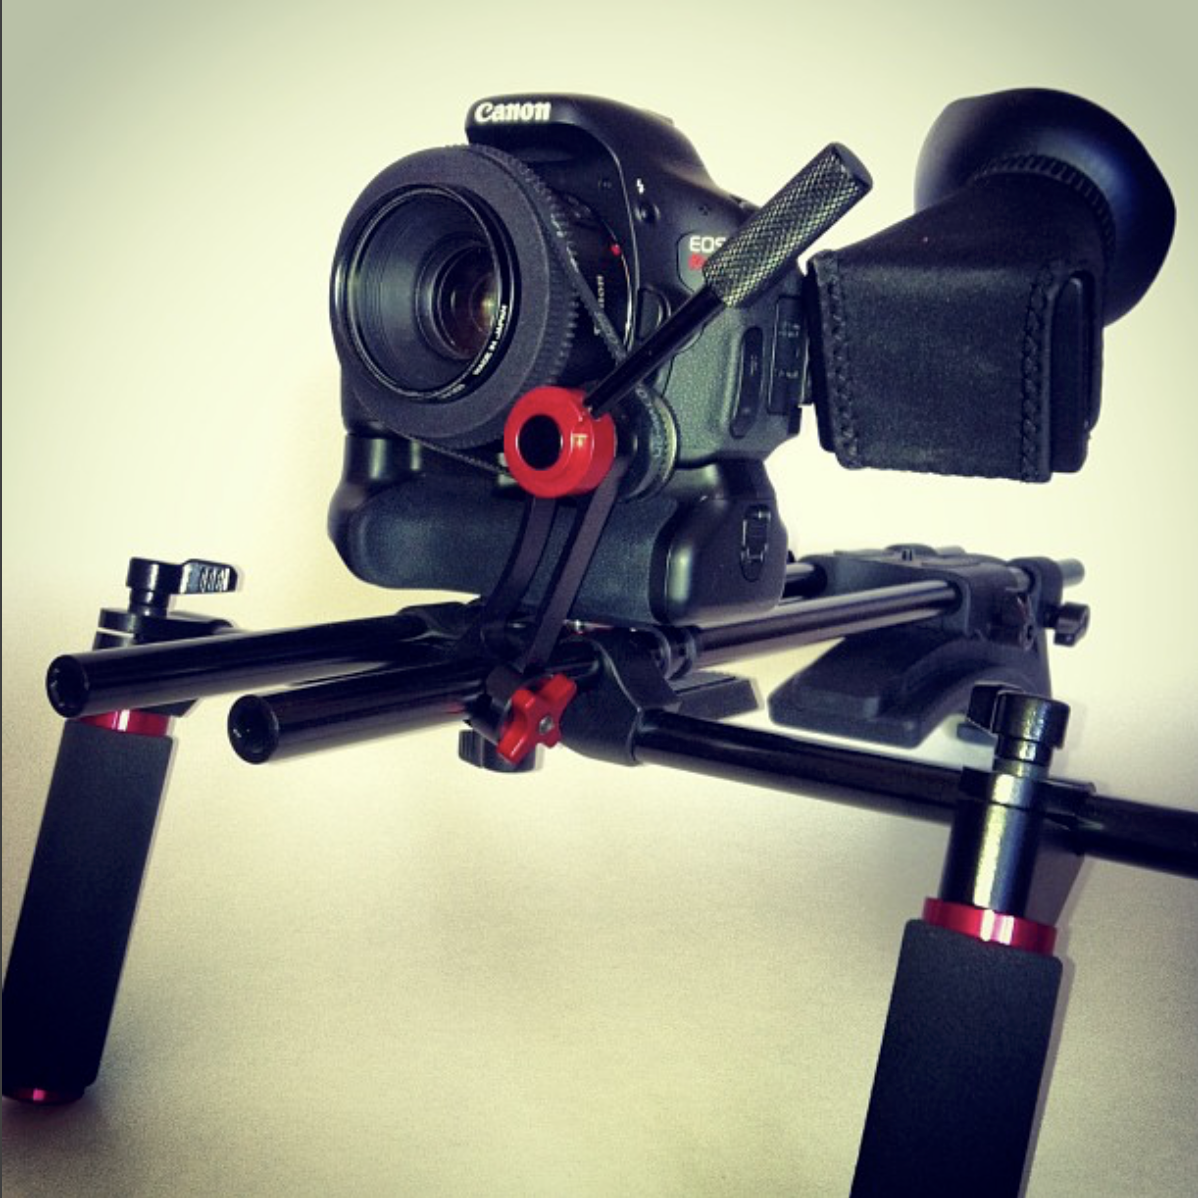
We first talked about camera rigging way back in week three. Rigs are great for adding additional components to your camera and for making it handle more like a traditional dedicated video camera. However, it’s also easy to go way overboard with rigging.
Several years ago, I was working on an informational video for a university in California. I had recently purchased some new camera accessories for my DSLR and – wanting to make a good impression as a capable professional – I built up a shoulder rig with everything I possibly could. The end result was heavy and awkward to use; on the first day of the shoot, I slammed into a door frame trying to maneuver it through a narrow hallway.
Since then, I’ve tried to be more thoughtful about how I accessorize my cameras and when rigging is and isn’t necessary. One of the biggest strengths of hybrid cameras is that they are light and portable – easy to move around with. Sometimes that is worth trading for some of the functionality of a dedicated video camera and sometimes it isn’t.
Of course, video cameras can be rigged up as well, with rails, a follow focus, an external monitor, or other accessories. It’s important to remember that all of these things are tools with specific purposes. In other words, don’r rig just for the sake of rigging.
Rods and Rails
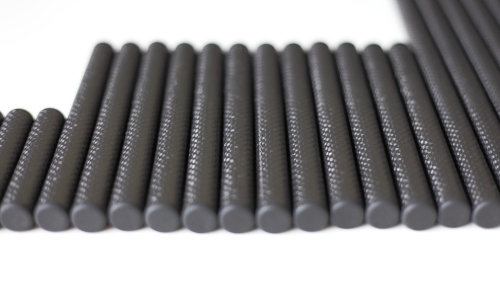
Rail systems are probably the most common way to rig up a camera. They use standard rods that are either 19mm – for large cinema cameras – or 15mm in diameter. These are generally made of either aluminum or carbon fiber. We use 15mm rods with our equipment and these have become much more common in the last few years. The rods use mounts and clamps that are always the same distance apart (60mm), so you can buy parts and accessories from various manufacturers and combine them however you like.
Most matte boxes and follow focus controllers are attached using rods. As hybrid cameras have increased in popularity, these tools have decreased in price and many hybrid shooters now use them. Unfortunately, the desire to make a small camera look “more professional” has led to a glut of cheap plastic accessories that function poorly. Make no mistake, it’s sometimes important to make a good impression on a client – but if you’re starting out as a filmmaker, there are probably better investments than a cheap matte box.
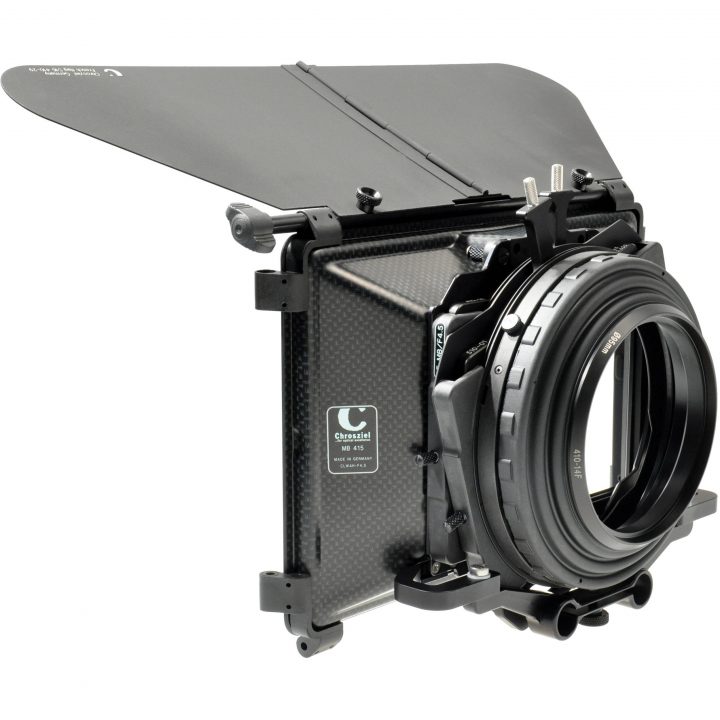
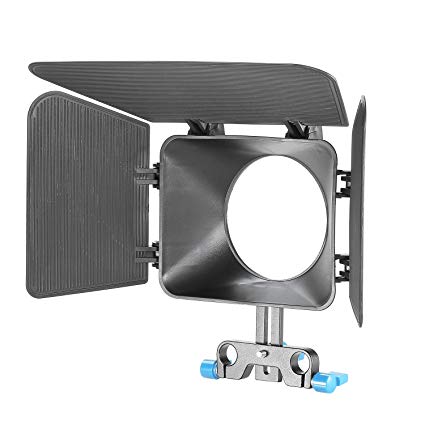
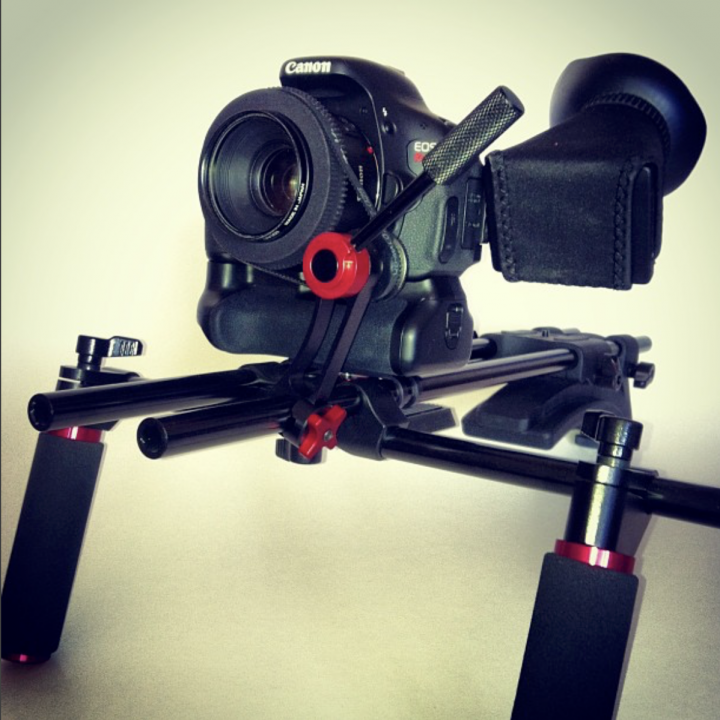
In addition to camera accessories, you can also use a rail system to add movement options to your rig. The simplest – and most effective – way to do this is by adding front handles and a shoulder pad. These come in a variety of shapes and sizes, but they all serve to add more points of contact between yourself and the camera, creating more stability.
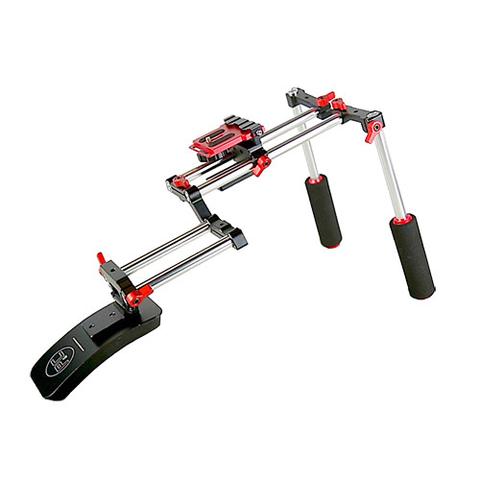
You might not think that adding a shoulder pad and handles to a camera would make a big difference, but it really does. You are much more steady when holding the camera still and much more smooth when moving it. Especially on smaller hybrid cameras without internal stabilization, small vibrations can make something like walking footage basically unusable. A shoulder rig adds a lot of stability. As an experiment, try a simple movement – say, following a walking subject – with and without a shoulder rig and review the footage.
Other Stabilizers and Rigs
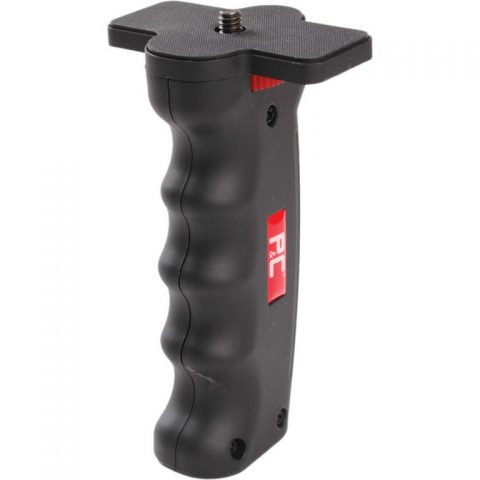
While 15mm rods are the most widely used rigging system, there are a number of other options available as well. One of the simplest is to add a handle to the bottom of a hybrid camera. Doing so places one hand directly under the camera’s sensor, which helps smooth out the footage. It also encourages you to hold the camera near your body, which also helps.
In our collection, we have two additional shoulder rigs that do not use 15mm rods. One is a folding “spider” rig, which can be twisted into a variety of configurations. This is a versatile tool – it can go from a shoulder mount to side handles to a tabletop tripod fairly quickly. I personally find it a bit too “fiddly” to use regularly, however.
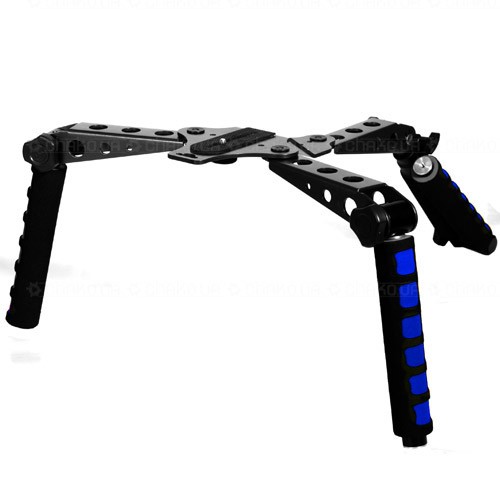
The other rig is a simple plastic shoulder rest with a mounting point for the camera on the end. This is an inexpensive rig and it definitely feels a bit cheap and creaky. However, for a lightweight camera, it actually does a really good job of adding stability. For handheld moving camera shots, it’s a great option – you just look a bit silly using it.

Stylish Shakes
In your first project, you made films using only a camera with a single lens – no tripods or other stabilization methods. This week, we’re going to explore the idea of handheld cinematography in greater depth.
Tripods are excellent for smooth movements and static shots. Monopods also offer stability and they allow you to smoothly move the camera in unique ways. In the coming weeks, we’ll also be using tools such as gimbal stabilizers, sliders, and cranes. With all of these options at our disposal, why go handheld?
Handheld footage has its own aesthetic, distinct from that captured on a tripod, gimbal, or Steadicam. We generally think of camera shake as a bad thing – and it often is, in non-professional work – but it can give cinematography a dynamic, vibrant quality when used thoughtfully. A bit of shake can make an intimate scene feel more personal – or it can make an intense scene feel more raw.
While our brains and bodies do a fantastic job of compensating for it, we are almost always experiencing a world in motion. That means that when a shot is completely static, it can actually feel unnatural. Filmmakers like David Lynch sometimes use static shots to build tension in a scene. In this sequence from Blue Velvet (cinematography by Frederick Elmes), there is a dolly in during the first shot, then no camera movement in any of the following shots.
Compare that to this scene from Alejandro Iñárritu’s 2000 film Amores Perros (cinematography by Rodrigo Prieto). Even on the wide establishing shot, there is a small amount of continuous camera movement – a tiny bit of shake. This completely changes the feeling of the sequence. Lynch’s shots feel detached and alien – there is an uncanny quality to the environment, which is appropriate as Lynch’s work tends to explore darkly unsettling worlds beneath the veneer of idyllic suburban life. Iñárritu’s shots feel personal – the movement places the audience within the environment of the film, rather than detaching them from it.
That is the real power of handheld cinematography – the ability to engulf the audience. When a camera is moving slightly, the viewer feels as though they are staring through the eyes of someone participating in the scene. Often, this movement is very slight, even subconscious, but it still affects the viewer in a significant way.
Subtle Movement
Here are two sequences that use camera movement in ways that don’t really call attention to the fact that they are handheld. Pablo Larraín’s Jackie (cinematography by Stéphane Fontaine) uses handheld cinematography even in very “generic” scenes such as this shot/reverse shot.
This remarkable sequence from Alfonso Cuaron’s Children of Men (cinematography by Emmanuel Lubezki) makes a more overt use of handheld camera work, but it sort of fades into the background after a few shots. Most of the shots could have been filmed on a tripod or stabilizer, but the slight additional movement helps place us into world of the film.
Intense Movement
Of course, a handheld camera can also be used in a much more overt way. In this chase scene from Fernando Meirelles’ City of God (cinematography by César Charlone), the wildly moving camera adds energy to the sequence. Notice also how the camera’s movement is more dramatic in the shots of the chicken being pursued than the early shots of the two friends walking. The rapid editing meshes well with the movement, creating a sequence that is immediately engaging.
A shaky camera can also jarring and disorienting, which is why it is frequently used in war films to portray the chaos of battle. The obvious example of this is the Omaha Beach scene from Steven Spielberg’s Saving Private Ryan (cinematography by Janusz Kaminski). Here, the moving camera confuses and frightens the audience, reflecting the panic felt by the soldiers.
While all of these examples use handheld camera movement in different ways, they are unified in that they all use it intentionally. We tend to associate shaky handheld movement with amateur productions because they are often then accidental result of an inexperienced camera operator. Good handheld cinematography requires the same attention to lighting, blocking, and framing that tripod-mounted camera work does.
Everyone’s Favorite Buzzword
The word “cinematic” gets thrown around a lot on filmmaking blogs and in video tutorials. It’s an extremely vague term, but generally describes footage that doesn’t look like a home movie or quick social media post. That could be due to the color grading, movement, depth of field, framing, slow motion, or other factors. Here are a handful of videos that promise to help you get that CINEMATIC (all caps!) look.
Deliberate Filmmaking
Filming cinematic footage is all about planning. The tools used on major cinematic productions are highly specialized and the individuals who operate them have very specific jobs to do. Filming a documentary short requires you to be resourceful; filming an event requires you to be adaptable; filming cinema requires you to be deliberate.
Of course, I’m exaggerating the distinctions between these different types of filmmaking. All creators need to be resourceful, adaptable, and deliberate to some extent in whatever they do. However, cinematic filmmaking really highlights the importance of thoughtful planning. When I use the word “cinematic,” I’m oversimplifying a bit there as well – what I really mean is narrative filmmaking that has been staged, lit, recorded, and color graded with a specific result in mind.
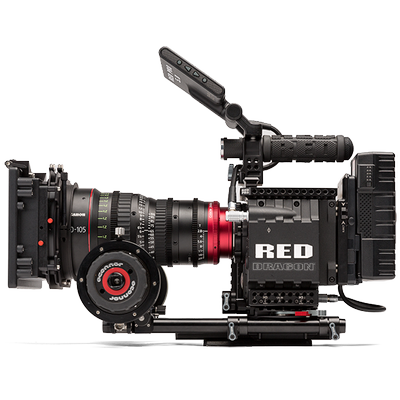
Cinema cameras – as opposed to hybrids or camcorders – have been designed for this kind of filmmaking first and foremost. Some cinema cameras have the versatility of a camcorder, with advanced audio features and comfortable ergonomics, but many do not. The cameras made by RED, for example (some of the most popular cinema cameras being used today), can be outfitted with different modules to expand their functionality – but the heart of the RED system is just an image sensor in a box.

Continuing our discussion from Lesson 5.1, the BlackMagic Pocket Cinema Camera is a true cinema camera. This makes it a frankly inconvenient camera to use, but one that can capture great images.
Rigging It Up
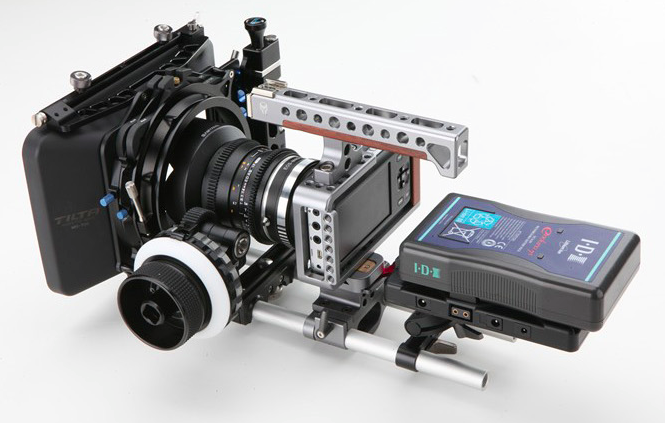
Here are the accessories that I’d recommend using with the BMPCC in order to maximize its usability.
Lighting
Without going into too much detail on lighting – we have an entire class for that – I want to point out that cinema cameras really require cinematic lighting. A standard “three point” lighting system will do the job, but you need to be thoughtful about how you light your scenes. Here are a few paragraphs from the “Fundamental Lighting” lesson of the Film/Media Studies Practicum on color and light:
Three point lighting isn’t a basic technique, it’s a fundamental technique – the fundamental technique – for lighting a subject. There may be dozens of lights set up for a shot, but the subject (the actor, generally speaking) will still be lit using three point lighting. That’s because three point lighting describes how we see other people every day, with different levels of light and shadow.
When you are outside, you are probably being primarily illuminated by the sun – that makes it the key light. The sun can be a hard or a soft light, depending on the weather and time of day; overcast days are generally considered great for filming, since the light is diffuse and flattering.
Depending on the sun’s location, it will cast shadows on one side of your face or the other, but these shadows are softened by the other lights in the environment: either light from the sun that has been reflected off of other objects or other sources of nearby illumination. These softening lights are the fill.
Finally, there is almost always light coming from behind you – usually either the sky or some reflected light from the sun. If this light overwhelms the light of the sun (the key light), you will be silhouetted; if it is fainter, it will wrap around you from behind as a rim of light. This is the back light.
When you are setting up three point lighting, you have a few factors to consider. How harsh should the shadows be? How intense should the back light be? Which side should the back light be on? These are largely a matter of personal preference and can change from one setup to another. I personally think that the back light looks best on the opposite side from the key, but many lighting diagrams show the opposite. The important thing is to be conscious of how these choices affect your scene.
Filming for Grading
As previously mentioned, the BMPCC can record two kinds of video files: raw and ProRes. The raw files are actually .dng still images that are captured in a sequence – you can actually inspect the frames one by one. These raw stills are read by an editing program as an image sequence. Recording in a raw format like this gives you the maximum amount of image quality and flexibility for color grading.
However, as you can imagine, recoding thousands of uncompressed still image files instead of a single piece of video really complicates the post-production workflow. I’d recommend using one of the ProRes options when filming on the BMPCC, as they are still robust, high-quality files, but they are much easier to work with.
If you plan on color grading your footage (a given in cinematic work), recording to a “log” or flat picture profile is also wise. The BMPCC always records a slightly desaturated image, but using the “Film” dynamic range setting takes this even further. From another lesson in the Color & Light course, here’s some information about log recording:
Simply put, log is a camera setting that lowers the contrast and saturation of the image being recorded; a “flat” picture profile. Log footage is pretty unpleasant-looking at first – milky, bland, and washed-out. Log footage comes to life in the color-grading process when saturation and contrast is added back into the image. Because you are starting with more of a blank slate, log footage can be color graded and tweaked more aggressively in post-production.
So should you always be shooting using a log profile? Actually, no. Because log footage has low contrast, it protects the details in both shadows and highlights. That makes it great for shooting environments with very bright areas and very dark areas. However, if you’re in a situation where you don’t need to recover details from both the shadows and the highlights, there really isn’t much point to shooting log – you’d only be adding unnecessary work later.
The way your camera records video files also makes a difference as to whether or not you should shoot log. Without getting too technical, cameras that use low compression (4:2:2 as opposed to 4:2:0) and capture lots of color information (12 or 10-bit as opposed to 8-bit) using a robust codec (RAW or ProRes as opposed to H.264) will do better with log footage. In our collection, the BlackMagic Pocket Camera and Sony FS5 are better suited to using flat picture profiles than cameras like the GH3 and AF100.
Finally, shooting log can be problematic because it’s difficult to imagine what your finished footage will look like when everything is desaturated and grey – it can even be challenging to light and expose correctly, since the footage appears so flat. However, some cameras and external monitors (like our SmallHD DP7-Pro) will allow you to load a LUT (essentially a color-grading preset) and preview your footage with a more finished look.
When filming in the log setting on the BMPCC, remember that the footage you are capturing will be significantly transformed in the color grading process. Use the tools at your disposal – light meters, exposure guides like histograms, LUT previews – to dial in your footage for the best result.
Tiny Camera, Big Image
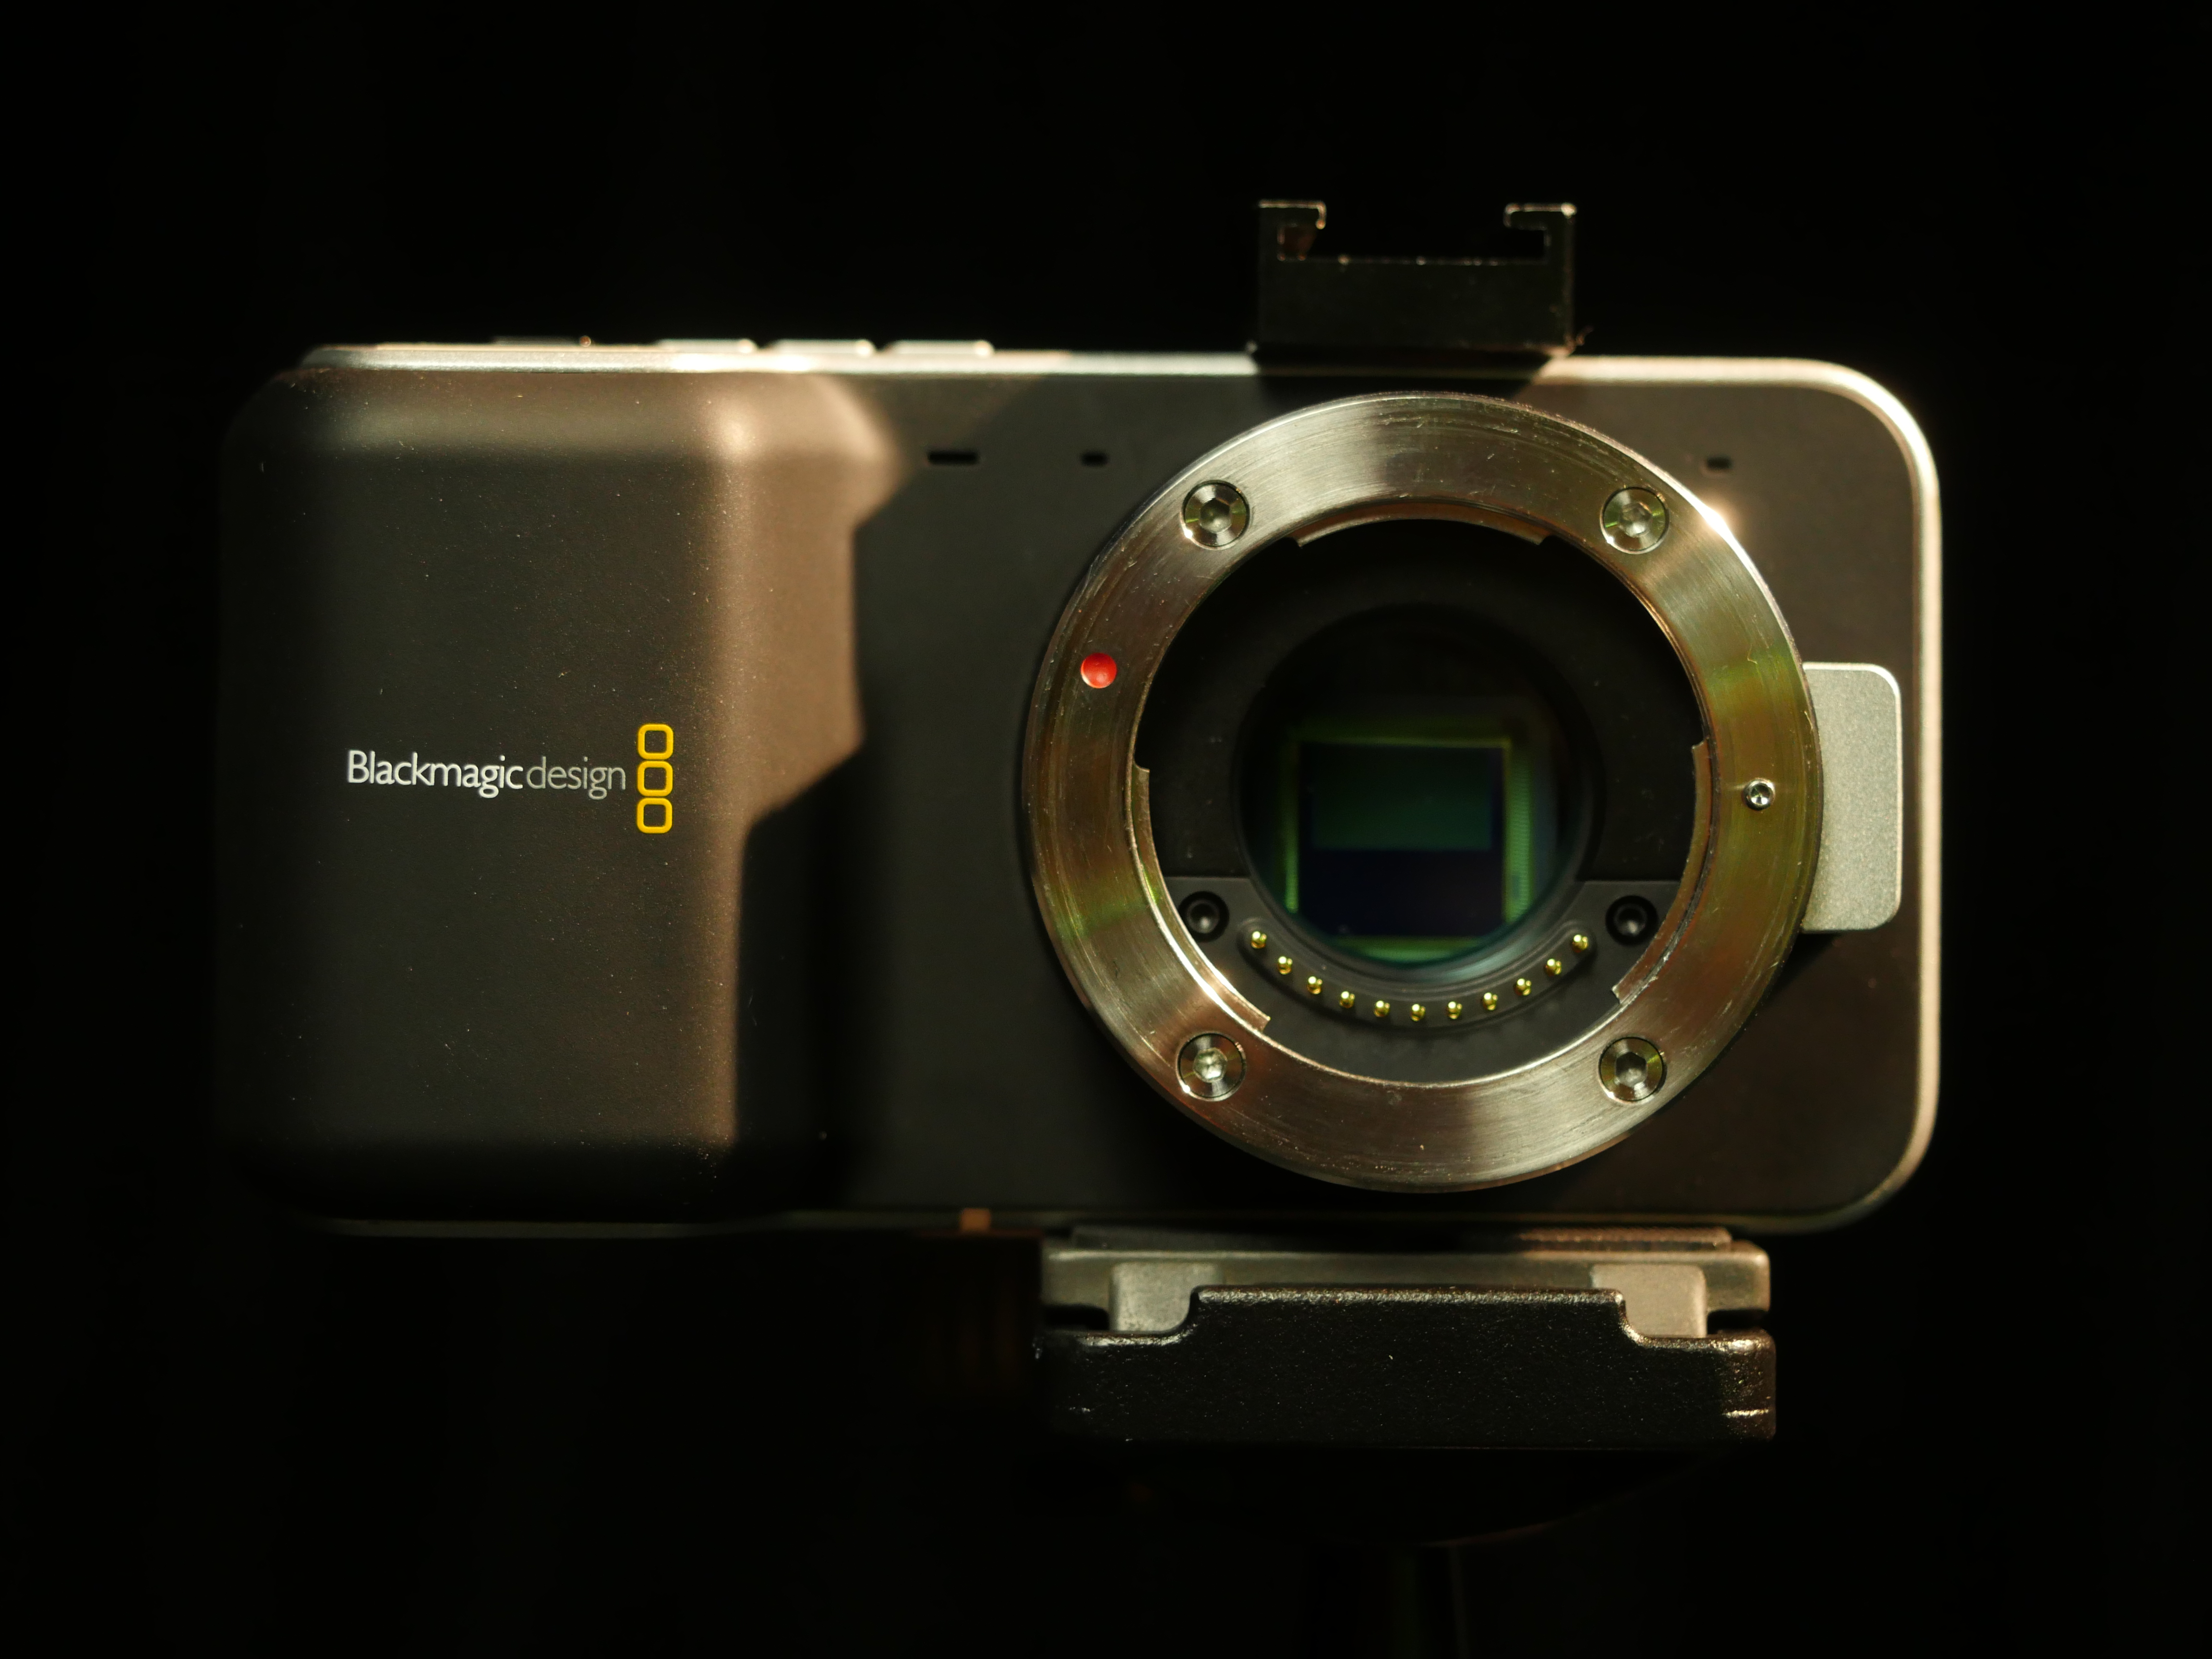
This week, we’re looking at a very unusual camera: the BlackMagic Pocket Cinema Camera. The first, much larger, BlackMagic Cinema Camera was released in 2012 and it immediately made waves in the filmmaking community. BlackMagic’s cinema line of cameras cameras don’t look like hybrid cameras or camcorders – they’ve rejected the body styles of both in order to create a device focused solely on capturing images. That means that they lose out on some of the handling and ergonomic benefits of those kinds of cameras. However, when it comes to capturing high quality images, BlackMagic cameras do their job very well. They also do so at a price point much lower than most of their competitors.
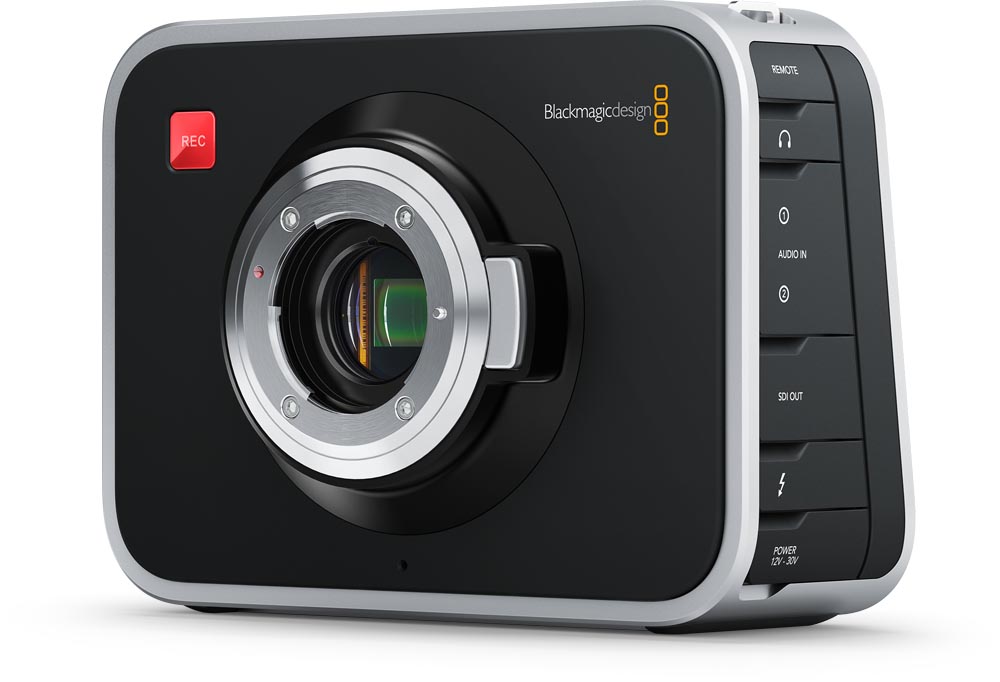
The BlackMagic Pocket Cinema Camera (let’s call it the BMPCC for short) was released in 2013 and it seems like it was designed with the goal of addressing some of the complaints about the larger Cinema Camera. It’s much smaller and lighter, it uses standard rechargeable camera batteries, and it records to SD cards instead of hard drives. It also retains a lot of what made the original Cinema Camera so enticing: it captures very high quality images in more robust file formats that can be color graded in a professional environment. It can capture raw video – that is, video that has not been compressed – or ProRes video, which is a compressed, but still high quality format.
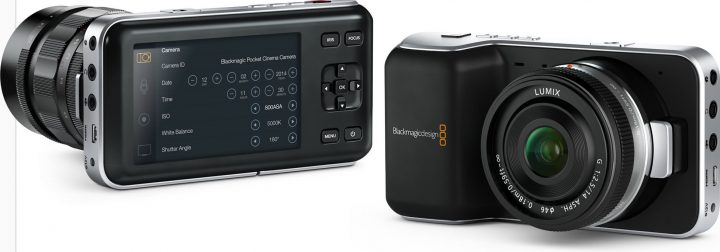
The resulting camera is… weird. It looks like a compact point-and-shoot stills camera, but it uses much larger lenses and doesn’t actually capture stills. The body itself is, in fact, probably small enough to fit in most pockets, but the camera is at its best when it is heavily accessorized, limiting its portability (more on this below). It has a beautifully designed and intuitive menu system, but those menus are limited and difficult to navigate with the controls on the camera body. The BMPCC is a camera of contradictions.
The Good and the Bad
Let’s address some of the BMPCC’s shortcomings, because they are significant. First of all, the battery life on this camera is terrible. Under normal shooting conditions, you will probably be able to use the camera for about 45 minutes before needing to change batteries. Fortunately, the batteries recharge fairly quickly and you can also power the camera using a larger external battery with an adapter. Still, whenever you use this camera, you should bring backup batteries and the charger.
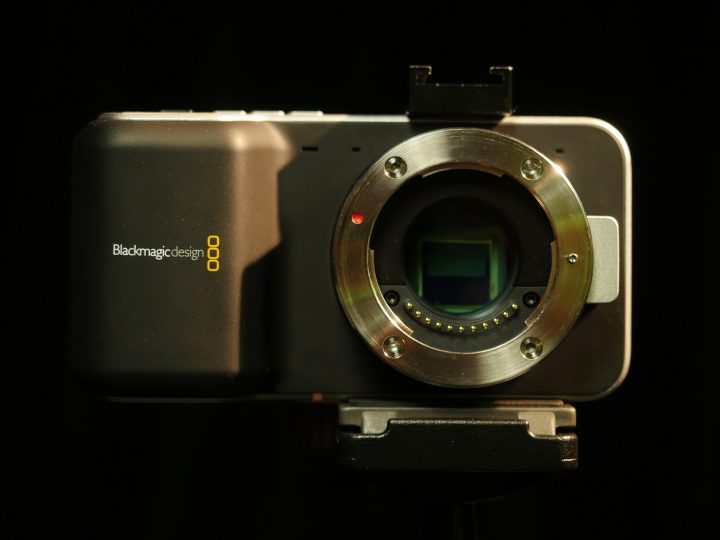
The camera’s audio options are pretty limited; it has a 3.5mm microphone input and a headphone jack, but no XLR inputs with phantom power and independent level control like you’d find on a high end video camera. Even with an XLR adapter, the audio pre-amps on this camera are pretty bad, so it’s best to capture sound to an external recorder.
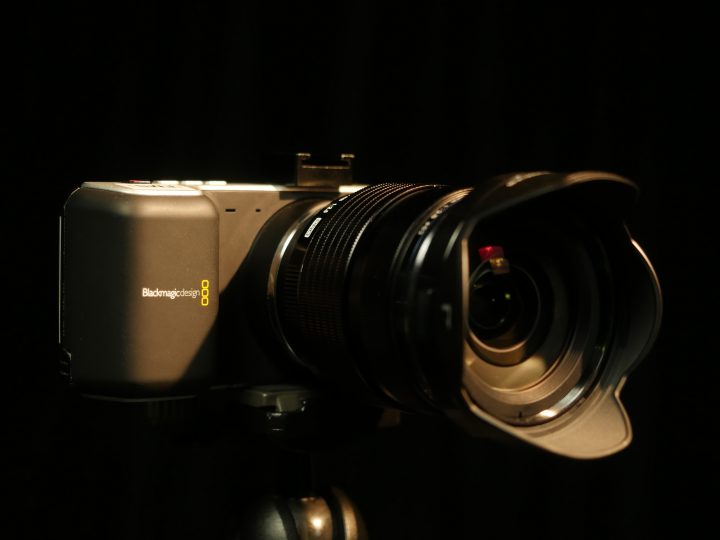
The body of the camera is compact, but as a result, it’s not an especially comfortable camera to hold and use. The lightweight body makes heavier lenses feel unwieldy – ironically, the “pocket” camera performs best when mounted on a tripod. The small body also means that the external buttons and controls are limited. You can adjust the aperture using buttons on the back, but you need to dig into the menus to change the ISO, white balance, and shutter speed. There is a dedicated focus button, but the autofocus is so slow and inconsistent that you probably won’t use it. The buttons also cannot be customized.
It doesn’t have any slow motion settings. It doesn’t capture 4K, only HD. It’s not very good in low light. It isn’t weather-sealed or particularly rugged. It has no viewfinder, only a dim rear screen that becomes useless in bright sunlight.
Finally, while the camera uses Micro Four Thirds lenses, it actually has a smaller sensor – roughly the size of Super 16mm film. That means that the crop factor on this camera is 2.88x, instead of the 2x you find on other Micro Four Thirds cameras (like the Panasonic GH3 and GH4). This means that it’s very difficult to get any wide angle shots on this camera, since you need an incredibly wide lens.
To summarize, the camera is slow, inconvenient, and “fiddly.” It has a body a bit like a hybrid camera’s, but misses out on a lot of the benefits that hybrid cameras carry with them. It purports to be a video camera, but misses out on a lot of those benefits too. So why do people use this camera?
BlackMagic Design named this device the Pocket Cinema Camera and, while the “pocket” designation is dubious, the “cinema” label is not. This is a camera that was designed to capture cinematic images and it does so beautifully. The sensor is small, but high-quality. The files captured – whether raw or ProRes – have a lovely, natural, “filmic” quality to them, especially when the camera is paired with a good lens. Those files are much larger than what you would get on a GH4 or AF100, but they also hold up to color grading and manipulation much better.
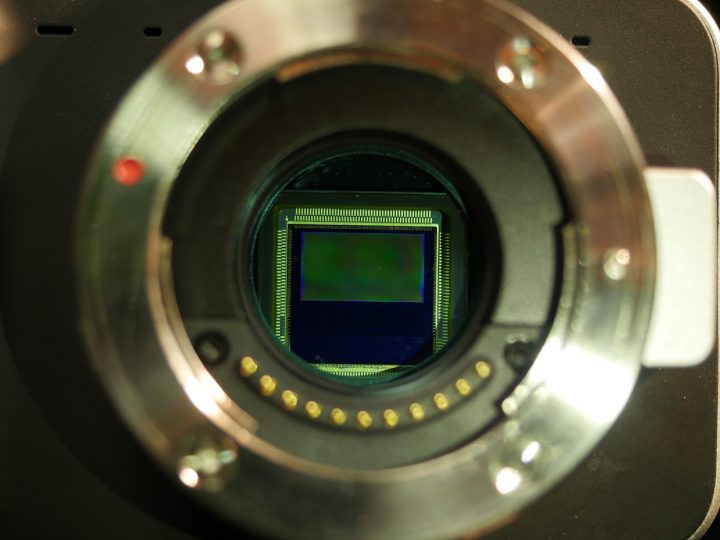
In terms of image quality, the BMPCC actually performs better than many cameras that are much more expensive and full-featured. If you stop thinking of it as a full camera and use it as a sensor around which you can build up a cinematic system – adding a good lens, battery solution, rigging, stabilization, an external monitor, and audio recorder – you’ll be able to take full advantage of its capabilities.
Using the BMPCC
Both the battery and memory card slots are located beneath a door at the bottom of the camera. Again, bring plenty of both, because this camera chews through media and batteries with abandon. You’ll also need fast memory cards to keep up with the data rates required by this camera.
On one side, you’ll find the inputs and outputs: remote cable, headphones, microphone, micro HDMI, and external power. On the top of the camera are the record button and playback controls. On the back are buttons for power, accessing the menu, iris control, and autofocus, as well as a directional pad and OK button. Those are all of the external controls on the camera.
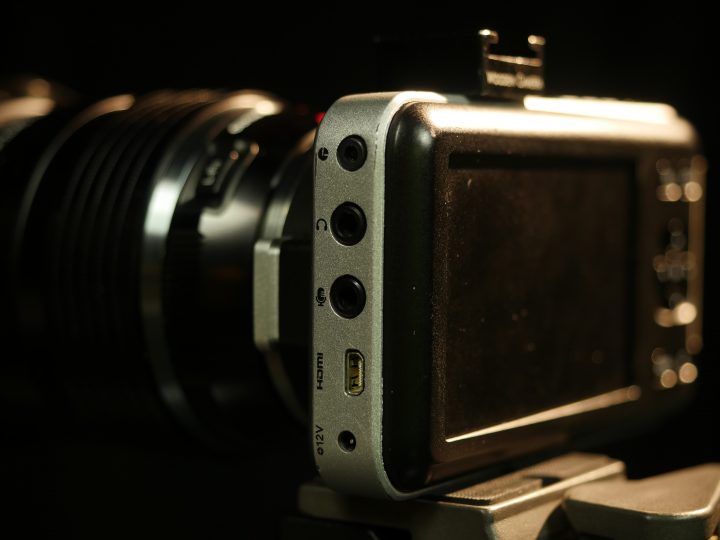
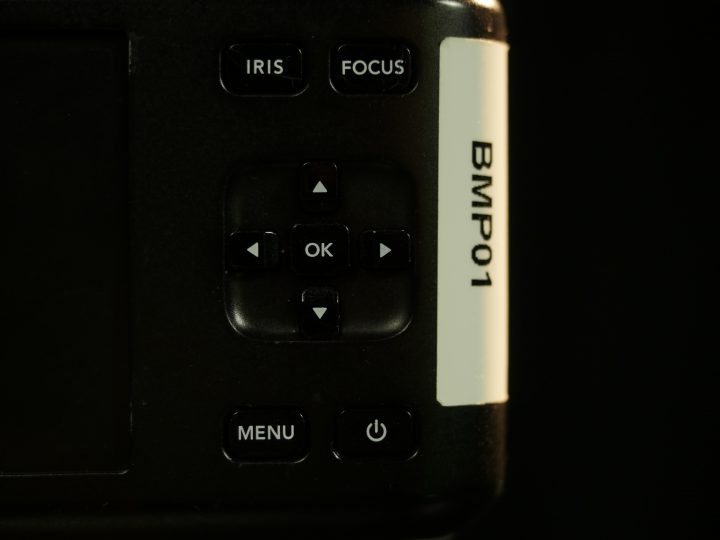
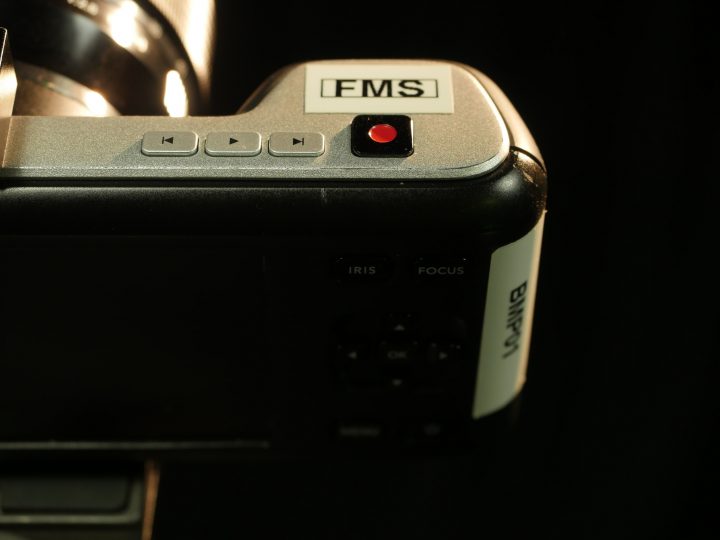
Opening the menus, you may be struck by how different BlackMagic’s interface looks when compared to other cameras. It is clean and modern, with clear labels and a logical layout. In the Metadata section, you can embed textual information into the files, but doing so using the directional pad is so time-consuming that you probably shouldn’t bother.
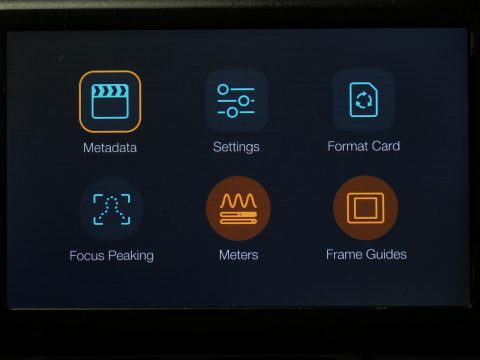
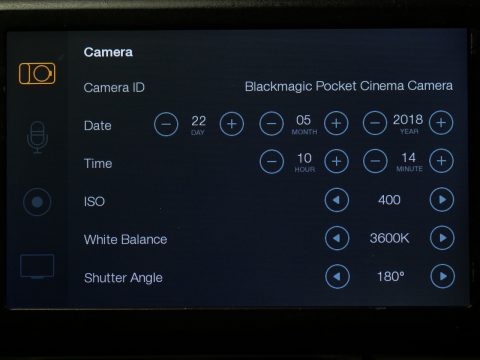
In the settings menu, you’ll find sections labeled Camera, Audio, Recording, and Display. In Camera, you can set the date and time (for some reason) and change the ISO, white balance, and shutter angle. The audio section lets you control the microphone input levels – but, again, the in-camera audio should really only be used as a scratch track.
The Recording section has some interesting options to play with. The Recording Format setting allows you to select RAW or several flavors of ProRes. In my opinion, ProRes 422 offers the best combination of high quality files with sizes that aren’t prohibitively huge. For the absolute best quality, choose RAW or ProRes HQ.
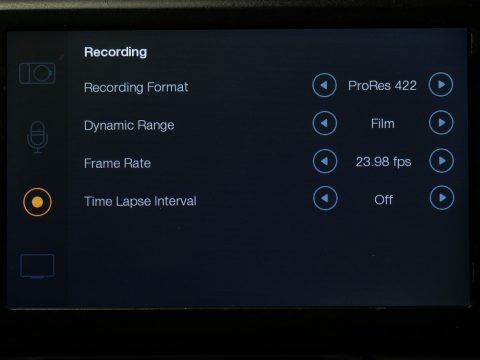
The Dynamic Range setting allows you to choose between Film and Video. Both settings will result in footage that is less saturated and contrasty than you might be used to seeing – the Film mode in particular is very flat. While this look may seem unappealing at first, the footage really comes alive when you bring it into post-production software and do some color grading to it. For the most flexibility in post, use the Film mode; for footage that looks a bit better right out of the camera, use Video. You also set your frame rate in the Recording section. There is a time-lapse mode there as well, but hybrid cameras are generally better-suited for time-lapse.
The Display section lets you control the brightness of the rear screen and adjust the zebras exposure guide. It also has its own Dynamic Range setting; if you have it set to Film in the Recording section, you can switch the display to Video to show what lightly color graded footage would look like. For simplicity’s sake, I’d recommend leaving the Display Dynamic Range set to whatever the Recording version is.
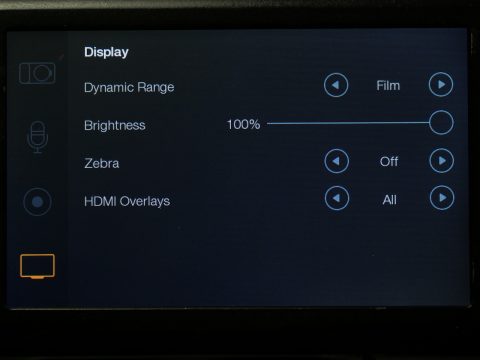
In the main menu page, there are also options for formatting the SD card, turning focus peaking on and off, turning exposure and audio meters on and off, and toggling frame guides.
In my experience, most people who use the BMPCC regularly develop a sort of love/hate relationship with it. It has a clean, thoughtful user interface in a cramped, awkward camera body; it combines beautiful image quality with terrible battery life and a limiting crop factor; it’s incredibly compact and light, but nearly impossible to use without a ton of accessories. It’s a weird camera, but also a fun one.
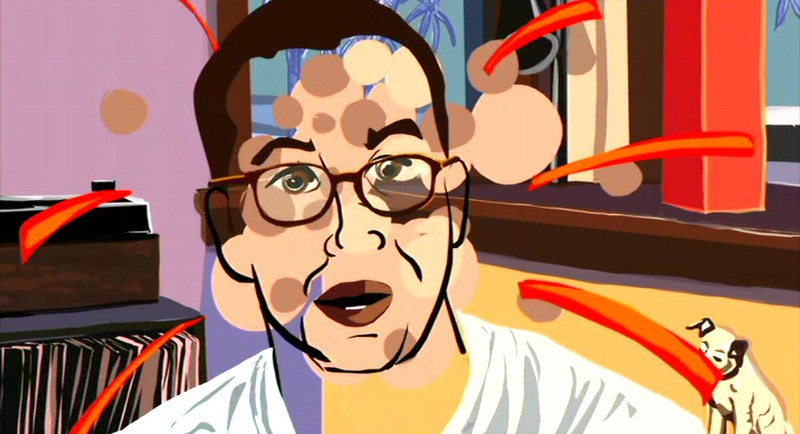
Project 4 – Create a Short Film Using Various Cameras and Techniques
For your next project, you’re going to be making a short film utilizing some of the different techniques we’ve discussed thus far. Your theme for this project is Sleeping/Waking. You can work in a small group on this or create something individually. You will probably need to use multiple cameras and other pieces of equipment for this project, so plan ahead and request studio time and equipment in advance.
Static Sticks
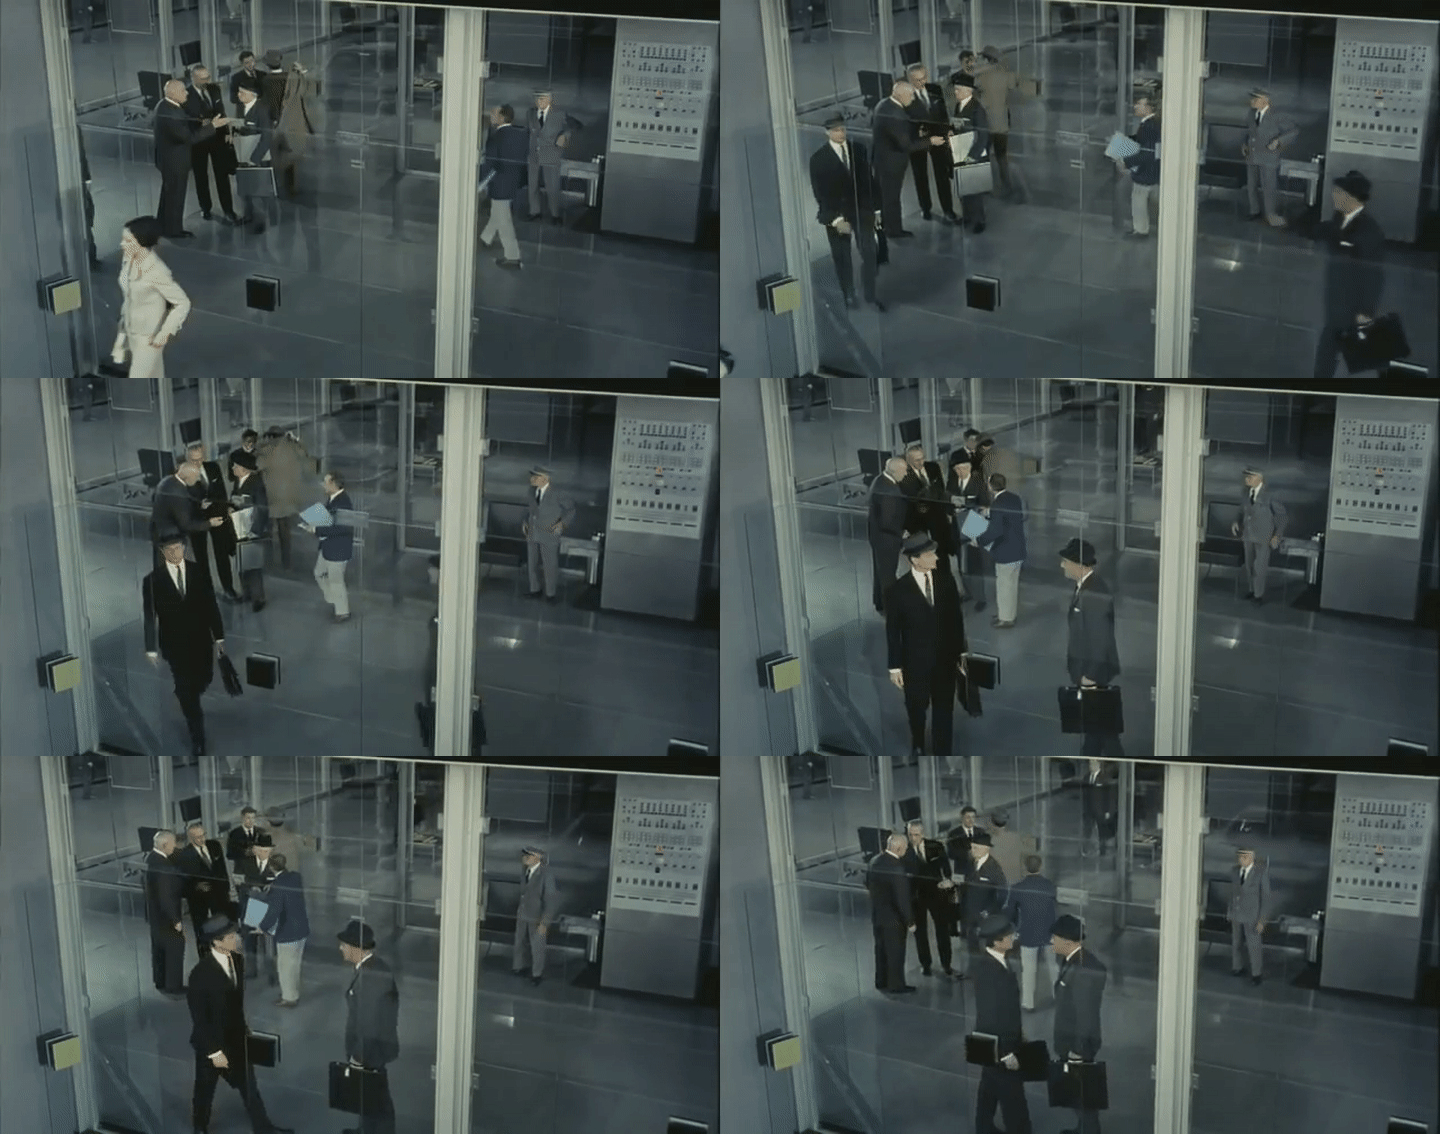
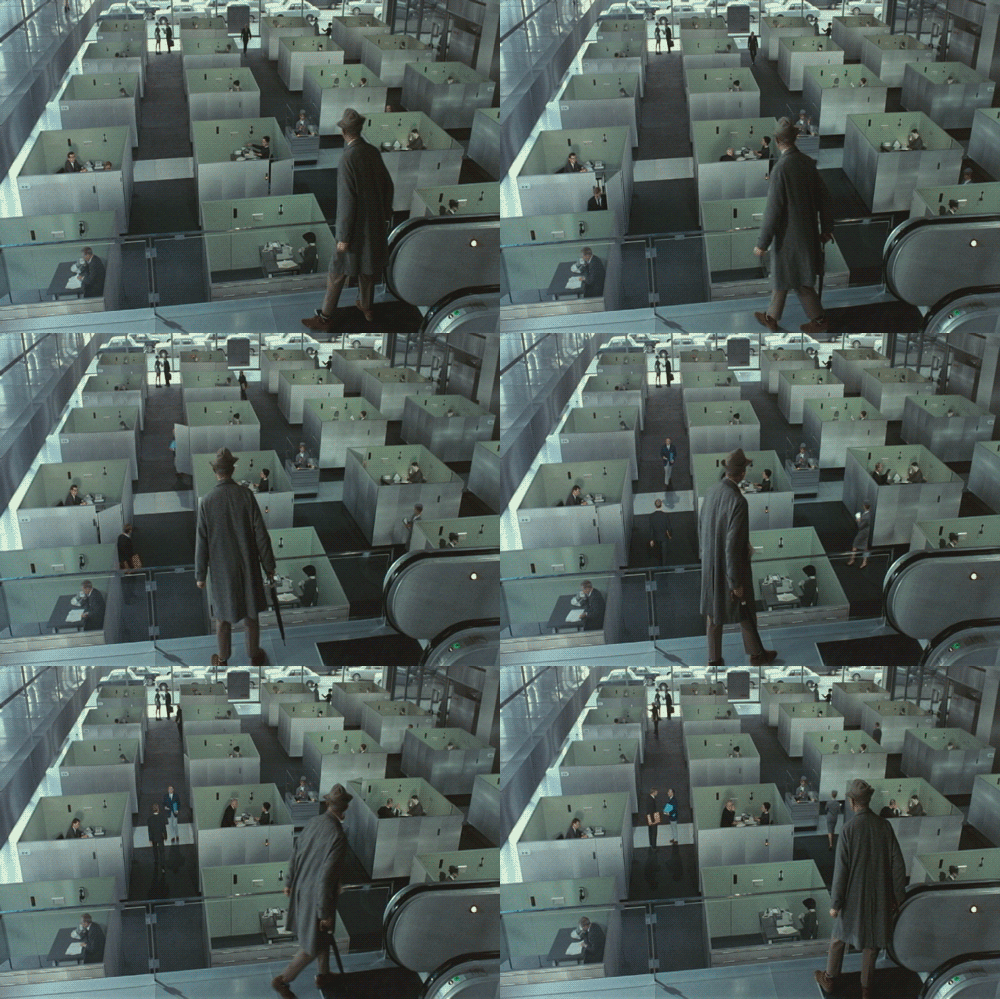
The most obvious use for a tripod is to keep the camera from moving – and that’s often critically important. When using a long lens or recording for a long period of time, tripods are a practical necessity. However, a static shot also creates its own kind of drama and not moving the camera can be an aesthetic choice. A greater emphasis can be placed on shot composition and editing by stripping away movement. Long static shots can even allow the audience to explore the frame on their own, as Professor Faden recently explored in his film Visual Disturbances, which examines the work of French filmmaker Jacques Tati.
However, tripods are also important tools for creating movement. A tripod with a good video fluid head can pan and tilt; many have a center column that can be used to pedestal up or down; and a tripod can be mounted to a wheeled base to dolly or truck.
When we talk about tripods, we are usually talking about two components: the legs and the head. You can generally buy a tripod as either legs and head together in a kit or separately, depending on your needs.
There are different styles of tripod legs and heads for different shooting situations. Some are designed for stability, some for portability. Some can get very tall and some are designed to get as close to the ground as possible. Some tripod heads are specially dampened to create smooth movement – these are called “fluid” tripod heads – and others are meant to be locked in a specific position.
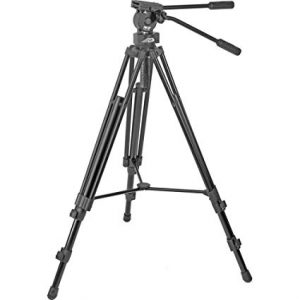
Here are the different tripods we have in our equipment collection.
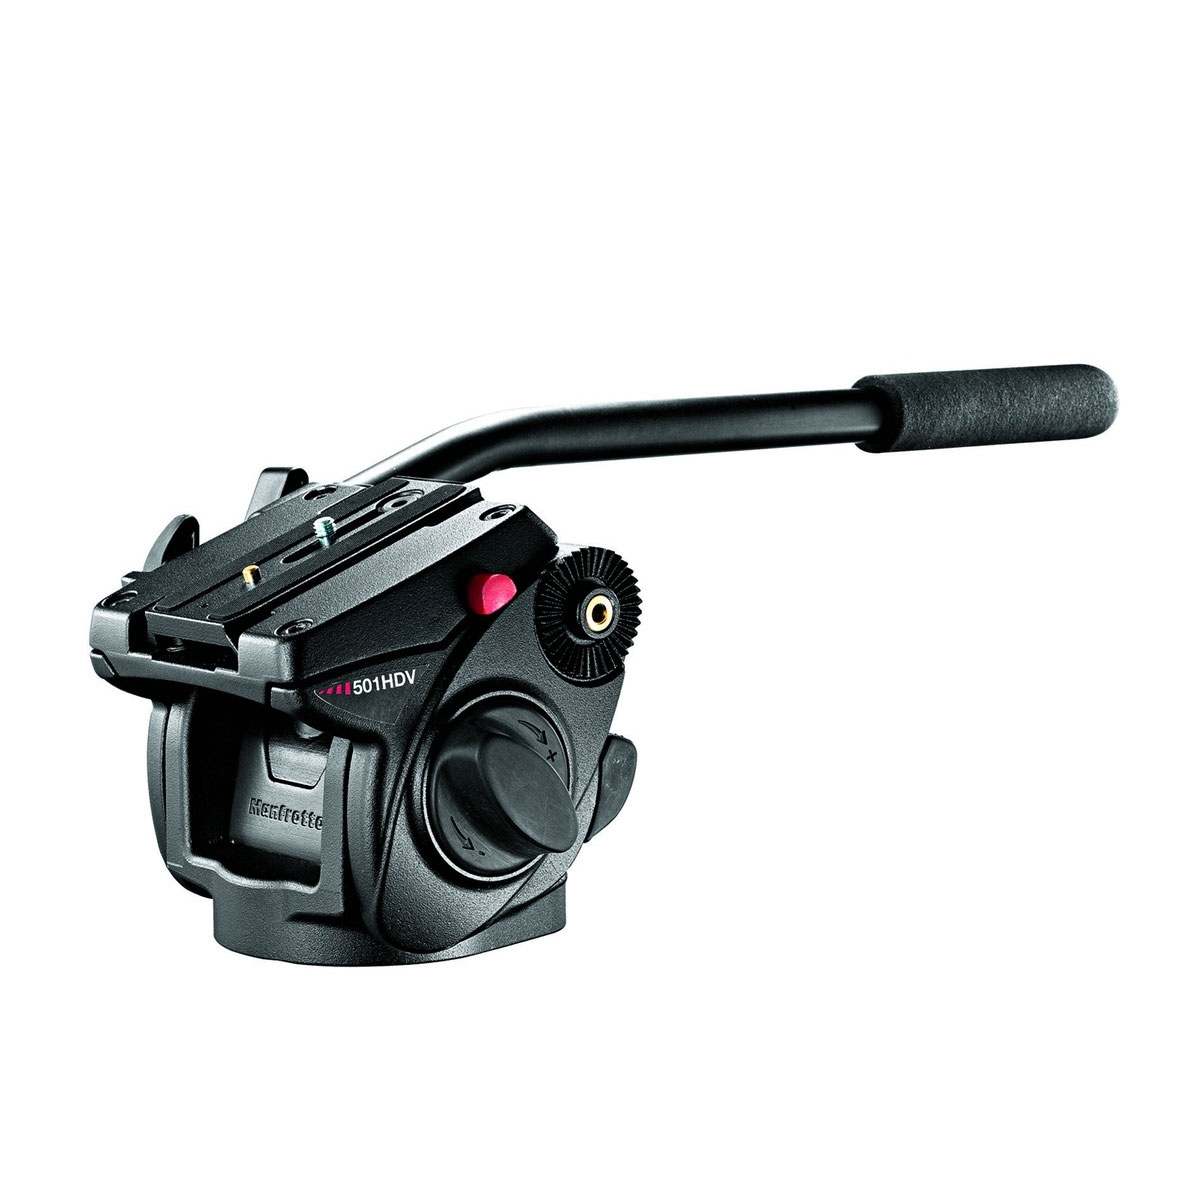
Manfrotto 501 HDV and 504 HD Fluid Heads
Our three largest Manfrotto tripods all use similar fluid heads that all accept the same quick release plate. These heads are designed to create smooth panning and tilting movements during recording and have adjustable “drag” or resistance. They have a high weight capacity are are a great choice for larger cameras.
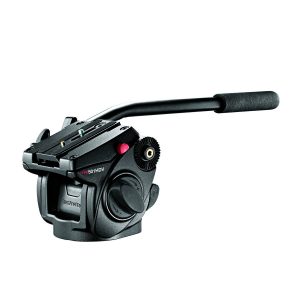
Manfrotto 475B Tripod with 501 HDV Fluid Head
This large tripod has a geared center column and can raise to a height of over six feet. The legs have a spreader attachment for added stability. This tripod is bulky and heavy, but sturdy.
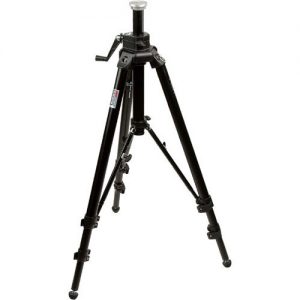
Manfrotto 546B Tripod with 504 HD Fluid Head
This tripod uses “two-stage” legs with a spreader, which creates a very sturdy base – albeit at the expense of size and weight. This tripod also uses a bowl mount, which is extremely useful for quickly leveling the camera.
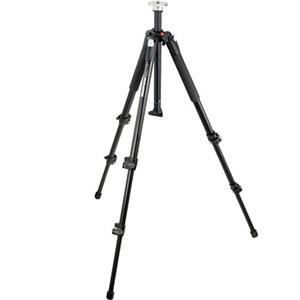
Manfrotto 055XB Tripod with with 501 HDV Fluid Head
This is a fairly basic tripod with lever locks and a center column. It is not as stable as the 564B or 475B, but it is much lighter and easier to transport. The combination of a lighter tripod with a heavier fluid head make this a good general-purpose option for mid-size to large cameras.
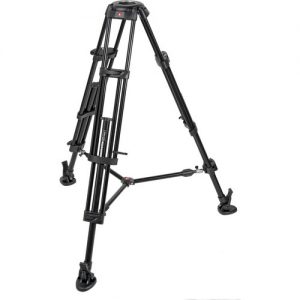
Davis & Sanford 7518 Tripod with FM 18 Fluid Head
This tripod is similar to the Manfrotto 546B, with multi-stage legs and a spreader, as well as a bowl mount for quick leveling. The fluid head uses slightly different mounting plates. This is a stable tripod, but it is cheaper than the Manfrotto, with some plastic parts and a less smooth fluid head. However, it can support a good deal of weight and it’s slightly lighter than the Manfrotto.
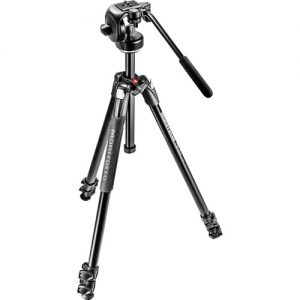
Manfrotto 290 Xtra Tripod Manfrotto 190X Tripod with 128RC Fluid Head
Both the 290 Xtra and 19X are basic mid-size tripod legs with a center column. These tripods are appropriate for mid-size and smaller cameras.
The 128RC head is a mini fluid head best used with hybrid and other small cameras. It utilizes a small drop-in plate, which is compatible with several of the other mounts in our collection.
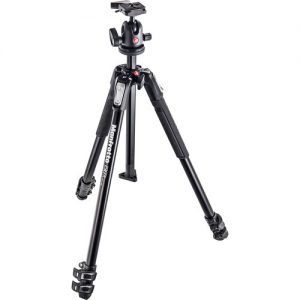
Manfrotto 190X Tripod with 496RC2 Ball Head
These tripod legs are identical to the ones described above. The difference here is the head, which is not a fluid head – it is a ball head design, which is best used for static shots, not smooth movement. The ball head does offer a lot of flexibility, so it’s an ideal choice if you need to point the camera straight up or down or adjust the yaw.
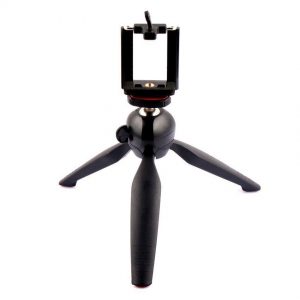
Mini Tripod
In addition to larger tripods, we have a handful of mini tripods, designed for very small cameras and cell phones. These can also be used as makeshift handles on hybrid cameras. These tripods do not have separate heads or even plates – they just screw to the bottom of the camera. These are not suitable for smooth panning or tilting.
Monopods
A monopod is, as the name suggests, a support with only one leg. As such, you cannot set it up and leave it like you can with a tripod. However, the monopod has several advantages of its own – it is smaller and lighter to transport; it has a much smaller “footprint” than a tripod and can be used in tighter spaces; and it allows you to create camera moves that are impossible with a normal tripod.
Many professionals prefer monopods for event work, since they can be picked up and repositioned so easily. As long as you keep a hand on the monopod, it will be stable. Video-specific monopods also often have a “chicken foot” or mini-tripod base. This provides additional stability and allows the unit to smoothly pan. If you add a fluid head tripod to the top of the monopod, you have a very versatile tool.
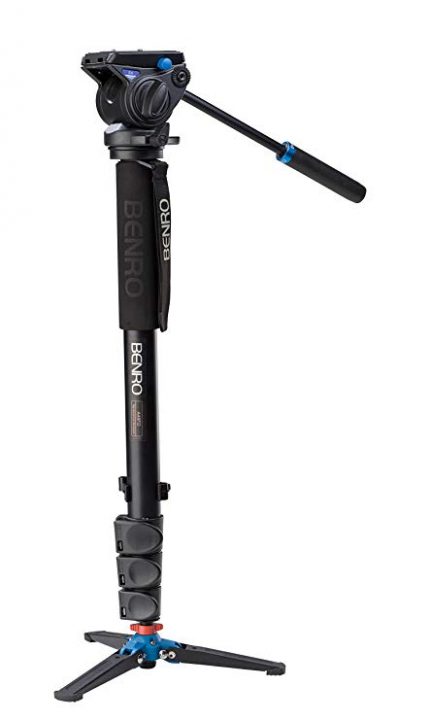
Because the monopod can be tilted forward and backward much more easily than a tripod, you can also do something like a crane shot. I’ve seen filmmakers use monopods in far more creative ways as well: holding them upside down, extending them fully for high shots, or using them horizontally. Here are a few videos from various filmmakers on their favorite ways to use a monopod.
Movement Terminology
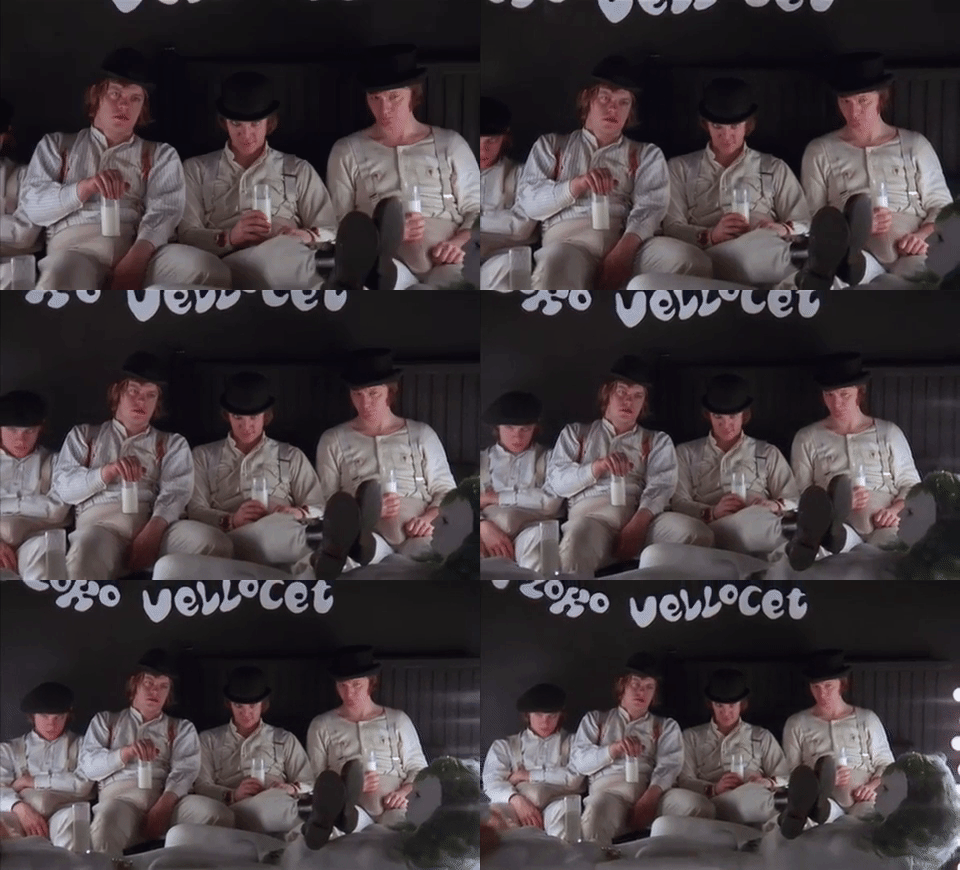
Here are some basic terms that we’ll be using a lot when discussing camera movement (GIFs courtesy of Boords).
Static – A static camera doesn’t move; usually, this means that it is locked down on a tripod. Incidentally, “locked down” means just that: the pan and tilt of a camera are tightened and don’t change during the shot. Note that a static camera does not necessarily dictate a static scene, as actors and even the background can move while the camera remains still.
Pan – Panning is rotation along a horizontal axis. Usually, this is done on a tripod – panning changes the orientation of the camera, but not the position.

Tilt – Tilting is rotation along a vertical axis. Like a pan, this is usually done on a tripod and involves a change of orientation, not position.

Yaw/Cant – Yaw is rotation along the z-axis – essentially, adjusting the camera, so that the horizon is no longer level. This is sometimes referred to as cant (or a canted angle) or a Dutch angle. Yaw is not usually adjusted during a shot, although it can be done to create a disorienting effect.
Zoom – A zoom is a change in the focal length of the lens being used. While not technically a camera movement, zooming still creates the impression movement within the shot.

Dolly – A dolly shot moves the camera closer or farther away from the subject. This is usually done on some sort of cart or track. The word dolly is used to describe both the movement (“dolly in” or “dolly out”) and the specific piece of equipment used to create that movement.

Truck – A truck (or tracking) shot involves moving the camera from side to side. This creates an effect similar to a pan, but moves the camera instead of changing its orientation.

Pedestal/Boom – A pedestal shot involves moving the camera vertically. This can be done using a crane/jib or handheld. The effect is similar to a tilt, but moves the camera instead of changing its orientation.

Motivated and Unmotivated Movement
One term that you will probably hear frequently when discussing camera movement is motivation. This can be potentially confusing, so let’s discuss motivated and unmotivated camera movements.
Put simply, a motivated camera movement is a movement that follows something happening on the screen. If you pan to follow a character walking across the frame, that is a motivated camera movement. Unmotivated camera movements do not specifically follow something happening on screen. If you dolly away from a group of people at a party, that is an unmotivated camera movement.
It’s important to understand that motivated camera movements are not inherently better than unmotivated ones; an unmotivated camera movement can (and should) still be an intentional, planned camera movement that adds to the cinematic impact of the shot. Motivated camera movements are often nearly subliminal, since they mimic the way our eyes naturally follow action. Unmotivated camera movements tend to draw more attention to themselves; the audience notices them, so they often make a greater narrative and stylistic impact.
The following shot from the opening sequence of It Follows uses motivated camera movement. As the you women backs away, the camera dollies forward with her; when she begins to run, the camera pans, keeping her locked in the center of the frame. The audience is given the perspective of someone watching – and following – the actress, which is in keeping with the narrative of the film. The moving camera also keeps the character’s actions prominent in the frame, which gives them emphasis; we know that her backing away and running is important to the story.
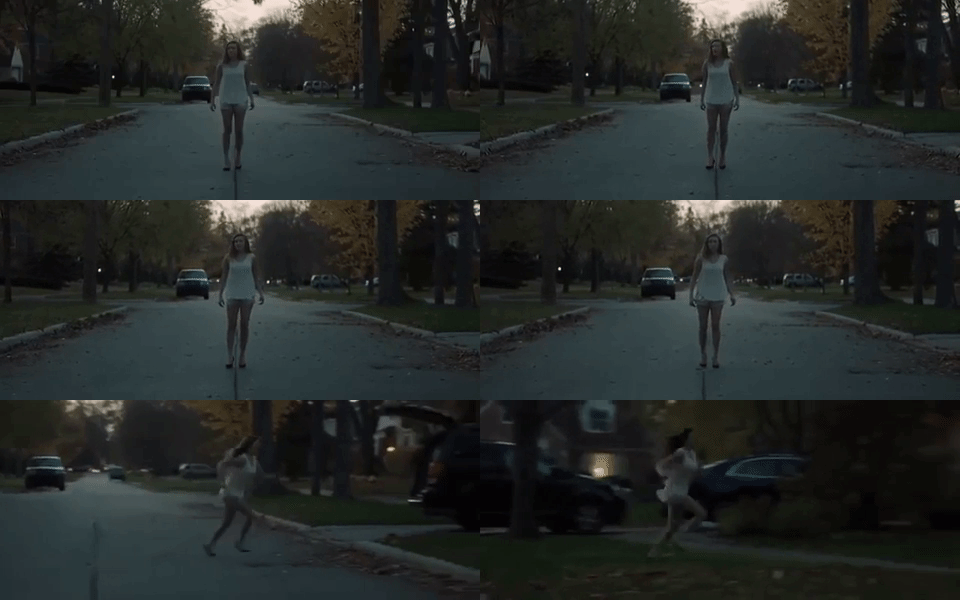
This shot from A Clockwork Orange uses unmotivated camera movement. As the camera dollies slowly away from the actor, more and more of the surreal scene is revealed, but there is no specific action that the camera is following. Instead, the focus is on the bizarre environment and its menacing inhabitants. In other words, the emphasis is on the reveal, not the action.

However, motivated camera movements can also reveal narrative details. In the following shot from Taxi Driver, the movement of the actor’s hand clearly motivates the pedestal movement of the camera, but the end of the shot reveals the character’s surprising new hair style, which is narratively significant.
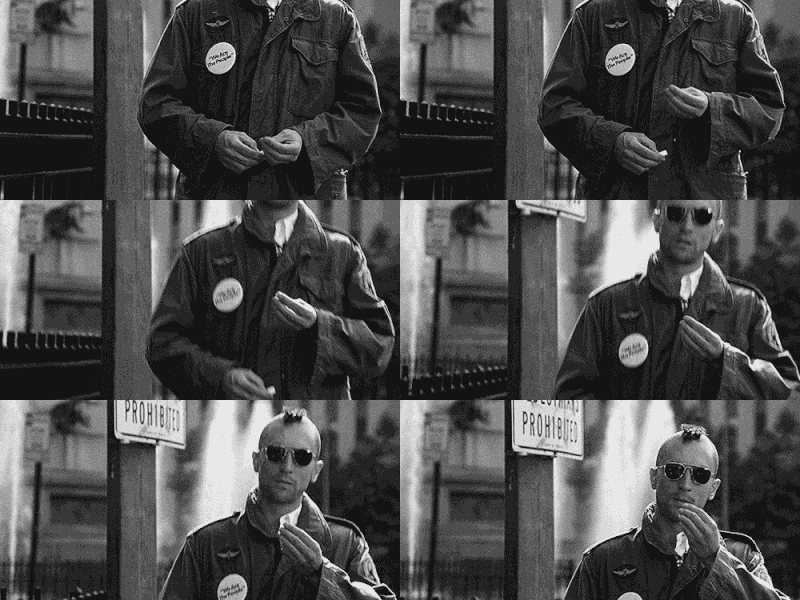
This is in contrast to an earlier scene in Taxi Driver, in which an unmotivated truck shot is used not as a reveal, but to emphasize the internal conflict happening within the character, who is abandoned by the camera as it moves from left to right.
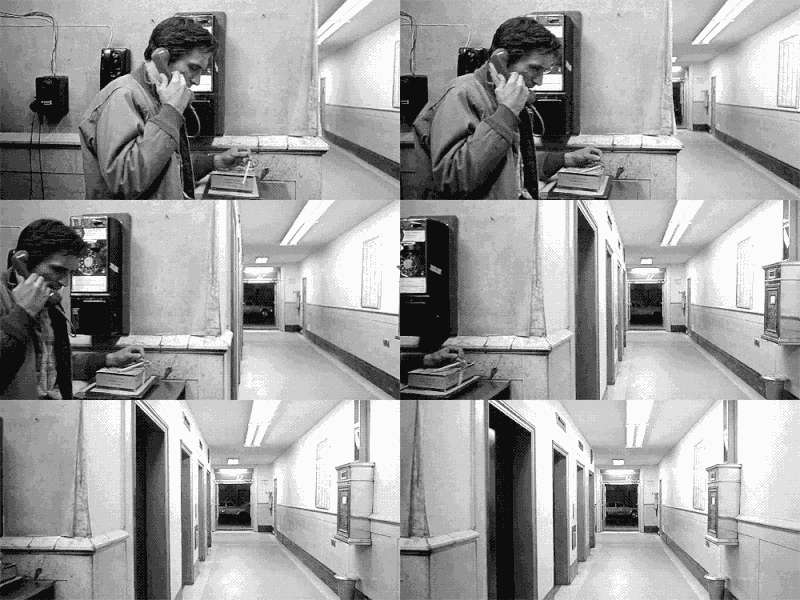
Motivated and unmotivated camera movements can be used in the same sequence or even in the same shot. An effective director and cinematographer will use both to shape the style, tone, and narrative qualities of a film. We’ll be exploring why, when, and how to use camera movement intentionally in the weeks to come.
Slowing Down in Vegas
Being able to film at up to 960 frames per second with the compact RX10 II is amazing. If you want to capture really slow motion, however, the best tool for the job is probably a Phantom camera, which can capture footage at thousands of frames per second for specialty shots or scientific tests. Here’s a “classic” YouTube video (six years old!) that a filmmaker with a Phantom Flex camera put together in order to stave off boredom in a Las Vegas hotel room.
https://www.youtube.com/watch?v=otkcRK2J3DI