Categories
Lessons

Lesson 2.2: Sensors and The Exposure Triangle

Sensor Size and Equivalence

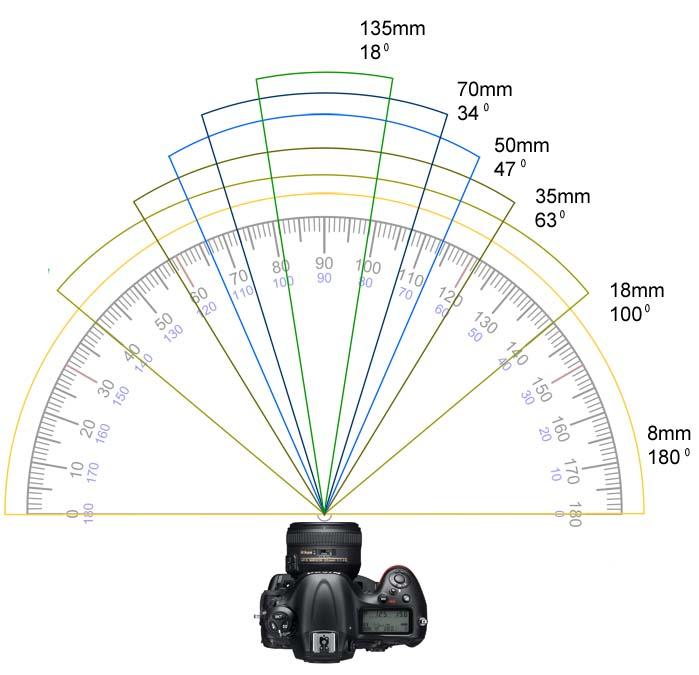
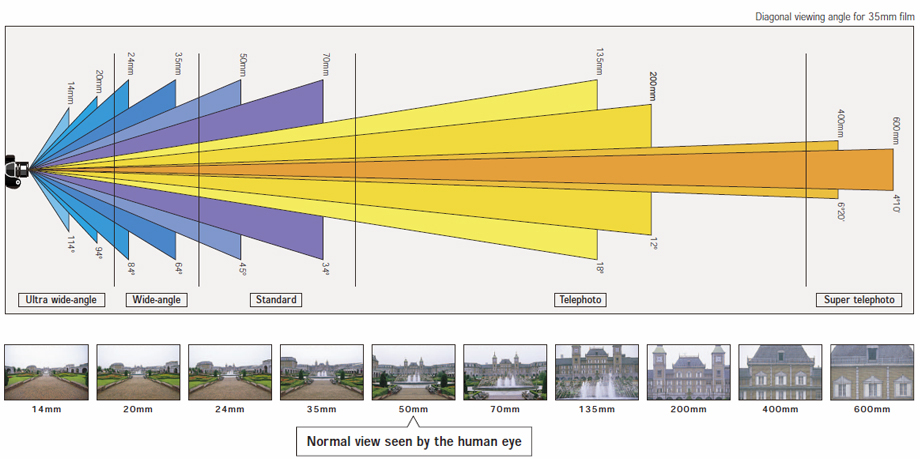
We’ve already discussed how the focal length of a lens affects field of view.  A 24mm lens will see a wider angle of view than a 70mm lens.  However, there is another factor that affects angle of view – the size of the sensor inside of the camera being used.

The focal length of a lens is the distance between the focal plane within the lens (basically, the point at which the light is gathered) and the sensor of the camera.  That’s an absolute measurement that dramatically influences angle of view – when the focal plane is near the sensor, the area seen is wider.  To visualize how this works, imagine holding a cardboard tube in front of your eye.  When the tube is near your eye, you can see a wide area through the tube.  When you hold the tube at arm’s length and look through it, you can only see a narrow area through the tube.  This is similar to the way a lens’ focal length determines its angle of view.

After the light enters through a camera’s lens, it hits the camera’s sensor.  If that sensor is large, a wider image is captured; if the sensor is smaller, a smaller image is captured.  To visualize this, imagine a projector shining an image onto a screen; the image is the light coming through the lens and the screen is the sensor of the camera.  If you were to replace the screen with a smaller one (without changing its position), some of the original image would be cut off and you would see a narrower angle of view.
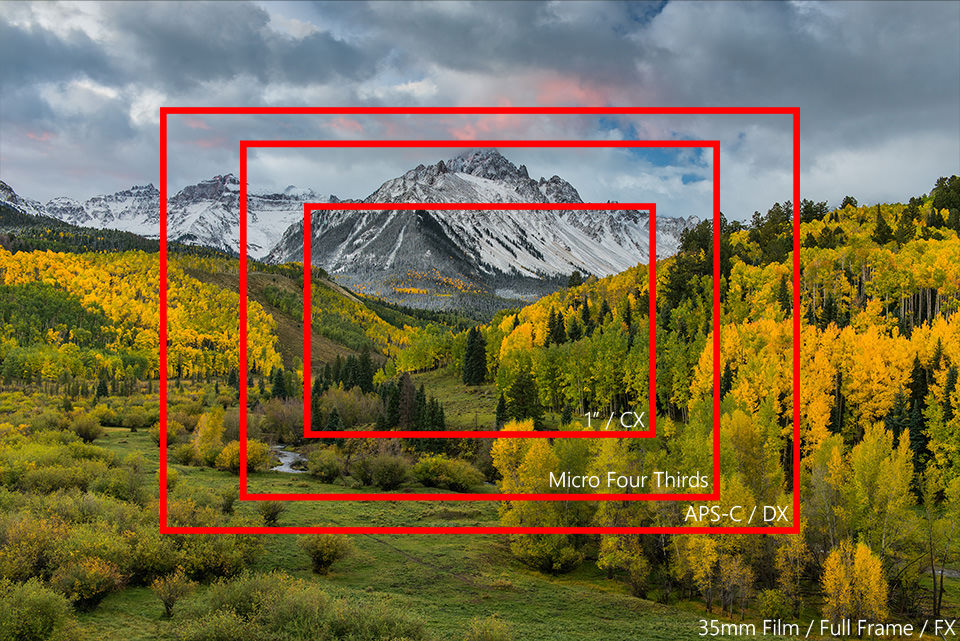
This means that the angle of view in a frame of video is determined by both focal length and sensor size.  A 24mm lens has a wide angle of view on a camera with a large sensor, but will look zoomed in on a camera with a small sensor, since some of the image is cropped out.  In order to make sense of these variables, we often talk about lens equivalence.

Equivalence uses a universal standard to describe the angle of view a lens produces.  Since film was the default format for stills photography for so long, most photographers think in those terms – we refer to camera sensors the same size as standard film (also known as 35mm film, which is the size of the film, not the focal length) “full frame.”  On a full frame camera, lenses with a focal length up to around 35mm are considered wide angle; around 50mm is considered mid-range; and 70mm and up is considered zoom or telephoto.

When we talk about lens equivalence, what we are actually doing is figuring out what focal length we would need to use to get the same angle of view on a full frame camera.  For example, on a micro four thirds sensor camera, 50% of the image is cropped out compared to a full frame camera.  That means that a 25mm lens is a 50mm full frame equivalent.  To put it another way, a 25mm lens on micro four thirds captures the same angle of view as a 50mm lens on full frame.

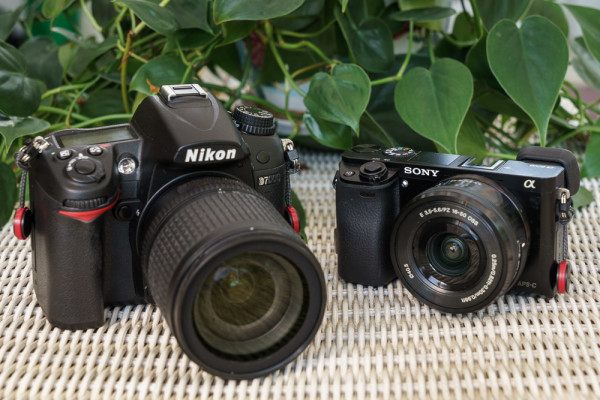
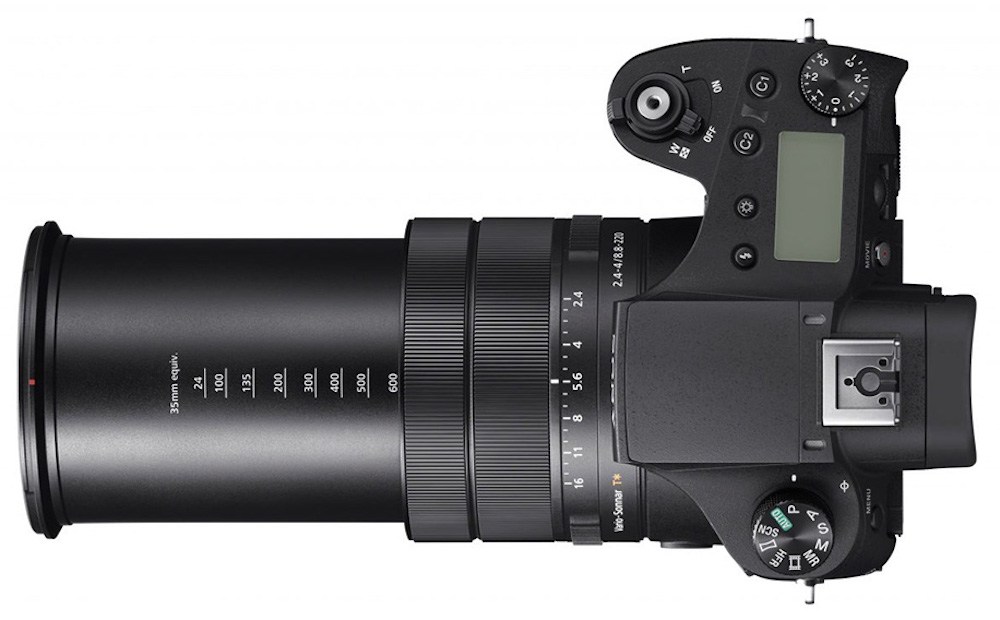
Because we are determining how much of the angle of view is cropped out, this is also referred to as a camera’s “crop factor.”  Micro four thirds cameras have a crop factor of 2 – you must multiply the focal length of a lens by 2 to get the full frame equivalent.  APS-C is a popular sensor size in Canon, Nikon, and Sony cameras – they have a crop factor of about 1.6.  Cameras like our Sony RX10 ii have a 1 inch sensor and a crop factor of 2.7; our BlackMagic Pocket Cinema Camera has a crop factor of 2.9, with its Super 16-sized sensor.

Most lenses are labeled with their actual focal length – not their equivalent one.  This means that you need to take a camera’s crop factor into account when choosing a lens.  Our Nikon prime lenses can be mounted on our BlackMagic Pocket Camera, our Panasonic Gh3 and GH4 cameras, and our Sony FS5 – all of which have different sensor sizes and different crop factors.  A 28mm lens will look wide on the Sony and telephoto on the BlackMagic.  Cameras with a fixed lens (like our Sony RX10 ii) tend to list the equivalent focal length instead of the actual focal length, which saves you the trouble of doing the math.
Of course, all of this confusion could be avoided if we just talked about angle of view instead of focal length.  Focal length has been the standard for a long time, though, and it doesn’t seem to be going away any time soon.
The Exposure Triangle

Let’s switch gears now and talk about actually capturing images with a camera.  There are three primary settings that we use to control the image captured by a camera: aperture, shutter speed, and ISO.  Of course, there are other factors to consider when setting exposure; for example, you might simply add more lights to a scene, move from the sunlight to the shade, or use an ND filter in front of the lens.  However, aperture, shutter speed, and ISO are the three settings that you will always make to the camera and lens, so they are especially important.  These three settings are often referred to as the exposure triangle.

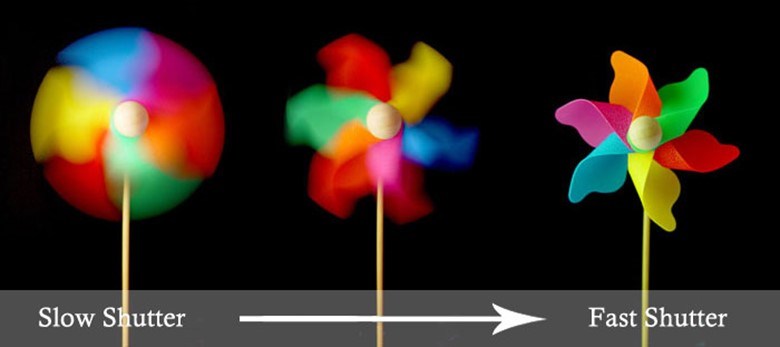
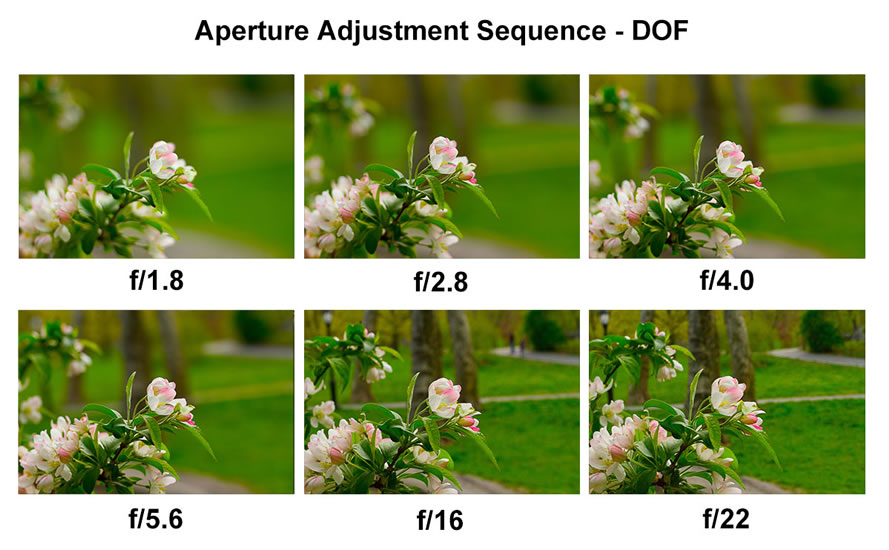
Each side of the exposure triangle has costs and benefits.  Opening the aperture lets in more light and makes the image brighter, but it also makes the depth of field shallower.  Using a longer shutter speed lets in more light, but it also adds motion blur.  Using a higher ISO makes the sensor more light-sensitive, but it also degrades the overall image quality by adding grain and noise.  The inverse of all these is also true: a smaller aperture creates a darker image with a deeper depth of field; a shorter shutter speed creates a darker image with less motion blur; and a lower ISO creates a darker image with less noise.  Understanding these tradeoffs is a really important part of knowing how to use a camera effectively.

Here are some basic guidelines for using the exposure triangle:  Start by setting your shutter speed to twice the frame rate, using the 180 degree rule.  So, if you shutter speed is 24 frames per second, set it to around 1/48 of a second.  There is definitely some wiggle room here, but doubling the frame rate will give you a natural looking amount of motion blur: not too blurry and not too jittery.  Your aperture should be set according to the kind of shot you are trying to capture.  If you want a dramatic, shallow depth of field, use a wide aperture (low number) and if you want to see both the background and foreground clearly, use a small aperture (high number).  You can then set your overall brightness level by controlling the ISO: a high ISO to make things brighter and a low ISO to make things darker.  However, you should also take care not to raise the ISO too high, since the quality of the image will degrade.  For most of the cameras we’ll be using, I’d recommend keeping it under ISO 1000 and lower if you can.  If your image is still too dark, you probably want to consider the external factors, such as the lights you are using and the environment you are filming in.
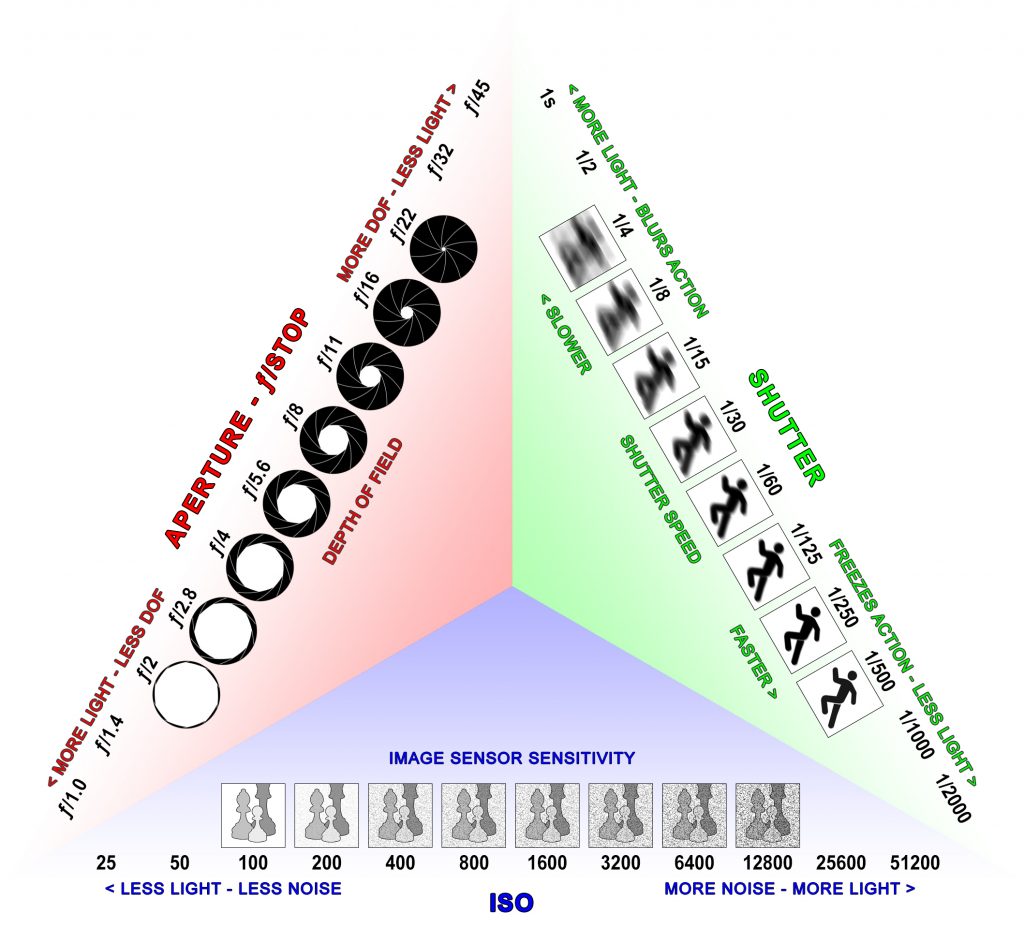
As you (hopefully) recall from our lesson on camera vocabulary, an f-stop represents a doubling or halving of the amount of light being captured.  The cool thing about the exposure triangle is that you can use the different settings to compensate for each other.  If you change your aperture from f/2.8 to f/4, that means you lose one f-stop of light.  You can then raise your ISO from 400 to 800, gaining one f-stop of light and retaining your overall brightness level.  This may seem a little confusing at first, but it can quickly become second nature and it’s extremely useful when filming.

Need a quick refresher on the basics of exposure?  Check out these fun videos on aperture, ISO, and shutter speed.
Categories
Lessons

Lesson 2.1: Glass

What’s In A Lens?

Let’s discuss some of the basic properties of camera lenses.

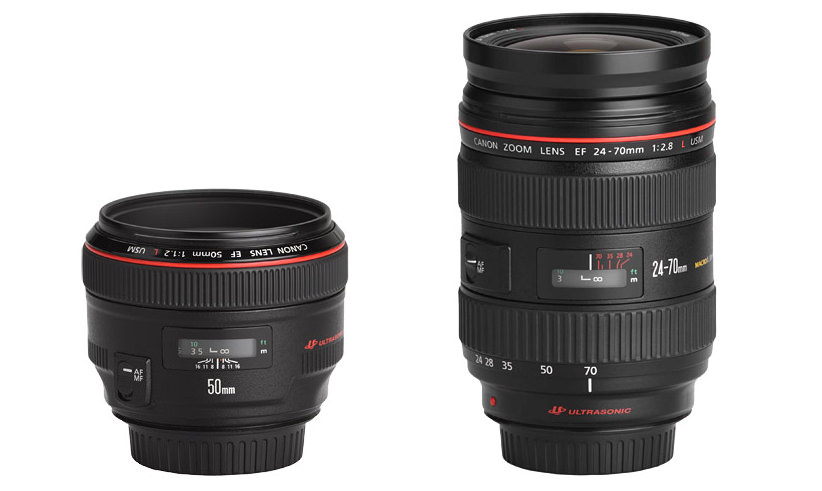
A camera lens is primarily defined by three qualities: its focal length (or focal range), maximum aperture (or maximum aperture range), and mount.  A prime lens only has one focal length; it cannot zoom in and out.  As mentioned in the last lesson, the focal length is the distance from the point of light convergence within the lens to the camera sensor.  This distance determines the angle of view that the lens is capable of taking in.  A zoom lens can be set to different focal lengths to change the angle of view.  Generally speaking, zoom lenses are more convenient and prime lenses create higher quality images.

The maximum aperture of a lens is the measurement of how wide the iris of the lens can open.  It is, confusingly enough, measured in a ratio: the focal length of the lens divided by the diameter of the aperture opening.  The resulting number is called the f-stop and most lenses use the following sequence: f/1.4, f/2, f/2.8, f/4, f/5.6, f/8, f/11, f/16, f/22. Again, a smaller number f-stop is a larger aperture and a larger number f-stop is a smaller aperture.  Speaking very generally, a lens that can open its aperture to f/2.8 or wider is considered “fast” and a lens that can only open to f/4 or narrower is considered “slow.”

The bizarre sequence of numbers used to measure f-stop represent stops of light – going from f/2 to f/1.4 doubles the amount of light and going from f/4 to f/5.6 halves the amount of light entering the camera.  Each sequential number is (approximately) the previous number multiplied by 1.4.  It’s admittedly confusing and the math isn’t really important.  What is important is that you understand that an aperture of f/2 is wider than an aperture of f/8.  The f/2 will let in more light and create a shallower depth of field.

You will sometimes see lenses that measure aperture in t-stops instead of f-stops.  The “t” in t/stop stands for transmission – it’s a measurement of the actual amount of light coming through the lens.  T-stops are used to account for the optical imperfections that might make lenses with the same f-stop behave slightly differently.  T-stops use the same sequence of numbers and the two terms can be used fairly interchangeably.

Finally, the lens mount determines what kind of camera it can be attached to; this is usually specific to the camera manufacturer.  Canon uses the EF mount; as well as EF-S, for crop-sensor exclusive lenses (more on that later); and EF-M, for their small mirrorless line.  Vintage Canon lenses use the FD mount and aren’t compatible with newer cameras.  Nikon uses the F mount, as well as the G mount, which is the essentially the same thing without a manual aperture control ring.  Sony uses the E and A mount; Fuji uses the X and G mount; Pentax uses the K mount; Leica uses M and R; and Olympus, Panasonic, and some BlackMagic cameras use the Micro Four Thirds mount.  There are also high-end PL mount cinema lenses and tons of old-school options, such as the M42 and C “screw on” mounts.

That’s a lot of different lens mounts and a lot of random letters.  The most important takeaway is that there are many different kinds of lenses for different kinds of cameras– if you just say “Nikon mount” or “Fuji mount,” you will probably be understood just fine based on the context.  Micro four thirds is interesting because it’s a standard used by multiple camera makers.  In our collection, we have mostly micro four thirds and Nikon lenses.


Adapters and Focal Reducers

When you use a lens on the camera mount for which it was specifically designed, we say that is a “native” lens.  If you wanted to use a native lens on one of our Panasonic GH4 cameras, you would select a micro four thirds lens.  When you use a lens that was designed for a different camera system, we say that it is an “adapted” lens.  Adapted lenses require the use of – you guessed it – an adapter and not every lens can be adapted to every camera.

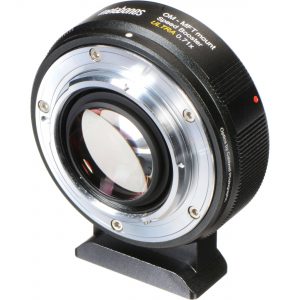
Native lenses usually offer the most functionality; many lenses have electronic connections to the camera for things like aperture control, autofocus, and image stabilization.  When you connect a lens to an adapter, you often lose that functionality.  However, some lens adapters offer other benefits.  For example, our Metabones Nikon to micro four thirds adapters actually have glass elements in them that help gather more light and increase the angle of view.  The use of adapters allows us to use one set of high quality Nikon mount lenses on our Sony, BlackMagic, and Panasonic cameras.  Since these particular lenses are fully manual anyway – they have no electronic controls – we don’t lose out on any functionality by adapting them to other cameras.

Coverage and Compatibility

Adapting lenses is extremely helpful because it really expands your toolset.  You can use one set of lenses across lots of different cameras!  However, not every lens can be adapted to every camera.  We’ll talk more about sensor size in the next lesson, but some lenses are designed for smaller sensors and just aren’t physically large enough to cover bigger ones.

Flange distance is also a concern: different cameras are designed to have their respective lenses mounted different distances from the sensor.  You can’t put a lens with a long mount on a camera with a short mount – there just isn’t room.

What all of this means is that some lenses are more easily adapted and some cameras can more easily accept adapted lenses.  Cameras with a micro four thirds mount (like our BlackMagic Pocket and Panasonic cameras) can accept lots of different lenses using various adapters because of the mount and sensor size.  We also own lots of Nikon mount lenses – even though we don’t own any Nikon cameras – because the mount, sensor coverage, and manual controls make Nikon lenses easy to adapt.

Filter and Hoods

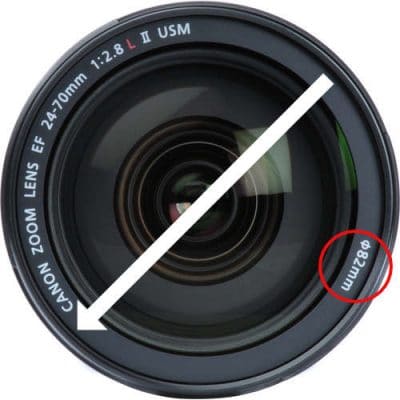
Most lenses have a threaded area at the very front that can be used to attach filters and other accessories.  Since lenses vary greatly in size, these filter threads can be found in a variety of sizes as well.  Filter threads are measured by diameter in millimeters – which can be confusing, since focal length is measured in millimeters as well.  For example, our Panasonic 12-35mm zoom lens takes 58mm filters, so all three numbers (as well as the aperture) can be found on the front of the lens.  You can usually identify the filter size by an icon that looks like a circle with a line through it.

There are many different kinds of filters that can be attached to a camera lens.  Some of the most widely used are ND filters, which cut down the overall amount of light entering the lens – ND filters are like sunglasses for your camera.  There are also circular polarizers, which can be used to cut down on glare and reflections and tinted filters, which can be used for specialty shots.

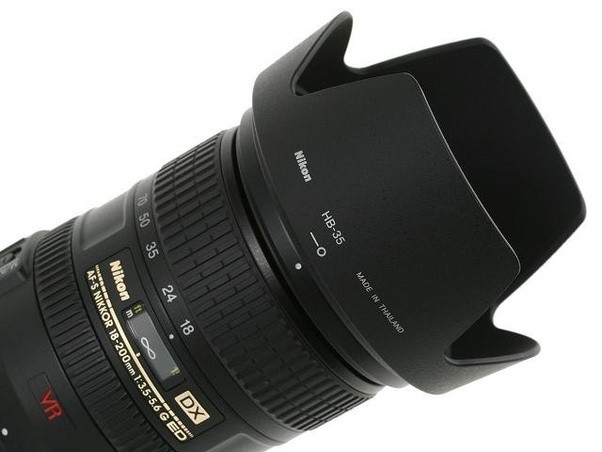
Many lenses also have hoods as optional accessories – and a few have hoods permanently attached.  Lens hoods help to cut down on things like flares from direct light sources.  Hoods may be attached either using the filter threads or using a “bayonet mount” on the outside of the lens barrel.

Cinema Vs. Stills

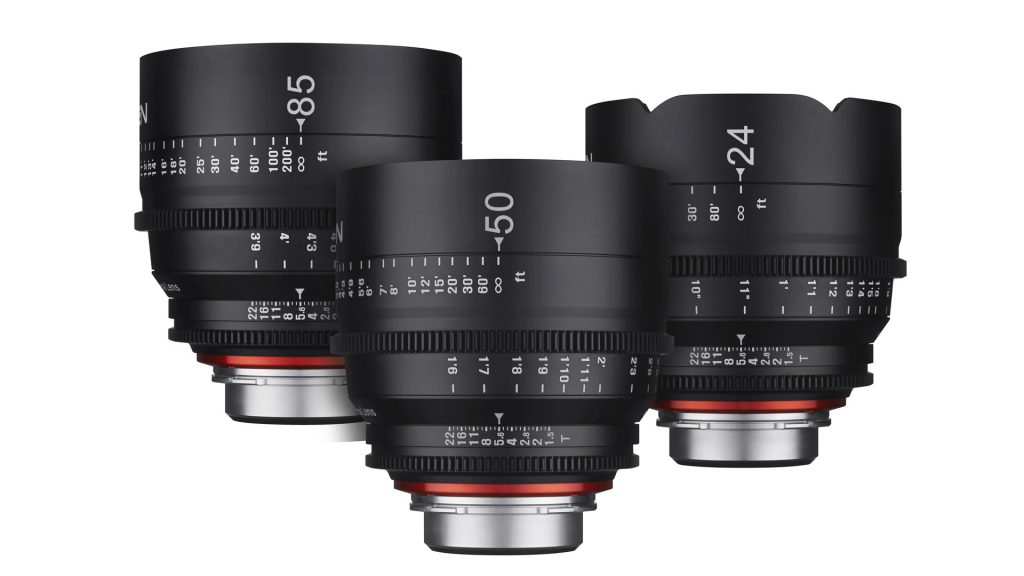
Generally speaking, lenses designed for stills-photography cameras work just fine for video as well.  However, there are lenses that have been designed specifically for video use that have some added benefits. The most noticeable difference is that cinema lenses usually have gear teeth on their focus and aperture rings.  This allows the lenses to be used with a follow focus (a tool used for precisely changing focus during filming) without additional accessories.

Cinema lenses also have click-less aperture rings.  Many stills lenses don’t have aperture rings at all – on most Canon and Panasonic lenses, for example, the aperture is controlled electronically using a dial on the body of the camera.  Cinema lenses have aperture rings on the lens itself – and that ring can be adjusted smoothly, without clicked stops at the different settings.  This allows a camera operator to subtly adjust the aperture while filming.  The aperture on a cinema lens is also measured in t-stops instead of f-stops – the numbers used are the same, but t-stops represent an accurate, measured amount of light that takes into account light lost due to optical imperfections.

You might also notice that the markings on a cinema lens are usually on the side of the lens, rather than the top.  This is so that a separate operator can see and adjust the lens settings.

Finally, some cinema lenses are available as a set with front filter threads that are the same size.  This allows the same accessories to be used on multiple lenses.  Because of this, cinema lenses tend to be larger and heavier than stills lenses.

Lenses may sound complicated, but remember that we’re really only looking at a few things: how wide or zoomed in the lens is (the focal length); how much light the lens lets in (the aperture); and how the lens attaches to the camera (the mount).  We usually use these three factors when describing a lens – you might ask for a Nikon 50mm f/1.4, or a Panasonic 12-35mm f/2.8.

Want to learn more – much more – about camera lenses?  Check out the following three videos from Filmmaker IQ:

Categories
Lessons

Lesson 1.2: The Language of Cameras

Camera Terminology

Before we discuss the way specific cameras work, we should spend some time defining the terms that we’re going to be using.

Stop of Light – When we talk about exposure, we are really talking about the amount of light in a shot.  That light is measured and qualified in a number of different ways, so we use the term “stop” to describe the process of increasing or decreasing the light in an image.  A stop of light has no fixed value; instead, doubling the overall amount of light is the same as going up one stop and halving the overall amount of light is the same as going down one stop.

ISO, ASA, and Gain – ISO, ASA, and gain all measure the sensitivity of a digital sensor – or piece of film.  As the sensitivity is raised, the image becomes brighter – but noise and grain also become more prevalent, which makes the overall quality of the image worse.  ISO is the most commonly used of the three terms, especially in stills photography.  Most cameras have ISOs that start at around 100 – going up in stops, this number goes to 200, then 400, 800, 1600, 3200, 6400, and so on.  As a general best practice, you should keep your ISO as low as you can, to ensure the best quality image.  ASA is an outdated term that was used before ISO was adopted, but you may still find it on some older cameras.  Gain is used more often on dedicated video cameras and is usually just measured as low, medium, or high.

Frame Rate – Frame rate describes the number of frames in a second of film or video.  The standard frame rate for cinema is 24 frames per second and that is the frame rate we will use the most often.  Television in the US is broadcast at 29.97 frames per second (long story – check out the video below for the details), whereas television in the UK is broadcast at 25.  The higher the frame rate, the smoother video will look – some video is now recorded and presented at 60 frames per second in order to show more subtle movement.  There have been experiments with showing cinema at higher frame rates, but most viewers actually prefer the look of 24.  Video can also be recorded at a high frame rate – 60, 120, 240 or greater – and then converted to a lower frame rate (usually 24) to create slow motion footage.

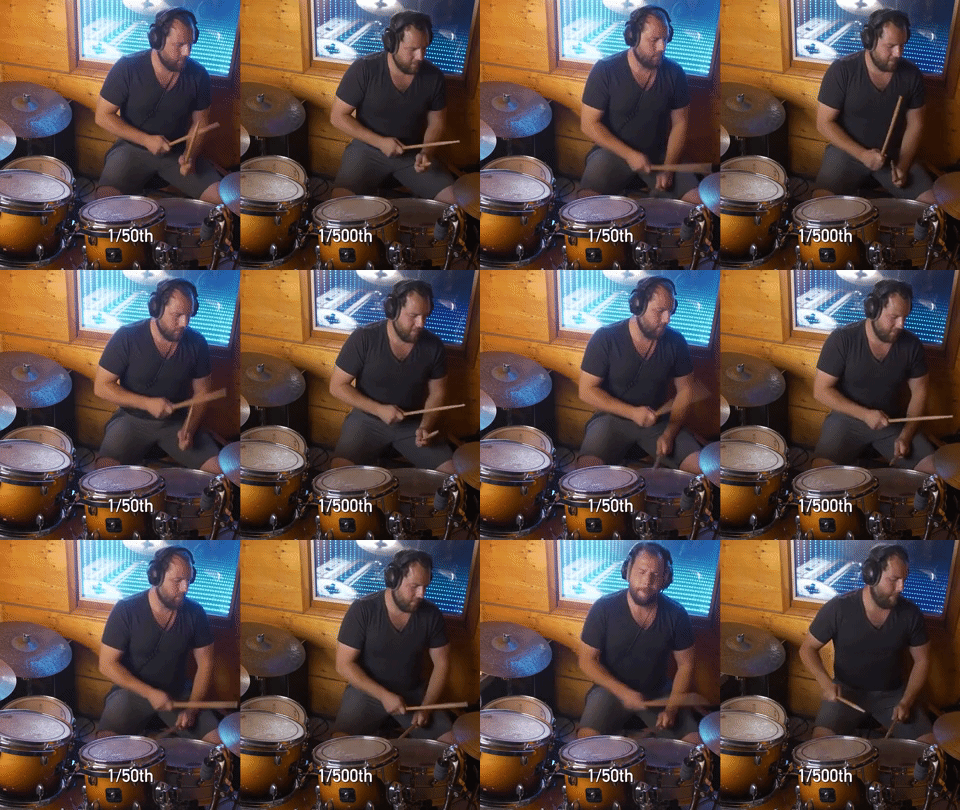
Shutter Speed and Shutter Angle – We know that each frame of video is a still image – a photograph.  The exposure time for each frame is called the shutter speed.  Shutter speed is measured in fractions of a second: 1/30, 1/60, 1/125, 1/250, 1/500, and so on.  In still photography, using a fast shutter speed – say, 1/500 of a second – will freeze the action.  Using a slow shutter speed – say, 1/10 of a second – will create more motion blur.  In video, the same principle applies: using a fast shutter speed will result in “jittery” footage without motion blur and using a slow shutter speed will result in footage with lots of motion blur.
There are a few things to keep in mind when setting shutter speed for video.  The first is that your frame rate will affect the minimum shutter speed you can use.  If you are filming at 24 frames per second, then the slowest shutter speed you can use is 1/24 of a second.  The general rule for “natural” looking footage is to use a frame rate of roughly double your shutter speed – so footage shot at 24 frames per second will look normal at 1/48 or 1/50 of a second.

Shutter speed also affects the brightness of the image – slower shutter speeds allow more light to hit the sensor  (because the shutter is open for longer) and create a brighter image; faster shutter speeds do the opposite.

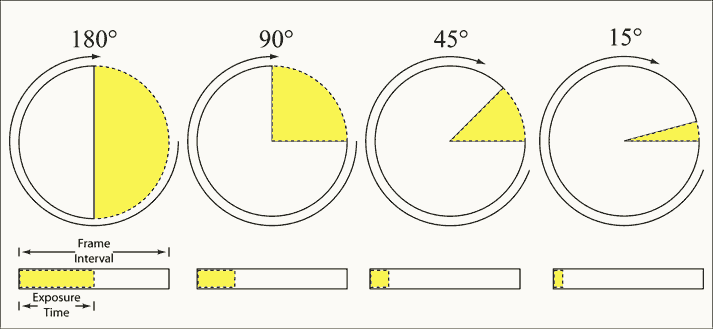
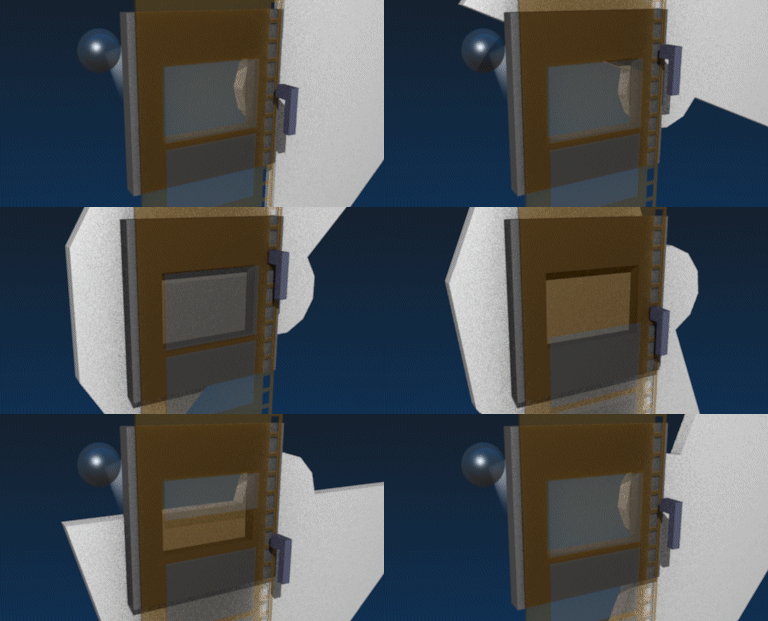
Shutter angle is a film and video-specific term that describes the same thing in a slightly different way – it measures exposure time relative to the frame rate.  Mechanical film cameras use round shutters that rotate past the exposed film.  A 180 degree shutter creates an exposure of double the frame rate – 1/48 of a second when filming at 24 frames per second and 1/60 when filming 30 frames per second.  A 90 degree shutter creates an exposure of four times the frame rate – 1/96  when filming at 24frames per second and 1/120 when filming 30 frames per second.  You can use the following formula to convert the shutter angle to shutter speed: (Frame Rate x 360) / Shutter Angle = Shutter Speed.  If that’s too much math, just remember that a 180 degree shutter is double the frame rate and you should be fine.

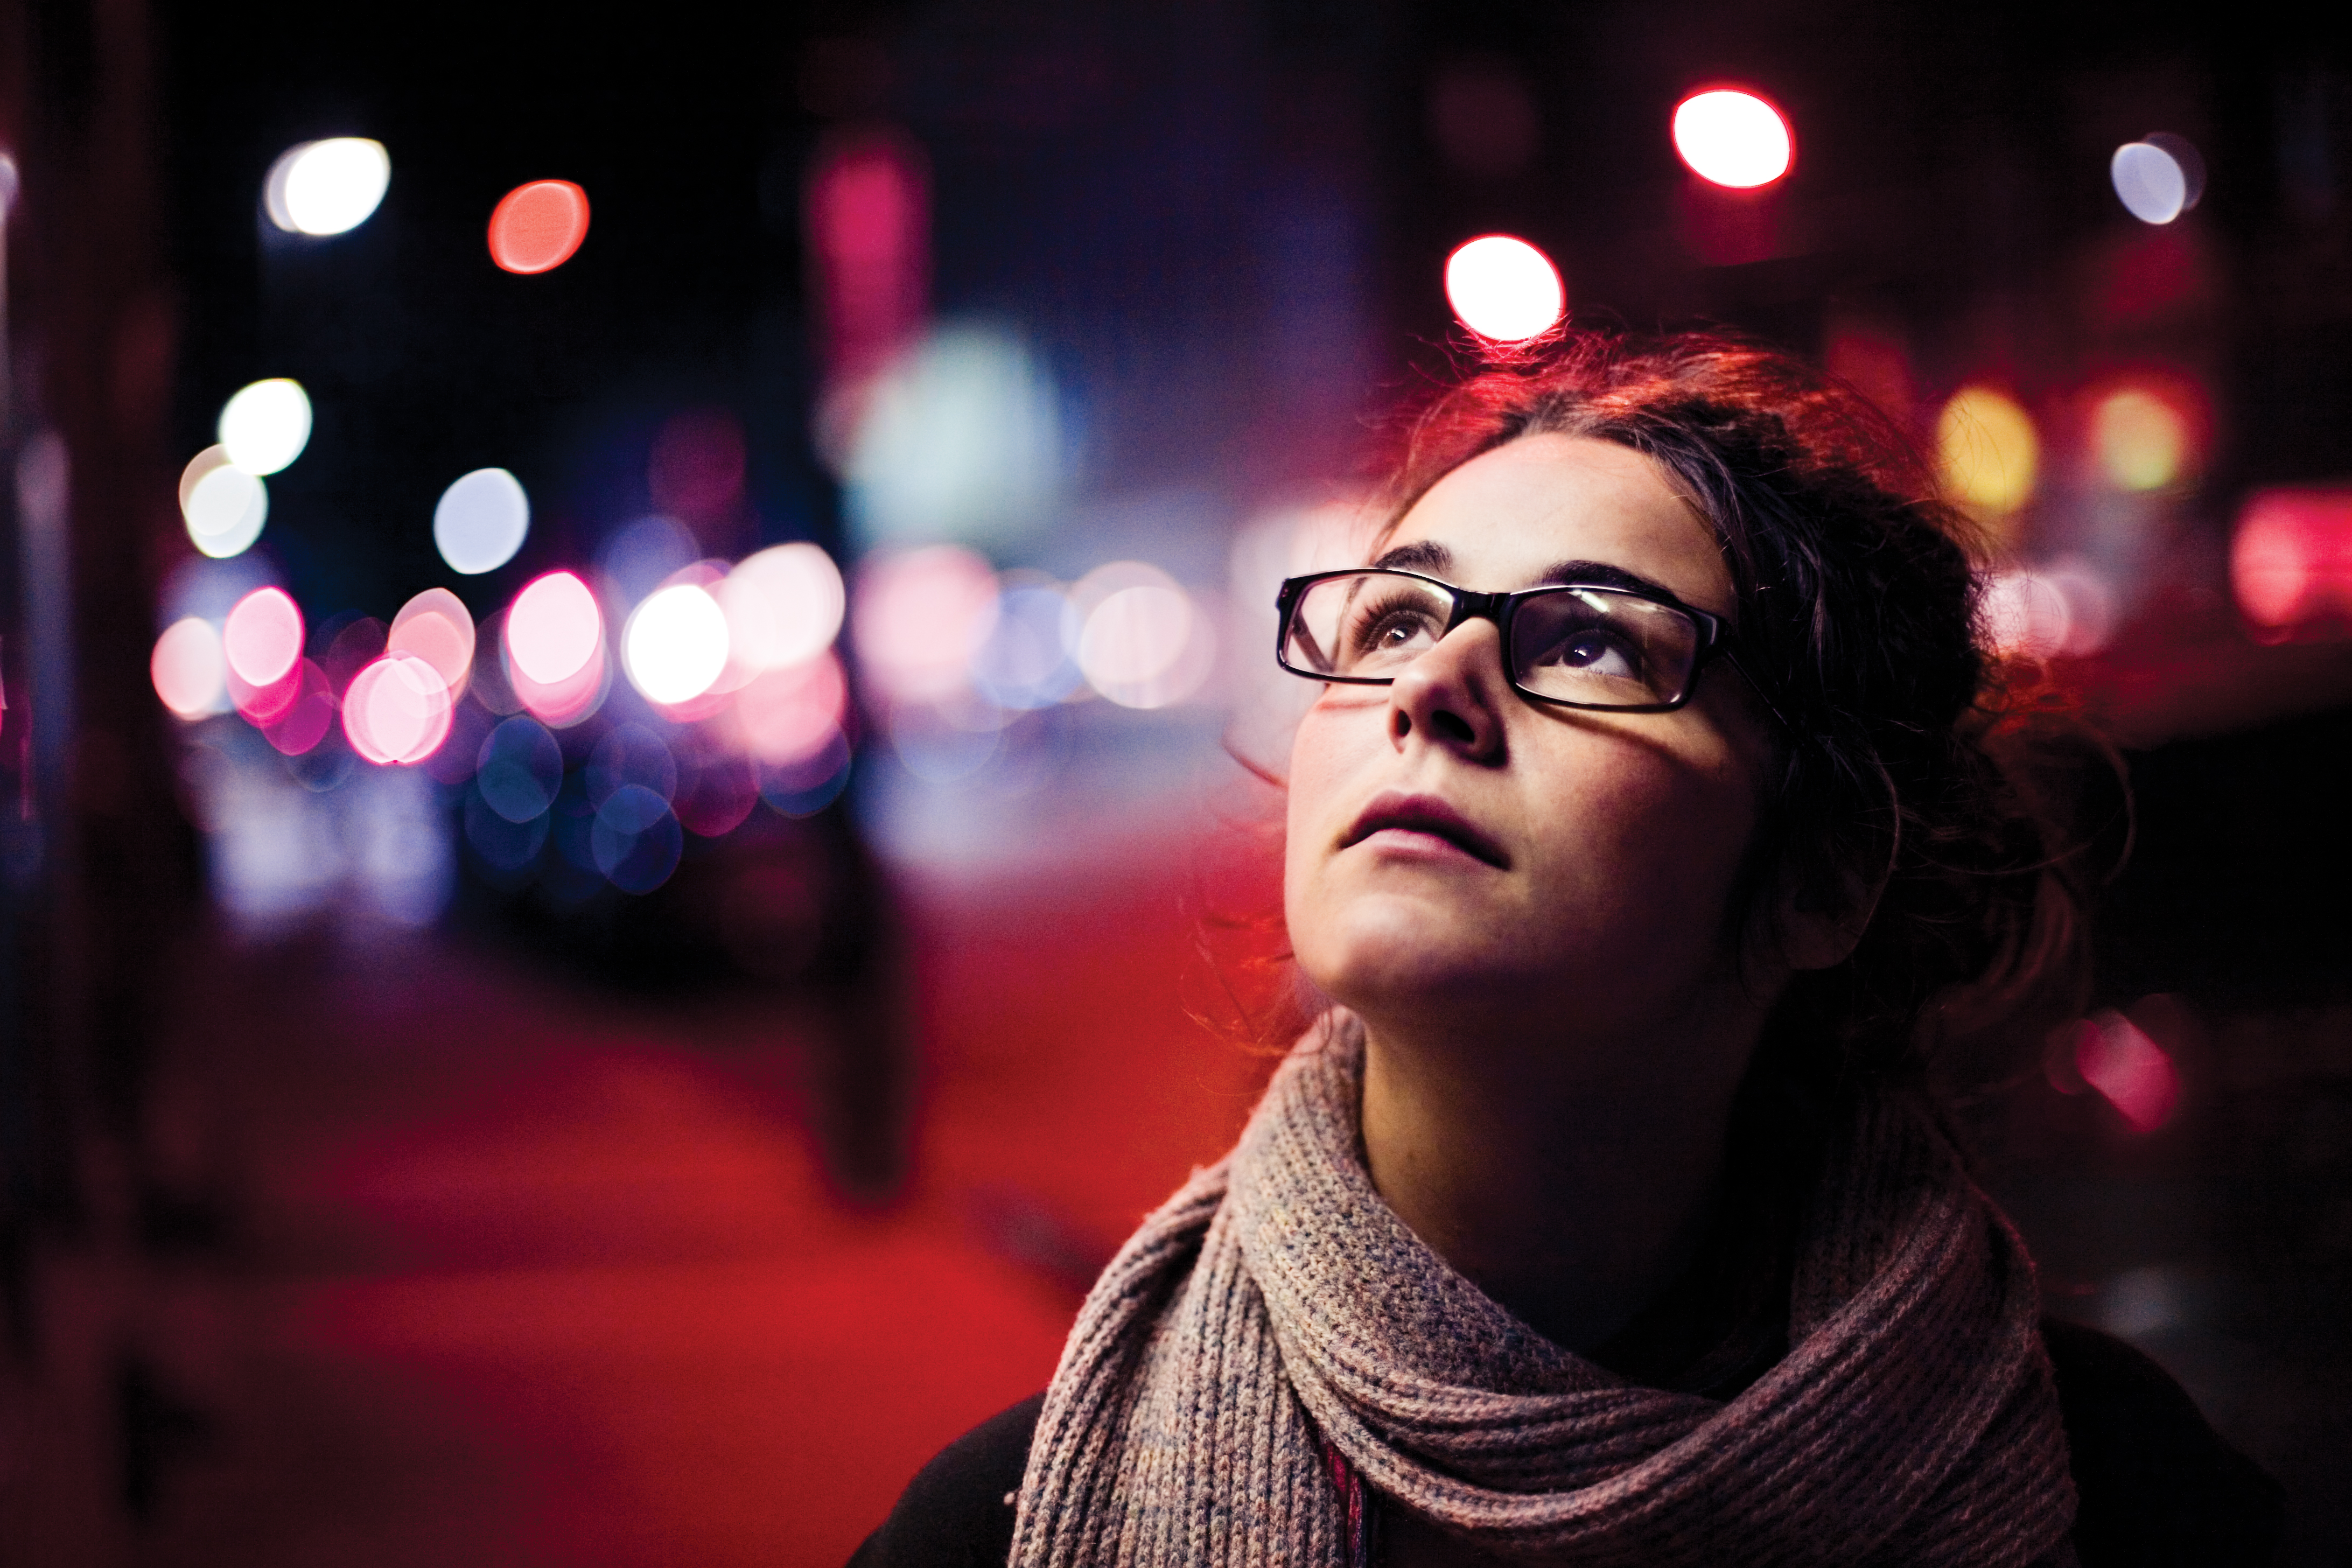
Aperture and Iris – Before light enters the camera, it passes through the aperture – also known as the iris – of the lens.  The aperture is an adjustable opening used to control the amount of light entering the camera.  As the aperture gets bigger, more light enters and the image gets brighter.  However, a larger aperture also means that a narrower area of the image will be in focus.  If you are filming an interview and you want the background to be blurry and only the subject to be in f0cus, you should use a larger aperture; if you want both the subject and the background to be in focus, you should use a smaller aperture.  We’ll discuss the way aperture is measured later, but you should know that a lower number is a larger aperture and a higher number is a smaller aperture.

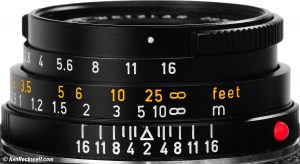
Depth of Field – A camera’s lens is focused at a specific distance; many lenses have focus markings in feet or meters.  This measurement is the distance  between the area in focus and the sensor of the camera.  The amount of space around that in-focus distance is the depth of field.  A large depth of field has a large area in focus; a shallow depth of field has only a narrow area in focus.  As discussed above, depth of field is controlled by adjusting the size of the aperture.

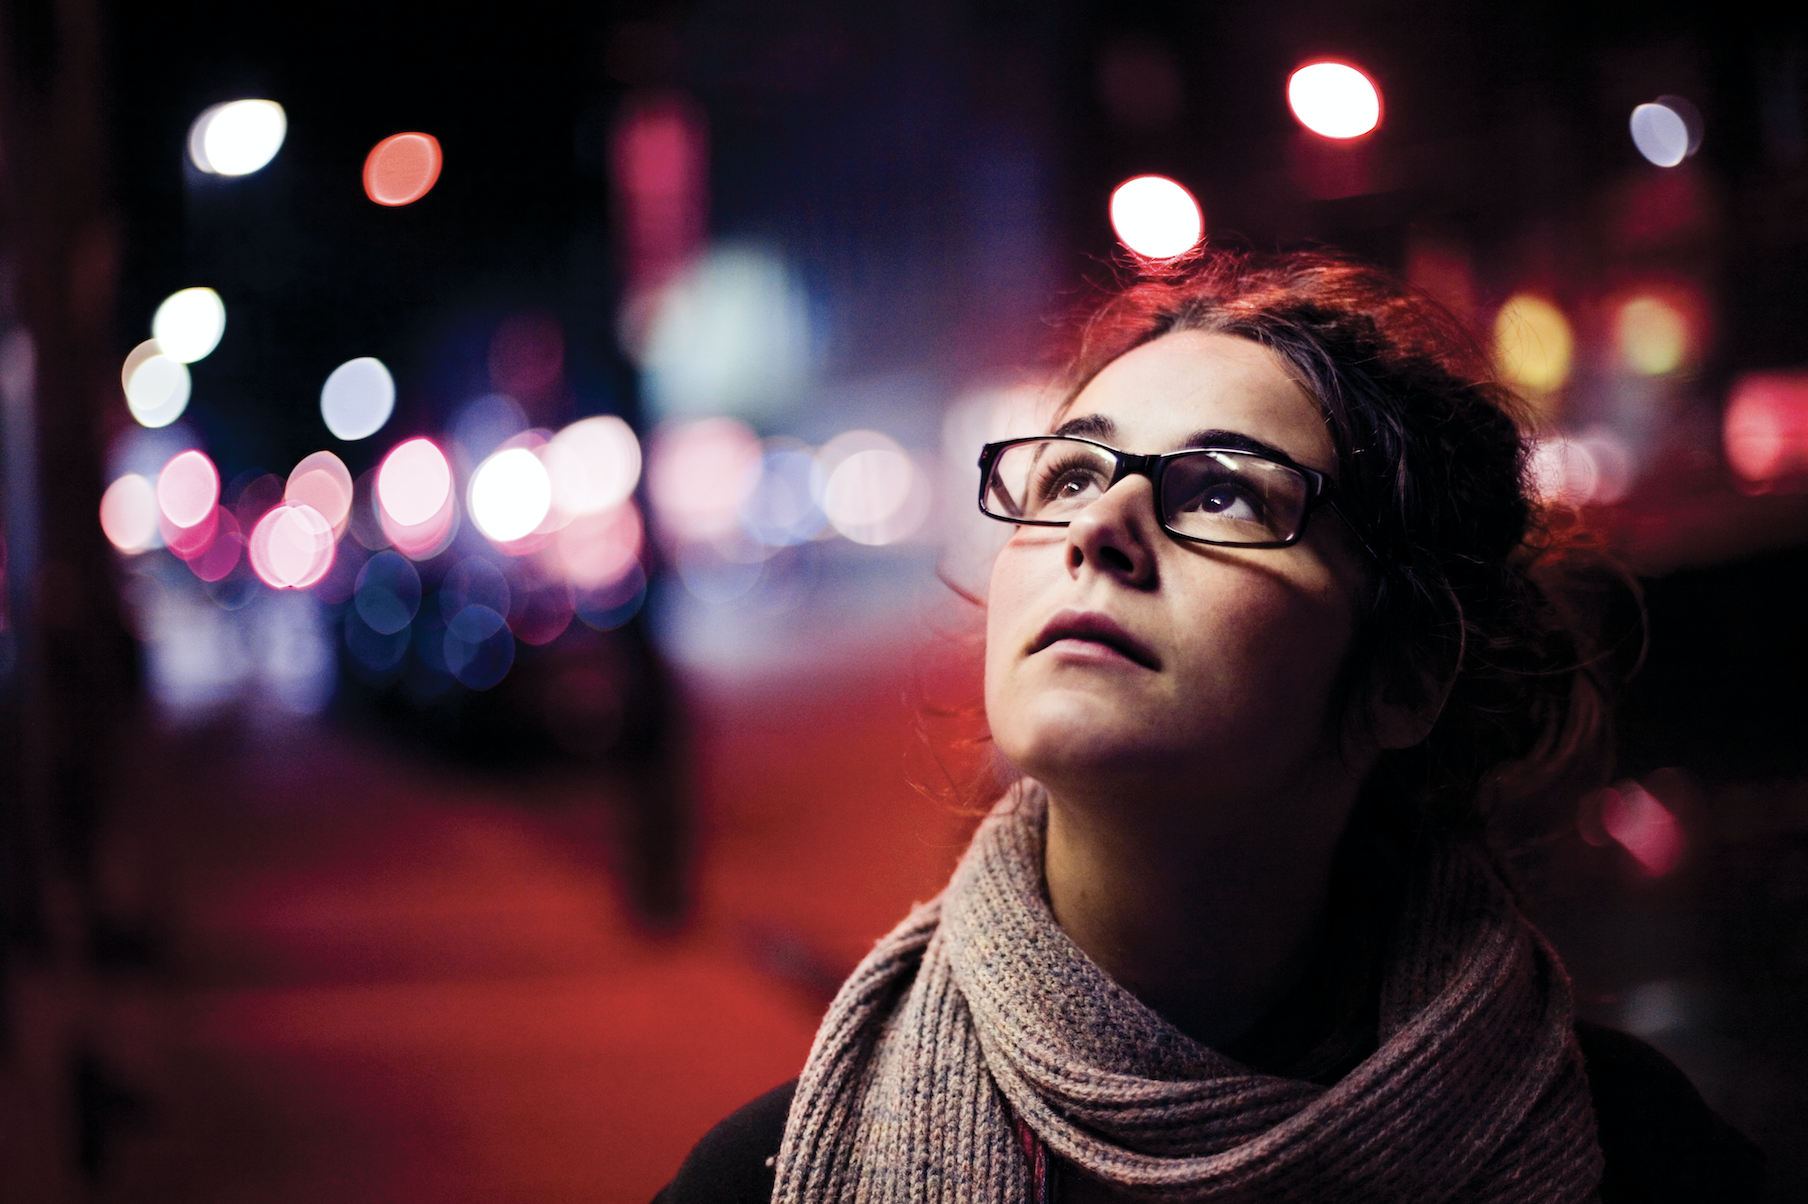
Bokeh – Bokeh describes a specific characteristic of images with a shallow depth of field: the round areas of out-of-focus light.  The quality of bokeh is something you will likely see discussed if you read a review of a camera lens – desirable bokeh is generally smooth and symmetrical.  Cheaper lenses tend to produce bokeh that is either asymmetrical or hexagonal.  Bokeh is very subjective, but it’s discussed often, so you should know the term.

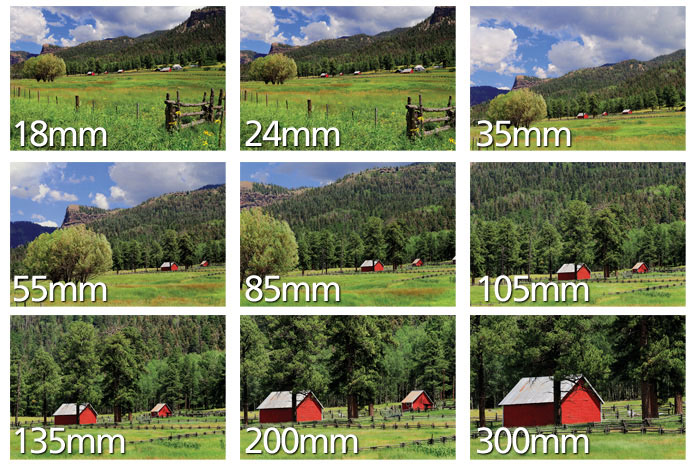
Focal Length and Angle of View – Both focal length and angle of view are used to describe the image captured by a lens.  A lens with a short focal length will capture a wide field of view and a lens with a long focal length will only capture a narrow field of view – in other words, short focal lengths are “zoomed out” and long focal lengths are “zoomed in.”  Focal length is measured in millimeters and it describes the distance between the point where light converges within the lens and the sensor (or film) of the camera.

What the focal length doesn’t take into account is the size of the sensor being used in the camera.  We’ll get deeper into sensor sizes later, but it’s important to understand that cameras with smaller sensors “see” less of the image and therefore look more zoomed in.  So, the exact same lens might look different on two different cameras.  We can get around this by converting focal lengths to a universal equivalent – or by simply using angle of view.  Angle of view is a measure of how much of a scene is visible – in the image above, the 18mm shot represents around 100 degrees and the 300mm shot represents around 8 degrees.  Around 50 degrees is considered a “normal” angle of view, since it closely mimics the way our eyes naturally see.

Categories
Lessons

Lesson 1.1: How Do Cameras Work?

Welcome!

Welcome to the Fall 2018 section of the Film/Media Studies Production Practicum.  This title for this semester’s class is “Camera/Movement,” which reflects the two areas we’ll be diving into: camera operation and camera movement.  We’ll start out with some basic camera settings, then look at how to use the specific pieces of equipment in our collection.  On the “movement” side of things, we’ll go over how to properly use specialized gear such as sliders, cranes, tripods, monopods, and gimbals and discuss the narrative, stylistic, and thematic possibilities of camera movement.  We’ll look at examples from throughout the history of the moving image – and spend lots of time doing hands-on workshops as a group.  We’re going to cover a lot of different topics and create some original work along the way.

This website will be your textbook for the class, so make sure you can find your way back here.  I post written versions of the weekly lessons, as well as work produced by the class, and any fun relevant material I that I happen to find.  There is a course Moodle page as well, which will be used primarily for grading.

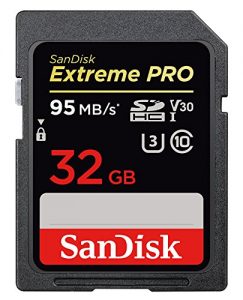
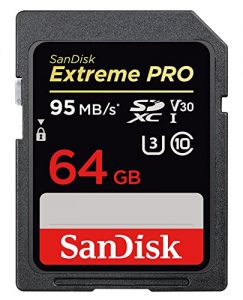
In terms of materials, I would like everyone to have their own SD card – this will make assignments where you have to go out and capture footage much more manageable.  The world of SD cards can be confusing (we’ll discuss this later in the semester!), with lots of different formats and speeds.  Everyone should get a card that is at least 32GB in size, C10, U3, and either SDHC or SDXC.  I would suggest either this 32GB card, which is around $20 or this 64GB card, which is around $35.  If purchasing a card is a problem for you in any way, let me know and we’ll work out another option.  If you have questions about a card, show it to me and I’ll tell you if it will work.

How SLR Cameras Work

Before we get into the specifics of the many different cameras in our collection, I’d like to spend some time going over how cameras work in general.  After all, learning how to set something like the shutter speed or ISO on a camera doesn’t do much good if you don’t understand what changing those settings actually does to your image.

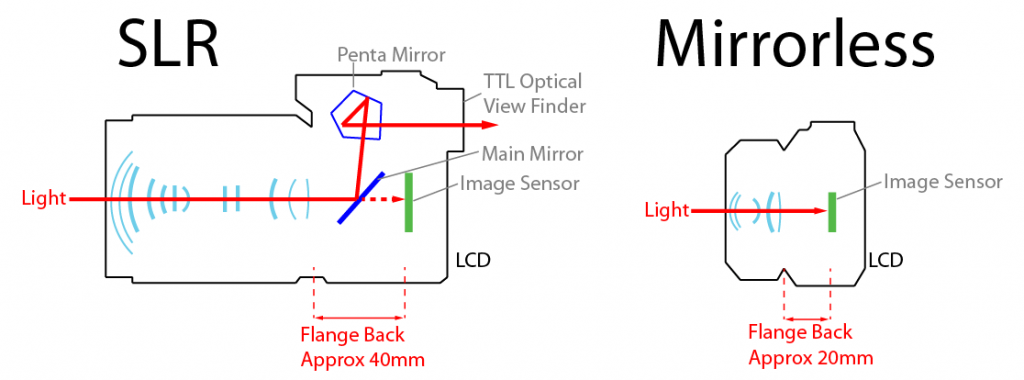
Even though our focus in this class is video, let’s look at a traditional stills camera first.  For many decades, the SLR was the go-to camera for serious photographers.  SLR stands for Single Lens Reflex. The Single Lens refers to the one interchangeable lens mount present on the camera.  Reflex refers to the way that light enters the camera and is reflected through the optical viewfinder.

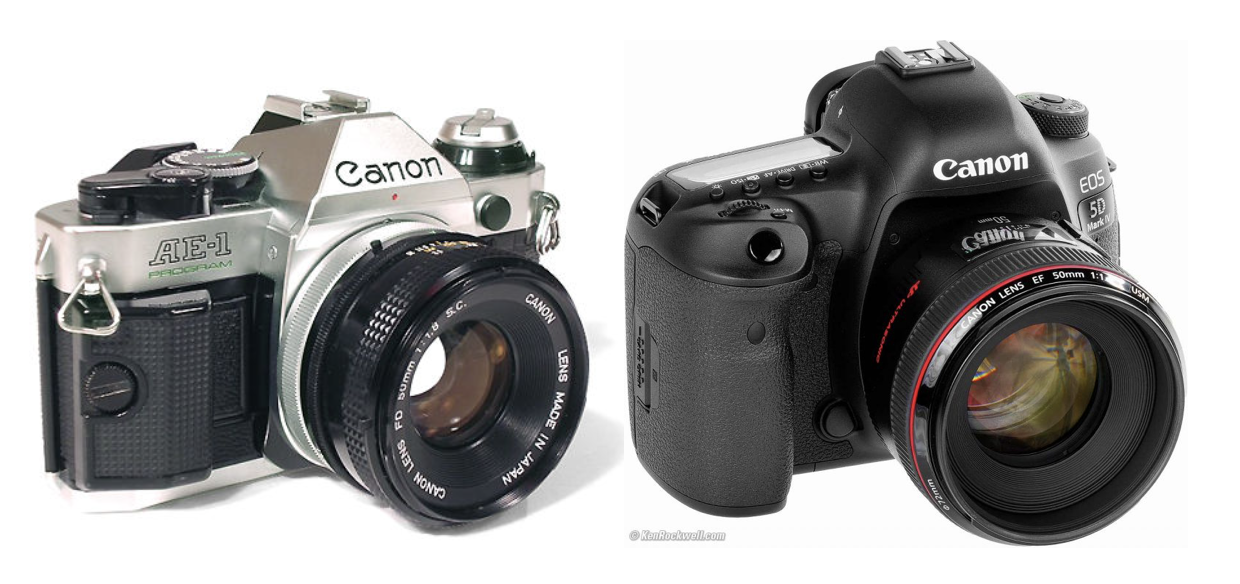
Film (left) and digital (right) Canon SLRs

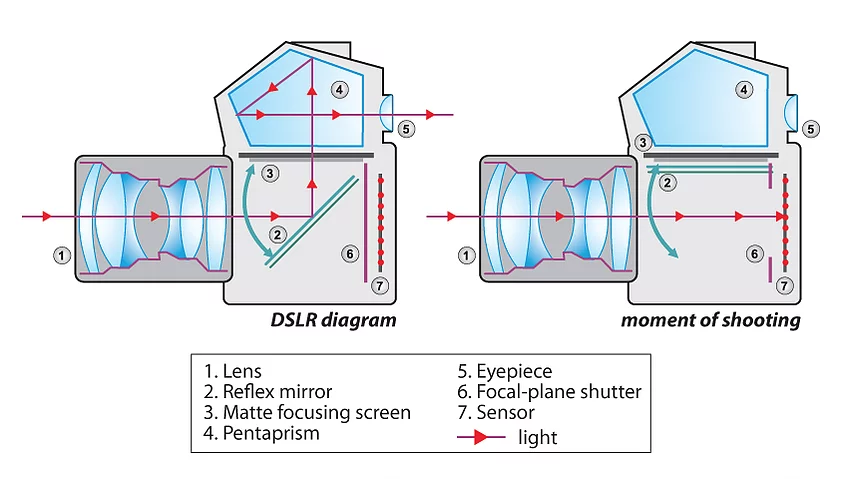
On an SLR, light enters through the lens and passes through various glass elements and then an adjustable opening called the iris or aperture before entering the camera.  Inside the camera, the light hits a mirror that sits at a 45 degree angle in front of the shutter.  The light bounces off the mirror and is reflected up through a glass pentaprism.  The pentaprism bounces the light around until it is reflected back through the camera’s viewfinder.  This means that when you look through the viewfinder of an SLR, you are looking directly through the lens, via the pentaprism and reflex mirror.

When you take a photograph with an SLR, two very important things happen.  First, the reflex mirror is lifted away, revealing the shutter and blocking the pentaprism.  Second, the shutter opens, creating the exposure – for a long exposure, the shutter will remain open for a long time and for a short exposure, the shutter will remain open for a tiny fraction of a second.  Because of the way the reflex mirror moves, the image in the viewfinder will actually be blacked out while the exposure is taken.

This process is the same whether the camera uses film or records to a digital format.  On a film camera, the open shutter will expose light-sensitive photochemical film; on a digital camera, the open shutter will expose the digital sensor.  During digital video recording, the shutter and mirror stay open and the sensor’s exposure is controlled electronically – it’s simply too mechanically demanding for the shutter to be constantly opening and closing.

Hybrid History

Digital SLRs (DSLRs) have completely transformed the world of filmmaking – particular for small budget and independent creators.  In 2008, both Canon and Nikon released DSLRs with the ability to record high definition video.  This was originally intended as a feature for photojournalists, who would be able to capture short video clips while on assignment.  However, narrative filmmakers quickly took notice – at the time, affordable digital video cameras with large sensors (like those in stills cameras) and interchangeable lenses simply did not exist.  While the early video-capable DSLRs were not cheap, they were infinitely more accessible than the equivalent 35mm film-based movie cameras – and they produced far better footage than the ubiquitous lower-end camcorders of the time.

DSLRs made by Canon and Nikon remain incredibly prevalent today, on productions of all sizes.  However, over the last few years, SLR cameras have been joined – and often replaced – by mirrorless cameras.  Mirrorless cameras lack the reflex mirror, pentaprism, and optical viewfinder present in SLRs – instead, light travels through the lens and goes directly to the shutter and sensor.  The optical viewfinder is replaced by a small screen.  Because there are no mirrors and fewer moving parts, mirrorless cameras are generally smaller than SLRs, but they operate in essentially the same way.

Because they look and operate similarly, some people mistakenly refer to digital mirrorless cameras as DSLRs, although the missing reflex mirror means that the term is no longer strictly accurate.  I’ve seen them referred to as “DSLMs,” but the distinction at this point is largely semantic.  Both DSLRs and mirrorless cameras are interchangeable-lens hybrid cameras, capable of capturing both stills and video.

We’ll discuss the various strengths and weaknesses of hybrid cameras in the coming weeks.  However, I think that it’s also important that we discuss the basics of exposure and camera operation in a general sense.  After all, every camera will operate in a slightly different way; buttons will be in different positions, menus will have different arrangements, and various manufacturers will use different terminology.  If you understand the basics of how a camera works, it will be much easier to move from one camera to another.