Flowing Through the City
Filmmaker Rob Whitworth has developed a unique style of time lapse video that he calls “flow motion.” Check out his travel videos for Sydney and Dubai below.
Flowing Through the City
Filmmaker Rob Whitworth has developed a unique style of time lapse video that he calls “flow motion.” Check out his travel videos for Sydney and Dubai below.
Project 3 – Filming Slow Motion and Time Lapse
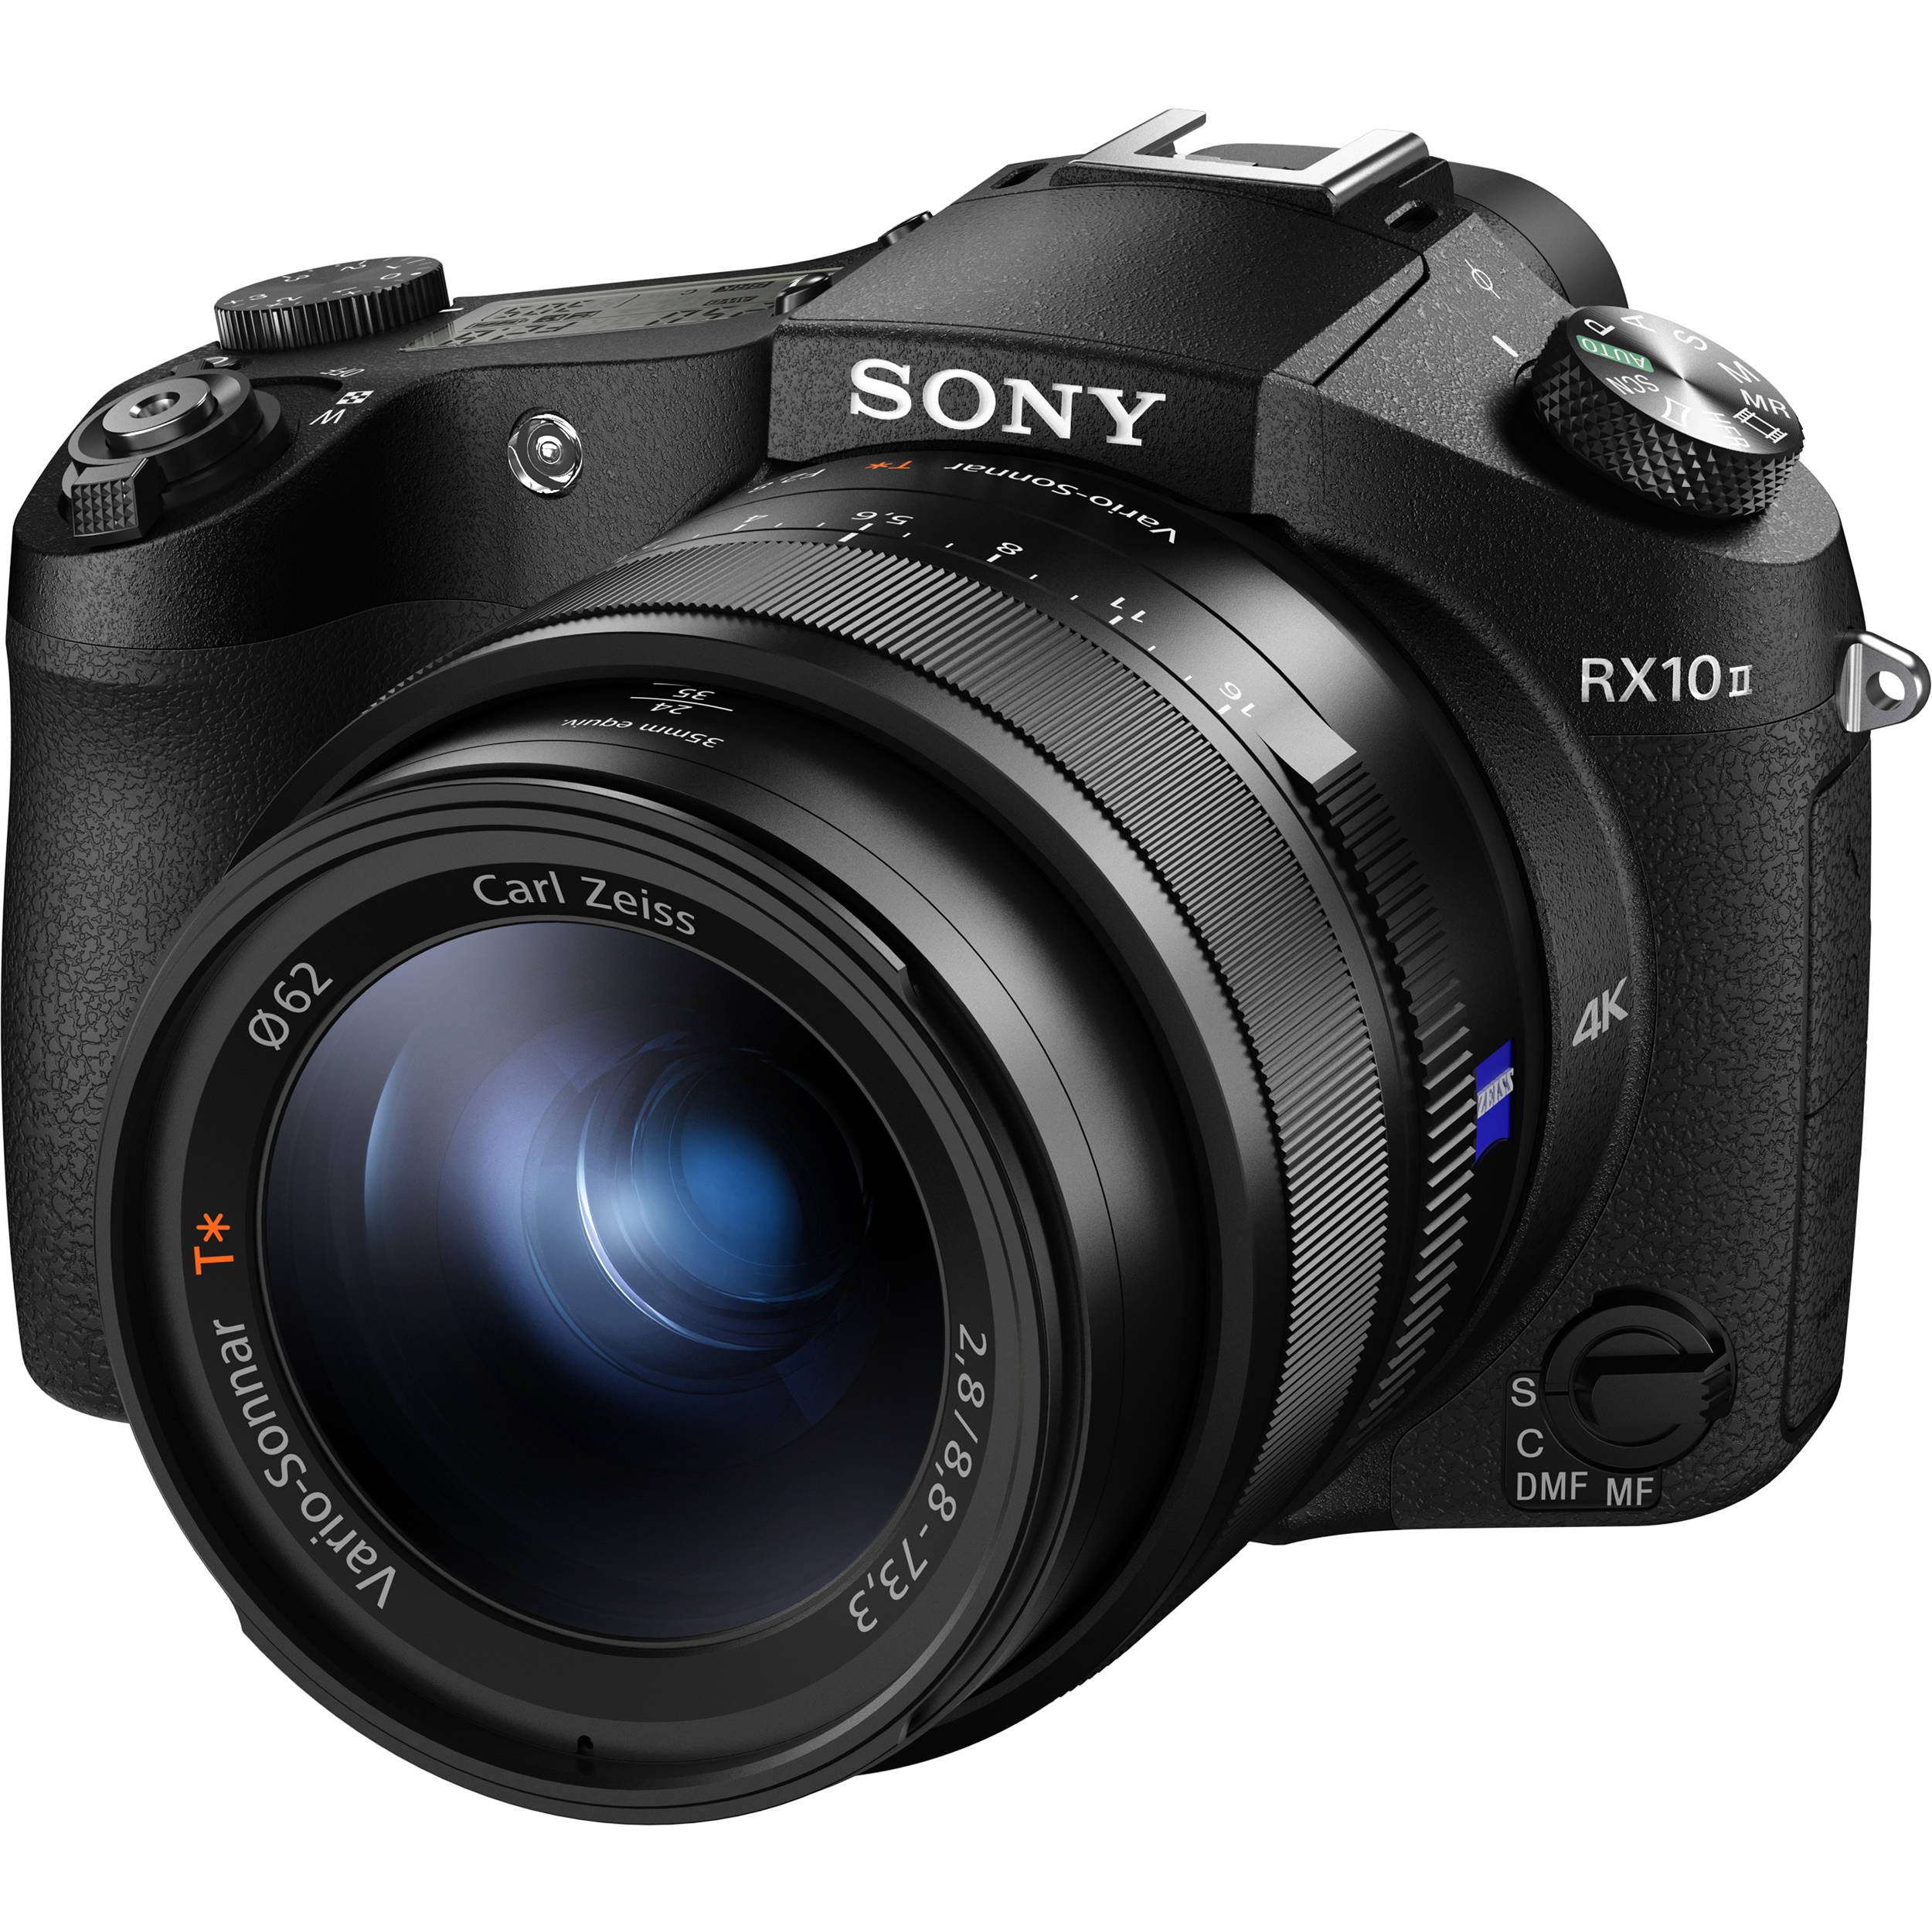
For this project, you’ll be capturing slow motion and time lapse shots. You’ll be working in three groups – two groups will capture two time lapse sequences using the GH4 and one group will capture four slow motion shots with the RX10 II. The groups will then swap cameras, so that each group gets to create the time lapse sequences and slow motion shots using the appropriate cameras.
For the slow motion shots, you can choose the frame rates that you want to use, but they should show off the slow motion features of the cameras. Remember that the image quality on the RX10 II starts to go down after 240; 480 is probably the highest you should go. You may also use the 120 frame per second mode, but please send me the shot in slow motion if you do so.
For the time lapse sequences, you’ll be given the camera and a small tripod. Please make your finished sequence no longer than ten seconds long – that’s 240 frames at 24 frames per second. Please do not leave the camera alone while it is taking the images.
I’ll be away until next Tuesday, October 2. Please coordinate amongst yourselves to rotate through the cameras and get me the shots before class on that date. Once again, each group should create two time lapse sequences with the GH4 and four slow motion shots with the RX10 II.

Take It Sloooooooooow
Slow motion is fun. It can give drama more weight and make comedy more ridiculous. While it’s often overused in Hollywood blockbusters, there are times when a slow motion shot just works. I don’t see many student projects that utilize the technique and I think that part of the reason is that it requires a lot of planning. You need to know exactly what your want your end result to be and it often requires additional equipment and setup time.
Fortunately, we have some really fantastic tools for capturing slow motion in our equipment collection. In particular, the Sony RX10 II and the Panasonic GH4 have excellent slow motion modes. However, before we discuss the particulars of using the individual cameras, we need to discuss how slow motion works in general.
Slow motion is sometimes referred to as “over cranking,” a reference to the manual, hand-cranked film cameras of early cinema. Put simply, shooting slow motion involves using a higher shooting frame rate than the display frame rate. If you film at 48 frames per second and display the footage at 24 frames per second, we will have half-speed slow motion. On the first movie cameras, this was literally done by cranking the handle on the camera more quickly than usual – hence, over cranking. The higher the frame rate filmed at, the slower the resulting slow motion footage.
There are some considerations that need to be taken into account when filming in slow motion, however. First of all, the “180 rule” for shutter speed still applies: for a natural looking amount of motion blur, the shutter speed should be roughly twice the frame rate. That means that shooting at a high frame rate involves using very short shutter speeds; if you are shooting, say, 100 frames per second, your shutter speed should ideally be around 1/200 of a second.
Since fast shutter speeds let less light into the camera, we need to compensate in some way. You can usually make up some of the difference using the exposure triangle – either raising the ISO or opening the aperture will help. Lens apertures can only open so far, though (plus it affects depth of field) and high ISOs have worse image quality. That means that, most of the time, you simply need to add more light to a scene that you are filming for slow motion.
You can also be a little more flexible about the 180 rule when filming slow motion. If you are shooting at, say, 240 frames per second, you probably don’t need to take your shutter all the way down to 1/480 of a second. Remember, though, that it’s impossible to film at a lower shutter speed than your frame rate, so for 240fps slow motion, you will still need to shoot at a minimum of 1/240 of a second.
Shooting slow motion can also cause some lights to flicker in unexpected ways. Flicker is caused by the shutter speed of the camera interacting with the frequency of the lights in the shot. Unfortunately, you can’t see this flicker until you play the clip back, so you may want to do some tests and adjust your shutter speed as necessary.
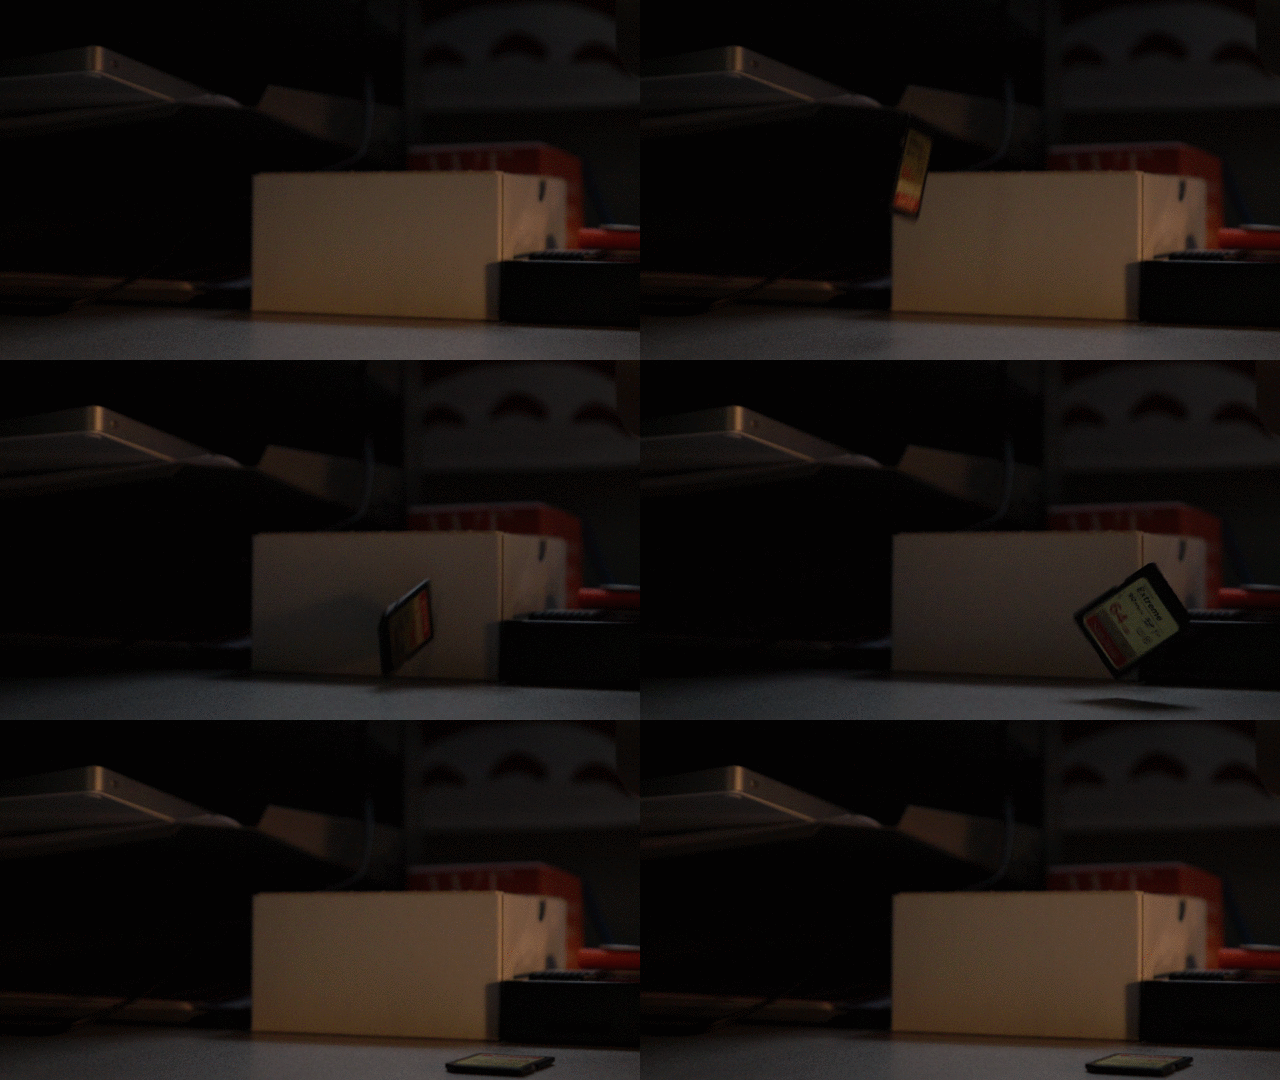
Finally, do keep in mind that the clip you create will be considerably longer – two, four, ten, maybe twenty times longer – than however long you actually record for. Your SD cards will fill up much faster, so make sure that you are only filming what you actually need.
HFR on the RX10 II
First up, let’s look at how to capture slow motion on the Sony RX10 II. The mode dial has an HFR (High Frame Rate) setting next to the movie mode, so you’ll want to switch over to that. Then hit the menu button and go to the second page of the camera settings section.

First, make sure that the file format is set to XAVC S HD. Next, move down to the HFR Settings option, which is on the same page. The Record Setting determines the frame rate for your resulting movie file – use 24p 50M, which will create a video clip that plays in slow motion at 24 frames per second. The Frame Rate setting allows you to choose three options: 240, 480, or 960 frames per second. Since our final video will be played back at 24, 240 plays back at one tenth speed, 480 at one twentieth, and 960 at an astounding one fortieth speed.


Unfortunately, these extreme frame rates come at the cost of image quality. Recording at 240 looks quite good, 480 is a bit soft and muddy, and 960 looks pretty bad. I would personally stick to 240 which is still very dramatic slow motion.

Set the Priority Setting to Quality Priority, which will ensure the best possible image. REC Timing is an interesting setting; when it is set to Start Trigger, the slow motion recording will begin when you press the video record button. When it is set to End Trigger, the camera will continuously “buffer” a few seconds of slow motion video – hitting the video record button will save whatever is in that buffer. This is great for capturing precise moments, because you can wait something to occur and then press the record button, as opposed to trying to anticipate the action you are trying to capture.

There are some limitations to recording in HFR mode on the RX10 II. First of all, the camera can only capture around two seconds of slow motion footage at a time. That might not sound like much, but remember that when played back, these clips will get ten, twenty, or forty times longer; two seconds of 240fps footage will result in a twenty second clip. Also, no sound is recorded in HFR mode, but audio that slow would be fairly useless anyway.
When the camera is switched over to HFR mode, it will operate as usual: you can dial in the zoom, focus, and exposure settings as you normally would. However, pressing the large center button in the control dial on the rear of the camera will place it into “Shooting Standby.” When the camera is set to standby, all the settings are locked. You cannot change exposure, adjust the zoom, or even focus the camera. When the camera is in standby mode, you press the movie record button to capture either the previous two seconds or the next two seconds, depending on how you set the REC Timing option in the menu.

After you finish recording, the camera will take a few seconds to process the clip. It’s a good idea to hit the playback button to check out what you’ve captured. Be sure to check for things like lights flickering.

The RX10 II has one other great option for slow motion recording, which is to record in 120 frames per second in the normal video mode. To do this, set the camera to movie recording on the mode dial. In the menu, make sure that the format is set to XAVC S HD on the second page of the camera settings section. Then go to Record Setting and choose 120p 100M. This will capture footage that does not play back in slow motion; however, you can take it into an editing program and slow it down in post-production.
The benefit of recording this way is that you don’t have to use the “standby” mode which locks all of the camera settings. You can record normally, with sound, and make changes to your zoom, focus, and exposure settings. This would be a good approach if you wanted a scene to start at normal speed and then transition into slow motion. It will require more work in the editing process, though. You could do the same thing using the 60p Record Setting for a less dramatic effect.
VFR on the GH4
The Panasonic GH4 has solid slow motion capabilities as well. Its frame rate options are more limited, but it gives you more flexibility in terms of recording time and settings. To enable VFR (Variable Frame Rate), set the camera to movie mode on the top dial and go into the menus. In the Motion Picture section, make sure that the Rec Format is set to MOV. Under Rec Quality, choose FHD 100M 24P, which will record a full HD image at 24 frames per second. You should see “VFR available” at the bottom of the description box.

At the top of the second page of the Motion Picture section, you’ll find the Variable Frame Rate settings. Click on it and go to SET. From there, you can set the frame rate to anything from 2, for fast motion, up to 96, for quarter speed slow motion. Once you set the desired frame rate, make sure that Variable Frame Rate is turned on in the menu and back out to the camera’s recording mode.


Much like recording slow motion on the RX10 II, the GH4 will not record any audio and the recorded clip will automatically be converted and played back in slow motion. Unlike the RX10 II, there is no recording time limit and you can continue to set the exposure, zoom, and focus – there is no “standby” mode. You simply hit the record button and stop when you are done.
Since VFR on the GH4 tops out at 96 frames per second, the slow motion options aren’t as dramatic as they are on the RX10 II. The recording mode itself is much easier to use, though, and being able to record much longer clips is a big plus. Clips recorded at 96 frames per second are still dramatically slow – they just don’t have the extreme slow motion effect that clips recorded at 240 or 480 frames per second do.
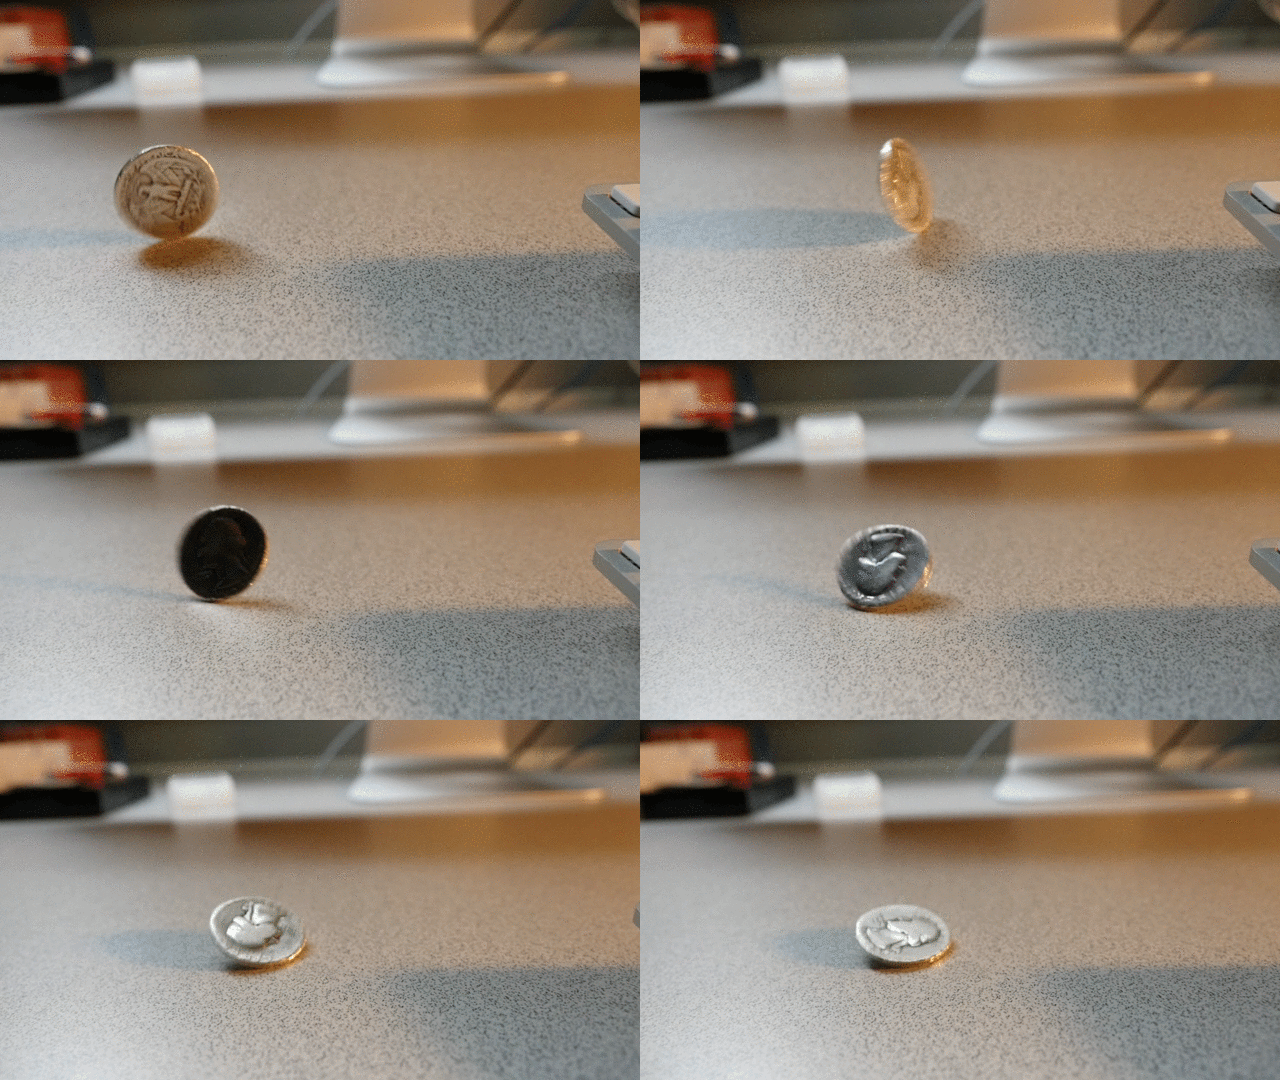
Like on the RX10 II, you could also record in the normal video mode at a higher than usual frame rate and then slow the footage down in post production. However, the highest frame rate available in full HD is only 60 frames per second and 4K tops out at 30.
T-I-M-E-L-A-P-S-E
The opposite of a slow motion shot would have to be a time lapse shot, which speeds action up by using a lower shooting frame rate than the display frame rate. In time lapse footage, you might capture a single frame every second, or every ten seconds, or every few minutes. The further apart the frames are, the more dramatically sped up the resulting footage will be.
Any footage can be converted to time lapse by speeding it up in post-production. However, the GH4 has a great time lapse mode built into the camera, which makes the entire process more streamlined.
To enter the time lapse mode, you need to turn the mode dial on the camera to a stills photography setting – I’d recommend M for manual mode – and the drive dial to the last option, which looks like a clock with two arrows around it.

Head into the menus and go to the Rec section – it has an icon of a stills camera. Since you are going to be capturing stills that will be converted into video, you may want to change the Aspect Ratio on page one to 16:9. This is the same aspect ratio that HD video uses, so it will ensure that your images translate correctly.

On the third page of the Rec section is the Time Lapse/Animation setting. Click on it and set the Mode to Time Lapse Shot. Leave the Start Time set to Now. The last option, where you set the shooting interval and number of images captured is a crucial setting. The interval determines how far apart the images are taken. The lowest option is one second, which means that it would take 24 seconds to create a single second of the finished clip (at 24 frames per second). This goes all the way up to 99 minutes.

The image count essentially determines how long your time lapse will go for. If you take shots two seconds apart and capture 50 images, it will take about 100 seconds to capture your footage and the resulting clip will be a little over two seconds long at 24 frames per second. I know that’s a lot of numbers; fortunately, the camera makes it a little easier by putting the estimated end time at the bottom of the screen.


With the time lapse settings dialed in, you can leave the menus and set your exposure. Since you will be capturing still images so far apart, you don’t need to pay much attention to things like the 180 rule for shutter speed. Just get your exposure set, hit the shutter button, and walk away. The camera will record for the predetermined number of shots and then stop. You definitely want to use a tripod when recording time lapses, since any camera movement will appear to be a huge jump in the footage.

After the shots have been captured, the camera will give you the option to create a video file from the stills in-camera, which is a nice feature. You can set the resolution and frame rate and the camera will take a few seconds processing the footage.



The 4K Sony Bridge Mirrorless Hybrid
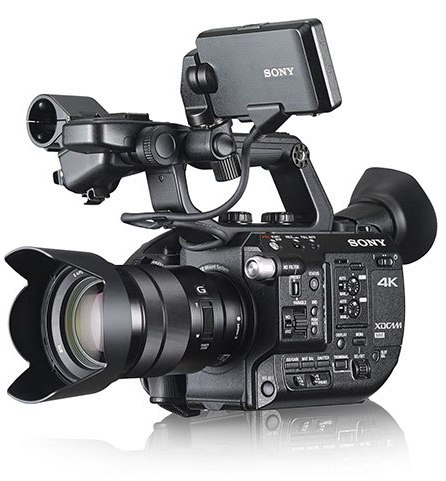
So far, we’ve looked at hybrid cameras (the Panasonic GH3 and GH) and dedicated video cameras (the Panasonic AF100 and Sony AX2000). This week, we’re going to get to know an unusual camera that offers some of the benefits of both hybrids and camcorders: the Sony RX10 II.
Sony has a few different cameras in their “RX” line – the most popular by far is the RX100, which is now on its sixth iteration. These cameras are beloved because they manage to pack excellent photo and video quality into a device small enough to fit into your pocket.
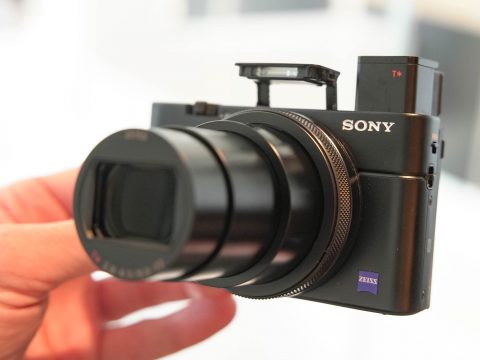
The RX10 cameras (of which there have been four iterations) are considerably larger than the RX100s. They generally use the same image sensor and offer the same features and image quality. However, the larger size makes room for a fixed zoom lens with much larger reach, longer battery life, more external controls, and advanced audio features via the use of an optional adapter.
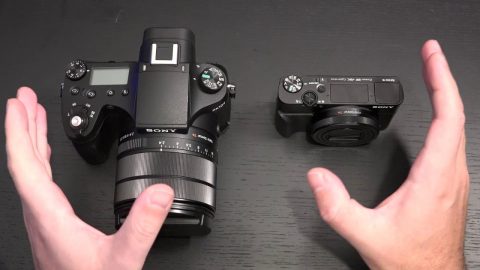
The RX10 is a “bridge” camera. It has a fixed lens like a point-and-shoot, but on a larger body with the layout and manual controls of a DSLR. These cameras have always occupied a strange niche – most photographers who want a larger camera body and manual controls also want to be able to change lenses; conversely, those who are interested in the convenience of an all-in-one also want it to be compact. As a result, these cameras are not especially popular. I personally find this camera very interesting, however, as it has some fantastic video features.
Using the RX10 II
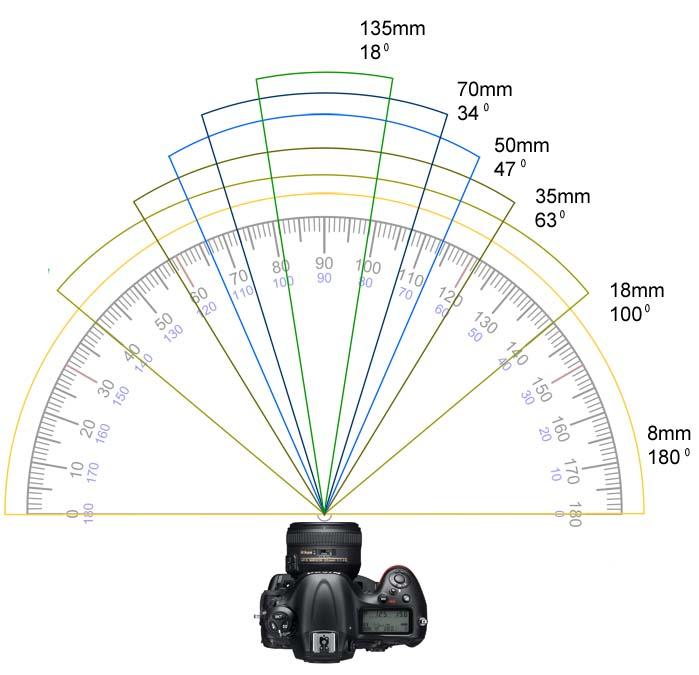
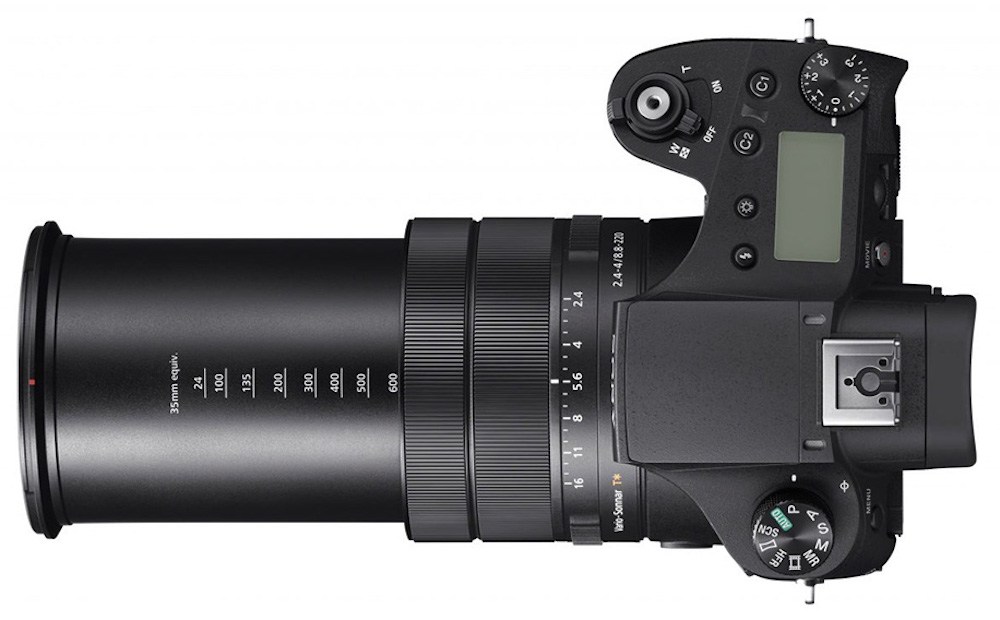
The most obvious feature of the RX10 is its massive fixed (permanently attached) lens. The focal length is 8.8-73.3mm with a constant aperture of f/2.8. The crop factor on the RX10’s one inch sensor effectively turns this into a 24-200mm full frame equivalent field of view. Having a focal range that long with a wide constant aperture is pretty unusual and it makes the camera very versatile.
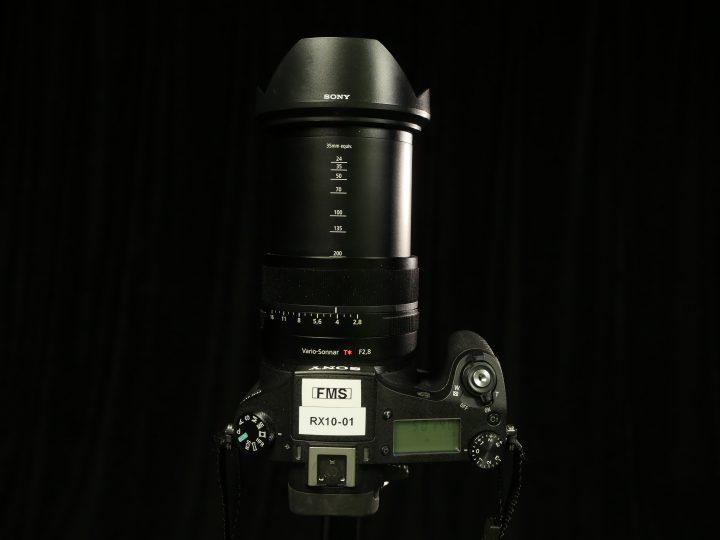
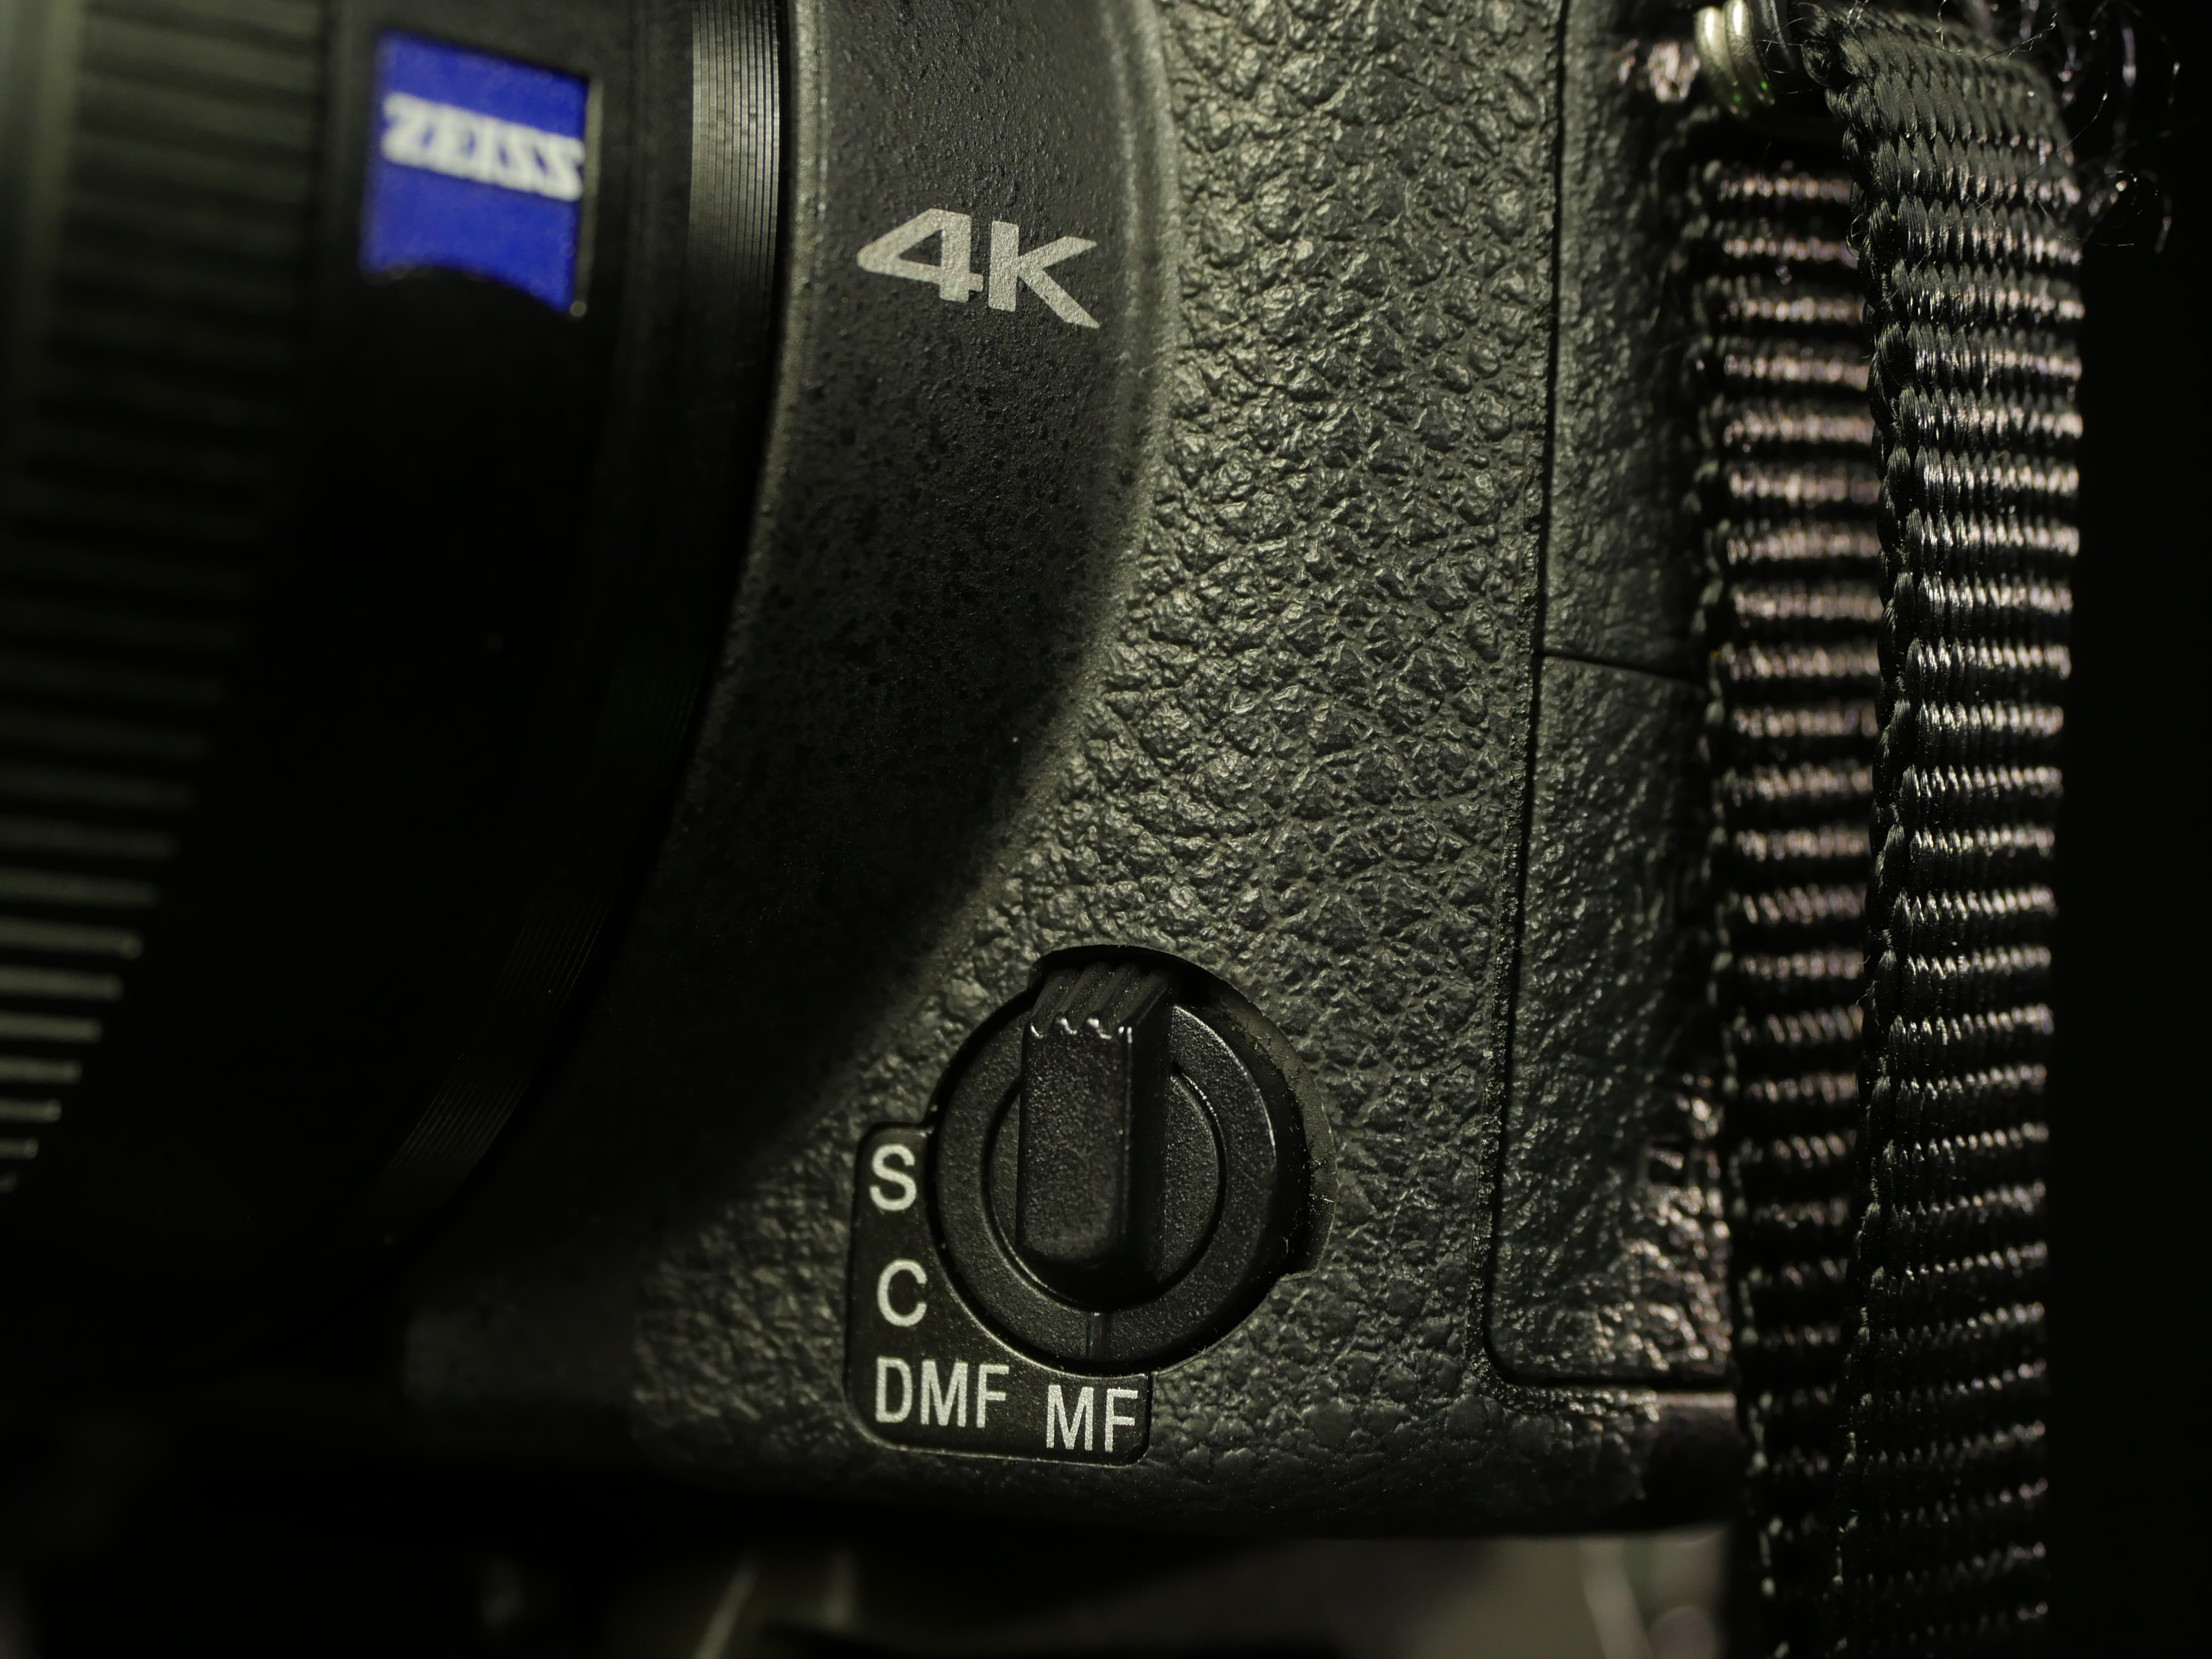
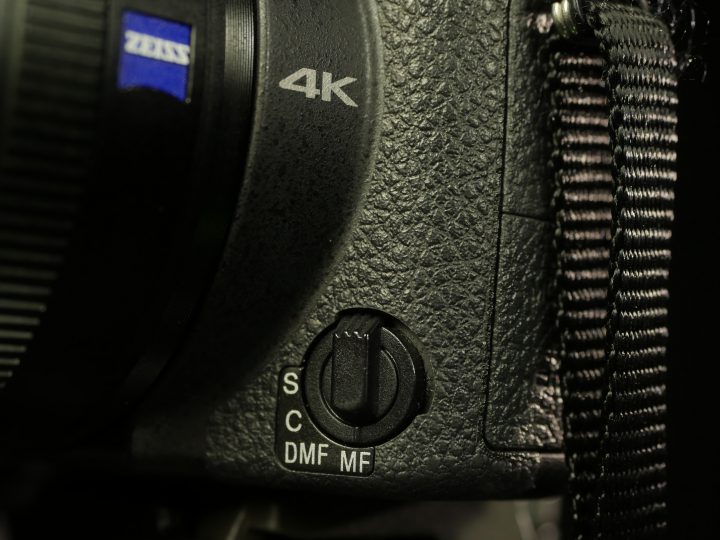
There are two rings on the lens itself: one for aperture and one for either focus or zoom. The aperture ring is unique in that it can be set to click (for stills) or rotate smoothly The combo ring only focuses when the camera is in manual focus mode (set using a dial in the bottom corner of the front of the camera); in one of the autofocus settings, it controls zoom. Zoom can be controlled in manual or autofocus modes using the rocker dial on top of the camera.
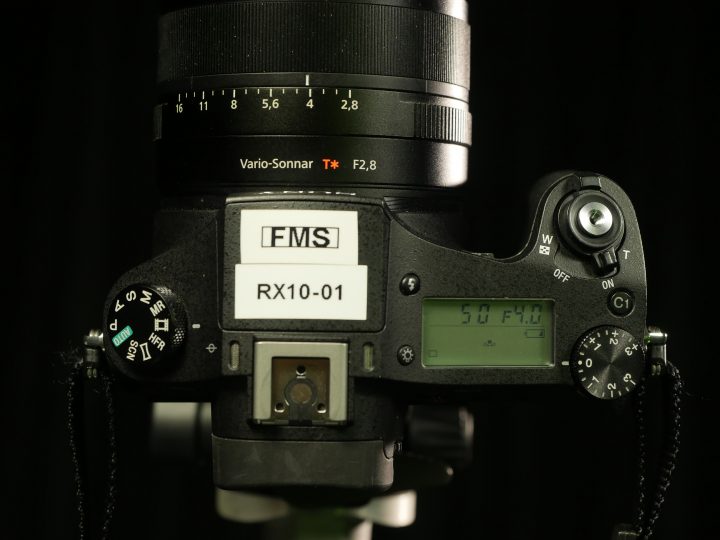
Also on the top of the camera, you’ll find the exposure compensation dial, which is used primarily for stills photography; the familiar mode dial; a customizable button, which I have set for focus magnification; and a useful LCD display, which shows the battery level and camera settings. For video recording, set the camera’s mode dial to the filmstrip icon. The HFR setting below the filmstrip is used for slow motion recording; we’ll discuss that in more detail later.
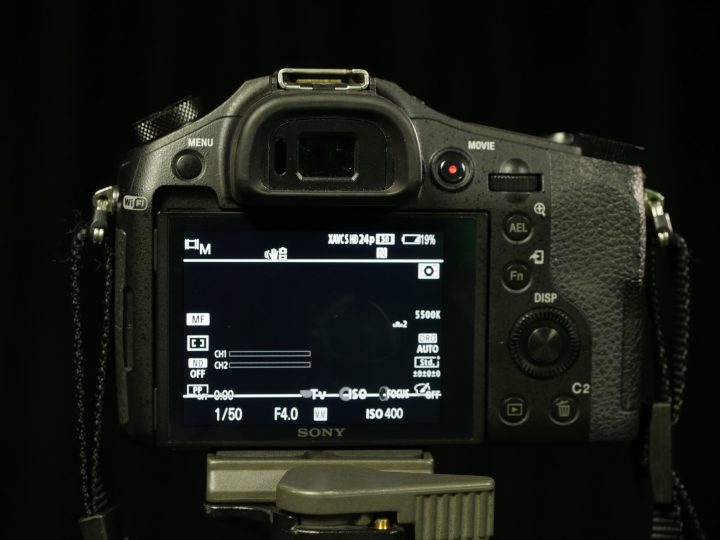
On the back of the camera, you’ll find more customizable buttons and a control wheel, which I have set to control the ISO. Since this camera has aperture controls on the lens, there is only one dial, which is used to control shutter speed. The rear screen tilts up and down, but it isn’t fully articulated like the screen on the GH3 and GH4. On the side of the camera, you’ll find a micro HDMI output, a 3.5mm microphone input, and a headphone jack.
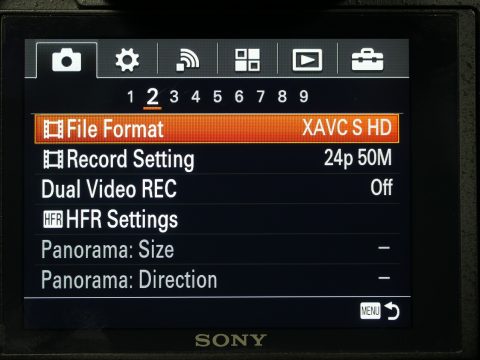
Digging into the menus: there are sections for camera settings, customization options (the gear icon), WiFi, apps which can be added to the camera (squares icon), playback, and general settings (toolbox icon). On the second page of the camera section, you can set the file format, resolution, and frame rate. For 4K recording, you should use the XAVC S 4K format. For HD recording, I like to use the XACV S HD format, since it gives you the most options for frame rates. You can actually record full HD at 120 frames per second with audio on this camera, which is a great feature.
On the fifth page of the camera settings is the option for one of the RX10 II’s most unique features: a built-in ND filter. There aren’t multiple strengths of ND, like you’d find on an AF100 or AX2000, but it’s still very useful. For convenience sake, I have set the C2 button on the back of the camera to control the ND setting.
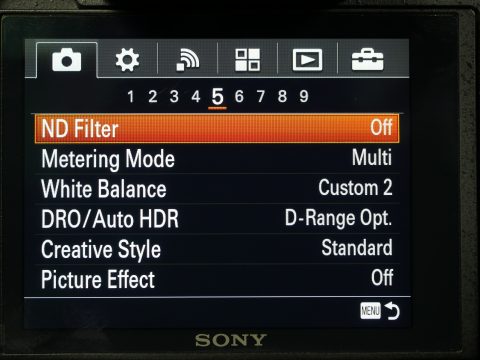
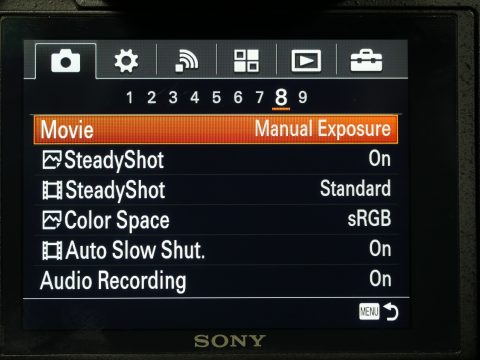
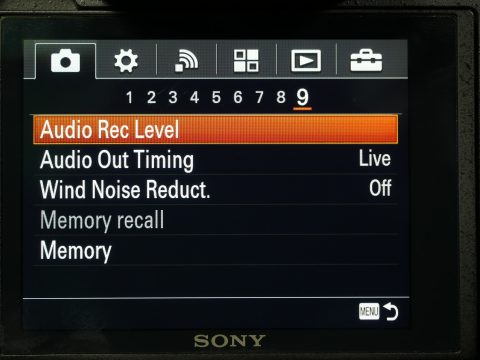
Buried on the eighth page of the camera settings is the exposure mode for movie recording – make sure this is set to manual. You can also turn on SteadyShot (image stabilization) for video recording. On the ninth page are options for controlling the audio levels.
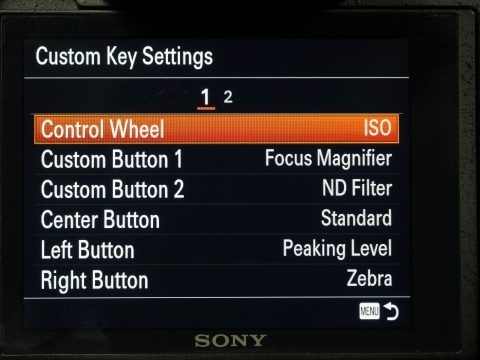
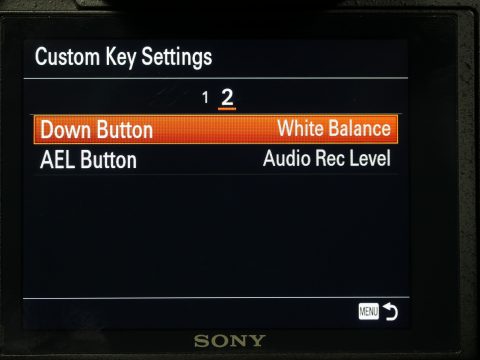
In the customization section of the menu, you’ll find a variety of exposure guides that can be switched on and off, as well as settings for things like the speed of the zoom ring. On the fifth page, you can set the custom buttons. I have the camera set as follows: Custom Button 1 is the focus magnifier; Custom Button 2 is the ND filter; spinning the rear control wheel controls the ISO; and pressing the control wheel left, right, and down controls the peaking, zebras, and white balance, respectively. Since these controls aren’t explicitly labeled on the camera, it can take some time to learn them, but they are easily accessible once you do.
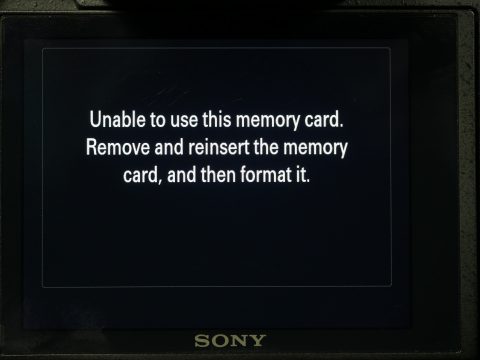
You shouldn’t need to do much in the other sections of the menu, with the possible exception of the fifth page of the general settings, where you can format your memory card. The RX10 II requires fast memory cards for most video recording settings – if the one you have isn’t fast enough, the camera will display a menu when you insert it.
Actually operating the camera is pretty straightforward. The large grip, viewfinder, and prominent lens controls make is a good camera for handheld use – it’s pretty easy to hold the camera steady. One odd quirk of this camera (and several other Sony models) is that you cannot start video recording with the shutter button – you have to use the record button labeled “MOVIE” on the back of the camera. I have no idea why Sony is so particular about this, but they will actually give you a warning message if you try to use the shutter button in movie mode.
Audio Options
The on-screen levels, 3.5mm microphone input, and headphone jack provide the RX10 II with audio capabilities that are about on par with other high end hybrid cameras. However, those capabilities can be greatly expanded using the K2M XLR adapter. This adapter attaches to the camera’s hot shoe flash mount (which Sony calls its “smart shoe”). On the adapter are two locking XLR inputs with phantom power and independent level controls.
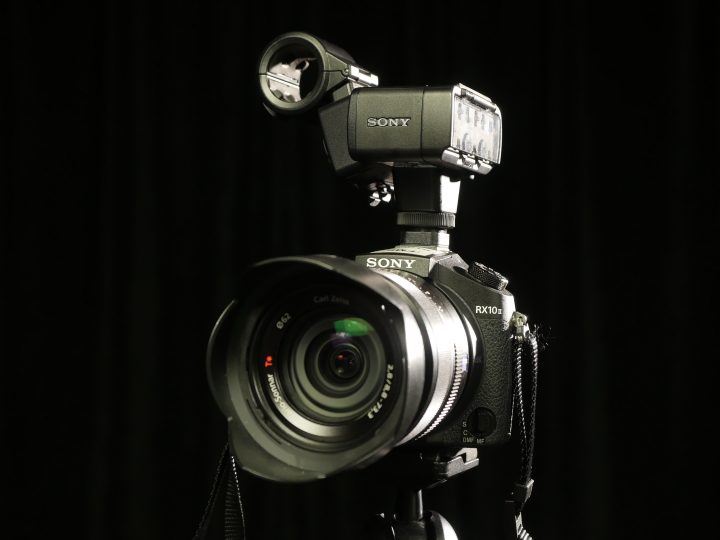
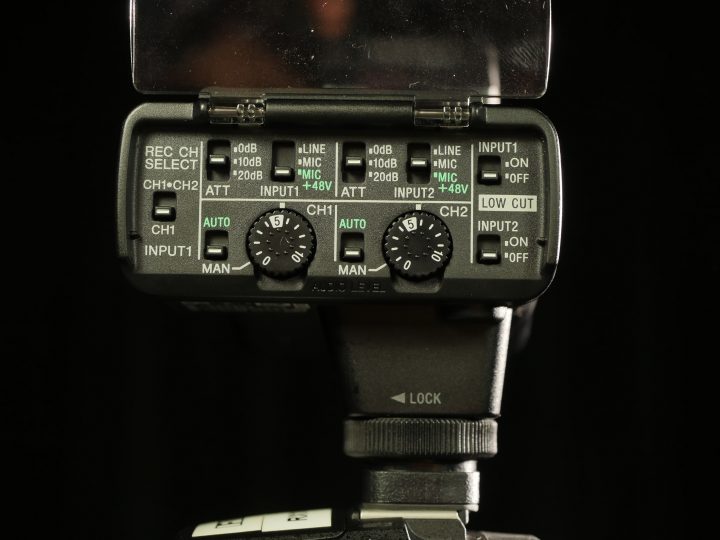
This adapter essentially adds the audio functionality of a high end dedicated video camera to the RX10 II. When you combine this with the built-in ND filter, click-less aperture ring, and the bevy of recording options, you have a lot of video-centric features in an extremely compact package.

Big Sensors, No Mirrors
The “world’s leading trade fair for imaging” – photokina – is happening later this month in Germany and that means lots of rumors and product announcements are flying around. The trend this year seems to be full frame mirrorless cameras, with Nikon and Canon announcing new systems. There are rumblings that Sony, Panasonic, and even lens manufacturer Zeiss will trot out new full frame mirrorless cameras in the coming weeks as well.
This is actually a pretty big deal. The first mirrorless cameras used the smaller Four Thirds image sensor and that size has been the standard ever since. Sony have been very successful with mirrorless full frame (and APS-C) cameras for a few years now, but Nikon and Canon have continued to use the older DSLR design for their full frame cameras. These announcements seem to signal that mirrorless cameras have really replaced DSLRs as the serious photographer’s tool of choice.
Nikon and Canon have announced a new line of lenses for these cameras as well. Again, this is bigger than it first sounds: Canon have been using the same lens mount for something like 30 years and Nikon’s current mount has been in use since 1959. These two companies dominated the photography industry for decades, but their apparent unwillingness to evolve has allowed Sony, Panasonic, Fuji, BlackMagic, and others to chip away at their share of the market. How will photographers and video professionals react to these new cameras? Only time will tell.
Project 2 – Filming with Camcorders
There are at least two situations where you will still see dedicated video cameras used consistently instead of hybrid cameras: event shoots and interviews. You’ll find camcorders used on event shoots because of their longer battery life, unlimited recording time, and better ergonomics for extended filming. You’ll find them used for interviews because of their superior audio capabilities; recording video and audio to the same device is a huge time savings, especially in an interview situation where audio is critical.
For this project – Sit/Stand – you’ll be using dedicated video cameras to record a sit-down interview and a lecture. The lecture will be recorded during class: using a Sony AX2000 set up on a tripod at the rear of the room, each of you will take (at least) one five minute shift recording the lesson. You’ll need to monitor both the image and the sound, framing the action, maintaining focus, and adjusting the audio levels as necessary.
We’ll have one operator framing and maintaining focus and one operator monitoring audio and adjusting levels. We’ll rotate through the roles, so that everyone gets to film, run sound, and answer the question.
We’ll start on the Sit/Stand project this week and finish it up either this week or next week during class.
A Tale of Two Camcorders
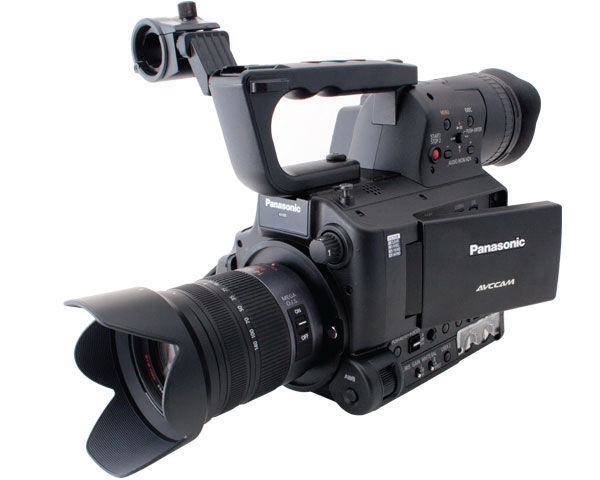
This week, we’re looking at two dedicated video cameras: the Panasonic AF100 and the Sony AX2000. As a quick disclaimer, the actual letters and numbers in a camera’s name don’t usually mean much – different manufacturers use different systems to label their products and trying to unravel the logic behind the conventions is basically useless. These two camcorders have some interesting similarities and differences, but they both offer the kinds of benefits you only get when filming on a dedicated video camera.
The Panasonic AF100 is an interchangeable lens camera that uses the Micro Four Thirds lens mount – the same mount and sensor size that you find in the Panasonic GH3 and GH4. The Sony AX2000 has a fixed (permanently attached) lens with a large zoom range and a smaller sensor. This means that the AX2000 is a more convenient all-in-one package, but the AF100 can capture higher quality images with its larger sensor and the option of premium lenses.
There is one interesting, often irritating, similarity that these two cameras share: they’re old. Both cameras were first released in 2010 and eight years is a lot in the rapidly-evolving world of digital video. This is most obvious in areas like the design of the menu systems, which are clunky and unintuitive. Despite their age, however, these cameras still capture high quality video and they still offer good handling, excellent battery life, unlimited recording time on two card slots, and advanced audio features.
Panasonic AF100
The AF100 was released just over two years after the release of the very first mirrorless Micro Four Thirds camera, the Panasonic GH1. The Micro Four Thirds system has proven popular for hybrid cameras because of its versatility and small size – but Micro Four Thirds camcorders are fairly unusual. The AF100 was an attempt by Panasonic to create a “best of both worlds” camera, with the large sensor and lens options of a stills camera and the body design of a video camera.

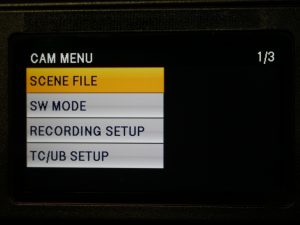
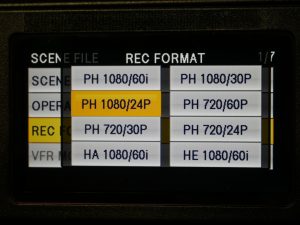
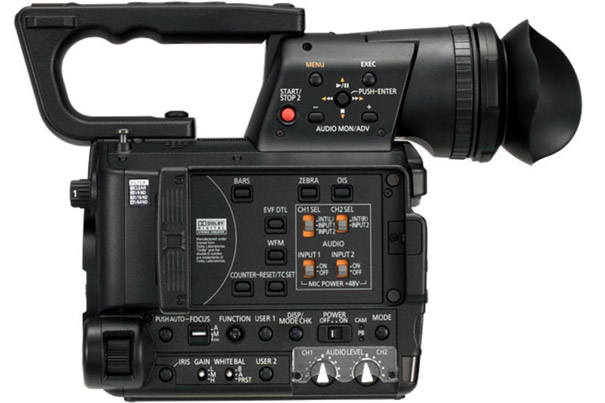
To turn the camera on, you need to find the small power switch on the side of the camera, just above the audio level dials. If you press the MENU button on the top of the camera (near the viewfinder), you’ll find three pages of confusingly-labeled settings. In the first section, SCENE FILE, you’ll find the important REC FORMAT option, which allows you to change the frame rate and resolution of the camera – for standard recording, use 1080/24.
In the next section, SW MODE, you’ll find some customization options, such as the ISO assignments for the gain control. The gain is set using a physical switch near the bottom of the camera – there are low, mid, and high options, which can be assigned to different ISO values. The AF100 is not a terrific low-light camera and I’d recommend setting low, mid, and high to 200, 800, and 1600, respectively. The rest of the SW MODE section contains settings for customizing the other buttons and dials on the camera body.
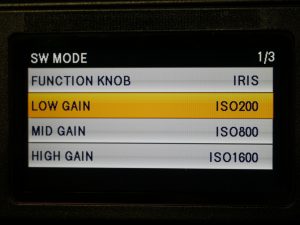
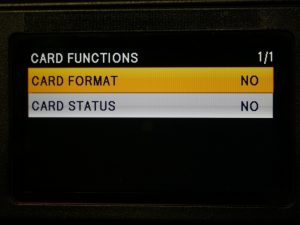
If you’re so inclined, you can navigate over to the DISPLAY SETUP section to customize the onscreen display – things like safety markers and meters can be switched on and off. You shouldn’t need to spend much time in the rest of the menu sections, with the exception of CARD FUNCTIONS, which allows you to format the SD cards.
The camera body itself is where you’ll be setting most of the exposure controls. The aperture is set using the dial near the front of the camera – press the IRIS button to toggle between manual and automatic modes. Next to the IRIS button are switches marked GAIN (the ISO setting) and WHITE BAL. White balance settings on this type of camera are a little different than they are on a hybrid camera: instead of dialing in a specific value, you can choose between two presets; or point the camera at a white surface and hit the AWB (automatic white balance) button at the front of the body. On the back of the camera, near the battery compartment, is a dial for changing the shutter speed.
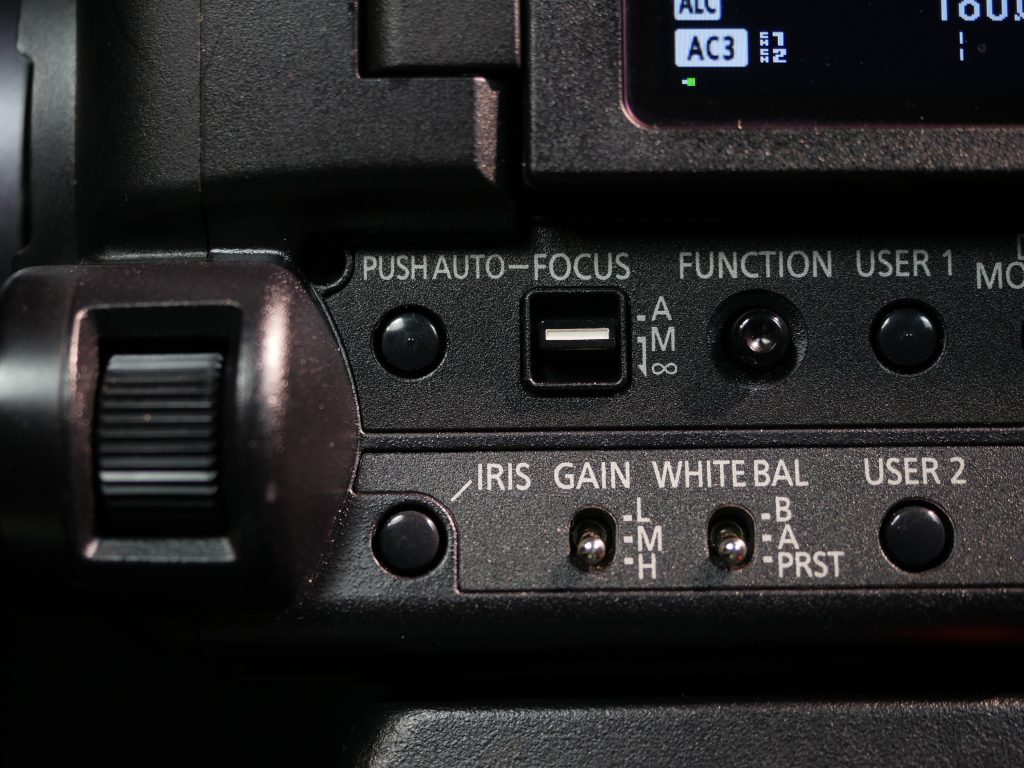
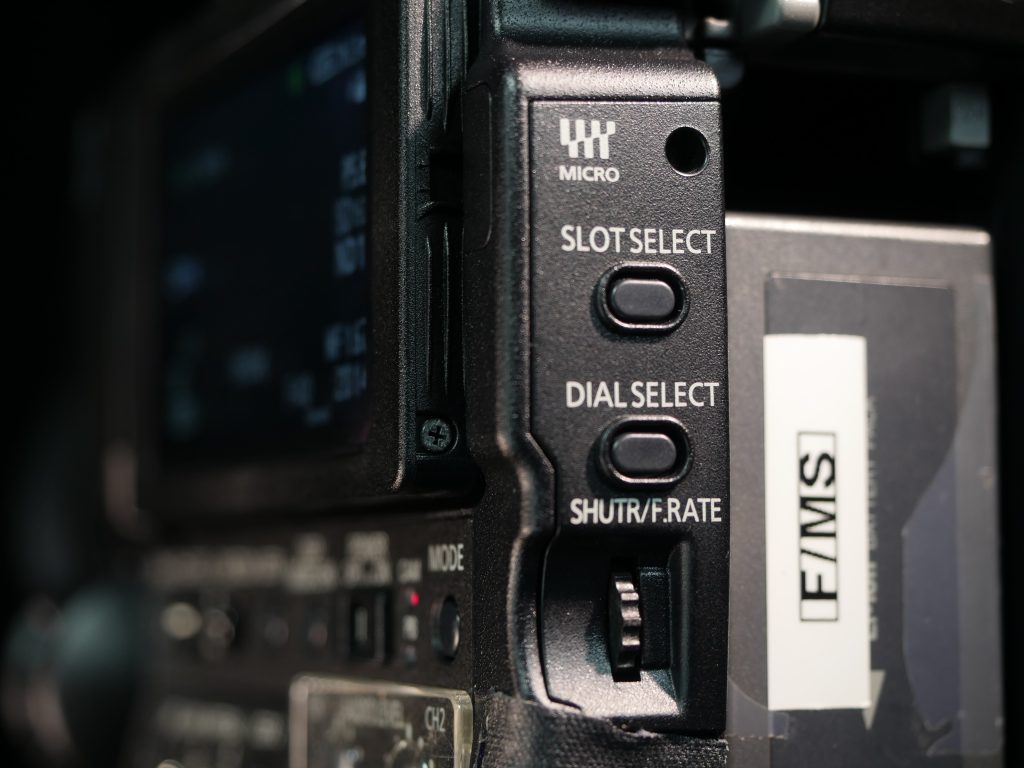
Continuing along the side of the camera body, USER 1 and USER 2 are customizable buttons – USER 1 has been programmed to show focus peaking, which is very useful. In the bottom corner are audio level dials for channels one and two. The rest of the audio controls are located behind the flip-out screen above.
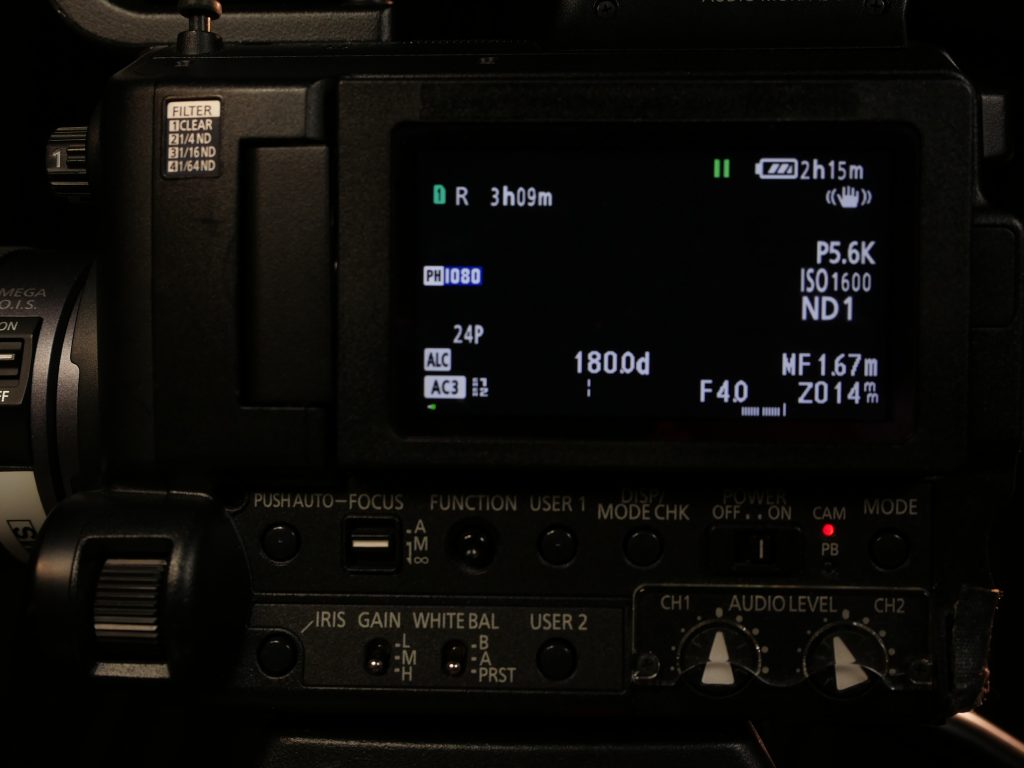
Moving back to the controls behind the flip-out screen, you’ll find button controls for zebra, image stabilization (OIS), waveform visibility (WFM) and more. There are record buttons on both sides of the camera, playback controls near the viewfinder, and a MODE button in the bottom corner that switches the camera from record mode to playback. Under the rubber covers on the back of the camera, you’ll find outputs for HDMI, SDI, and A/V cables, as well as the headphone jack.
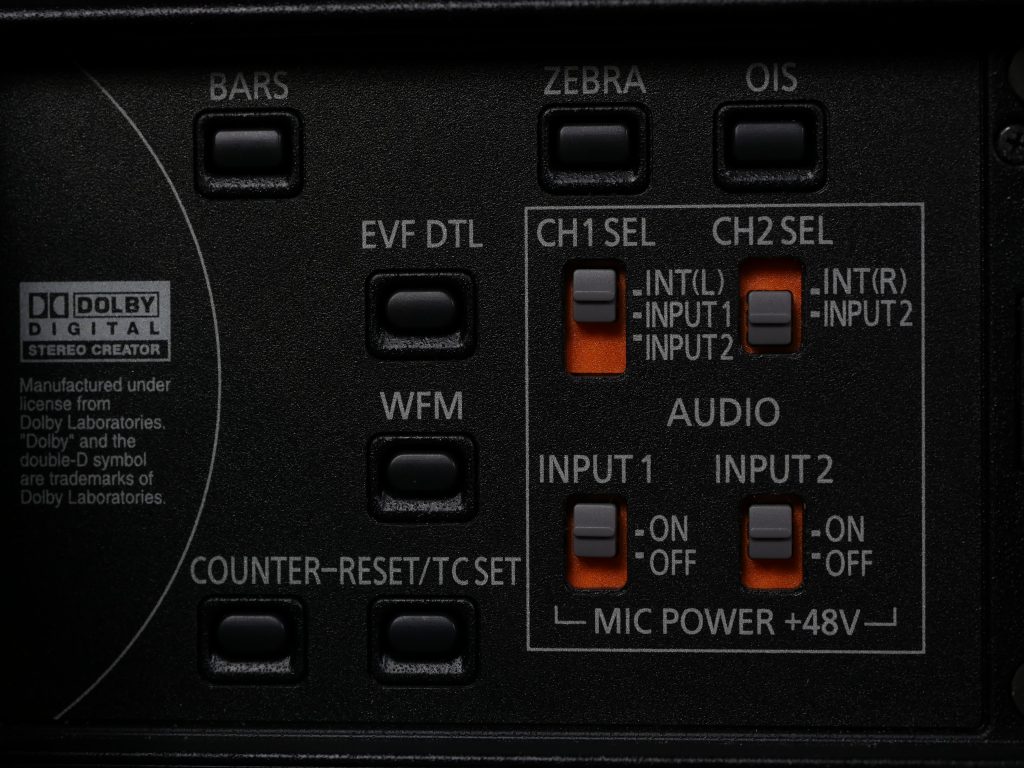
Audio controls and inputs are one big advantage of using a dedicated video camera and the AF100 does not disappoint in this area. In addition to a built-in microphone, there are two XLR inputs with optional 48V power for shotgun microphones. The inputs themselves are located on the opposite side of the camera and can be set to microphone or line level. For most of your recording, these should probably stay on microphone – line is meant for audio coming from a mixing board.
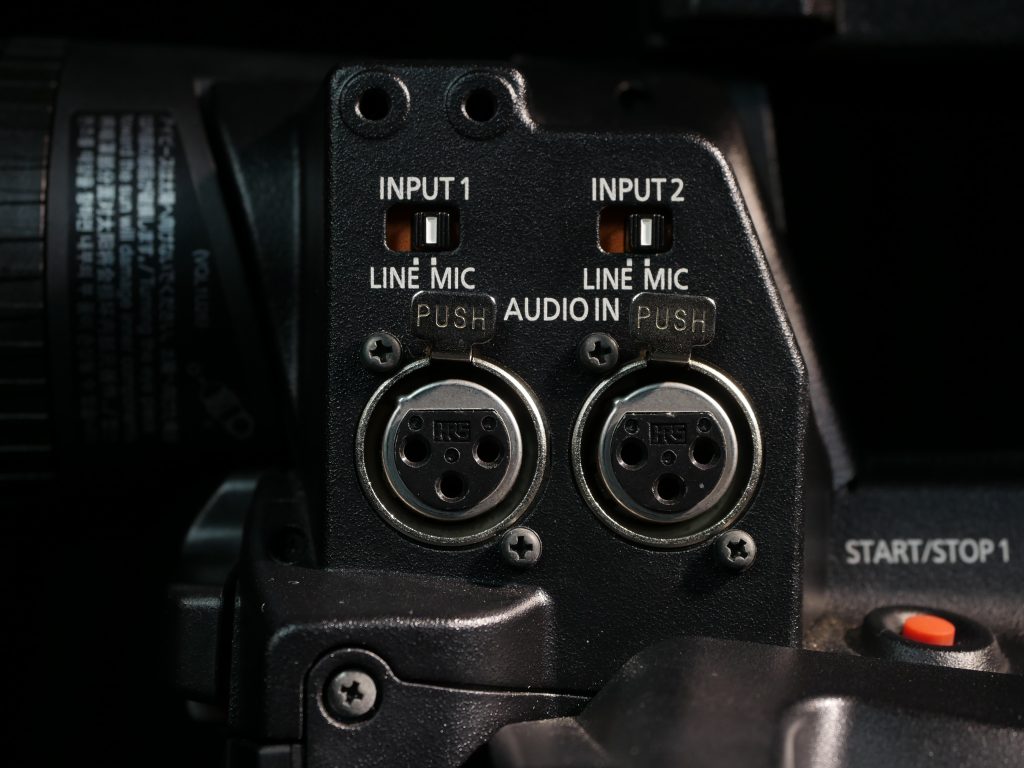
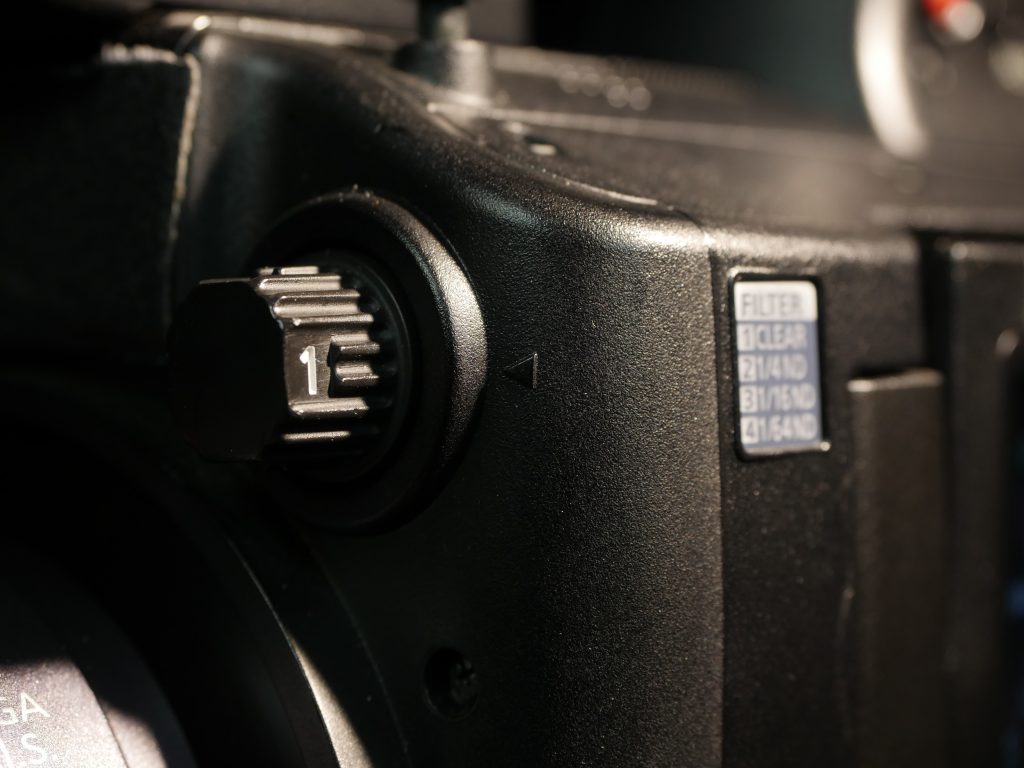
On the front of the camera, you’ll find one of the best features on cameras like the AF100: built-in ND filters. The filters are controlled with a rotating dial and are a huge asset when filming outdoors or in unpredictable lighting situations. Having built-in ND filters means that you don’t need to bring filters for the lens or a matte box.
Because of the sheer number of buttons, dials, and switches on the AF100, it can be an intimidating camera to pick up and start using. Unlike the hybrid cameras we’ve been using, dedicated video cameras have a somewhat steep learning curve – you should definitely take some time to familiarize yourself with the camera before filming with it. However, once you know the layout of the camera, you can make adjustments very quickly. It’s also a camera that is well-suited for multiple operators; for example, you might have one person controlling the sound and another recording and watching the focus.
Sony AX2000
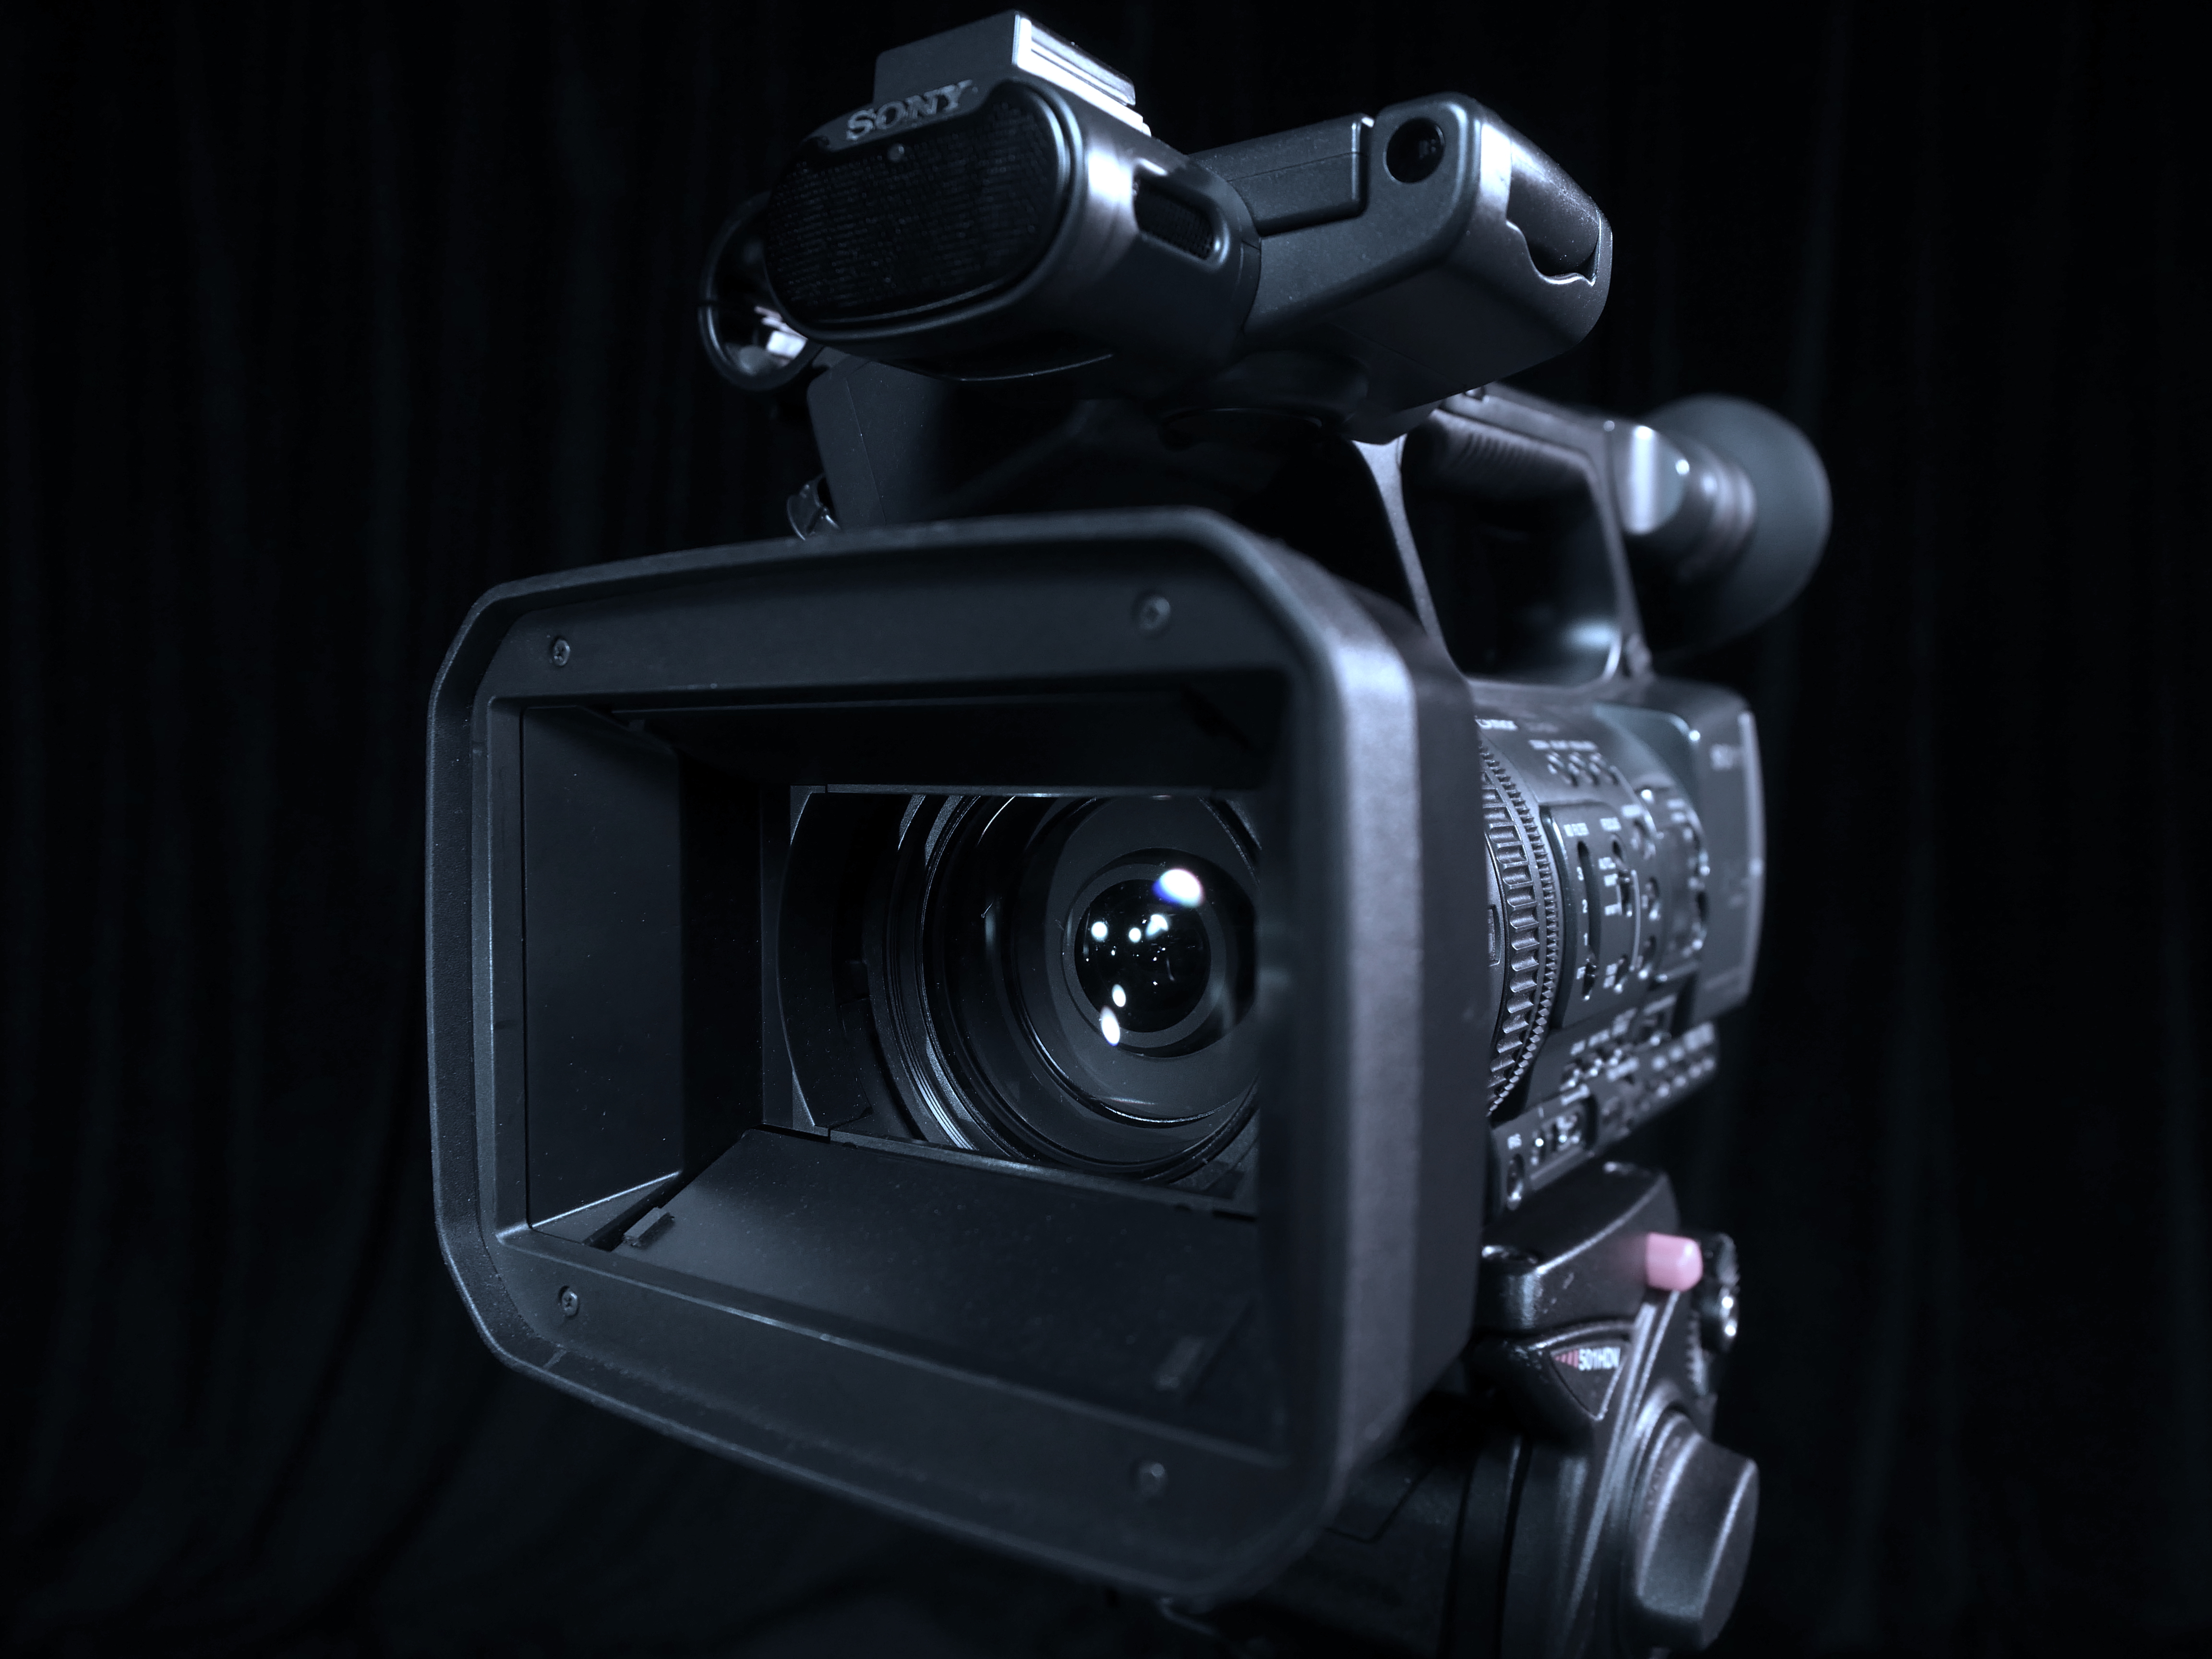
The most obvious difference between the Panasonic AF100 and the Sony AX2000 is that the Sony has a fixed lens with a massive 20x zoom – it’s roughly equivalent to a 30-590mm full frame lens. There are zoom, focus, and aperture control rings on the lens itself. It also has a removable hood with a clever integrated cap. Because the lens is integrated into the camera itself, you can control the zoom with rocker dials on the handle of the camera, which generally works better for zooming during recording. Speaking of recording, there are two record buttons on the AX2000, one on the side handle and one on the top handle. To power the camera on, turn the POWER dial around the record button on the side handle.
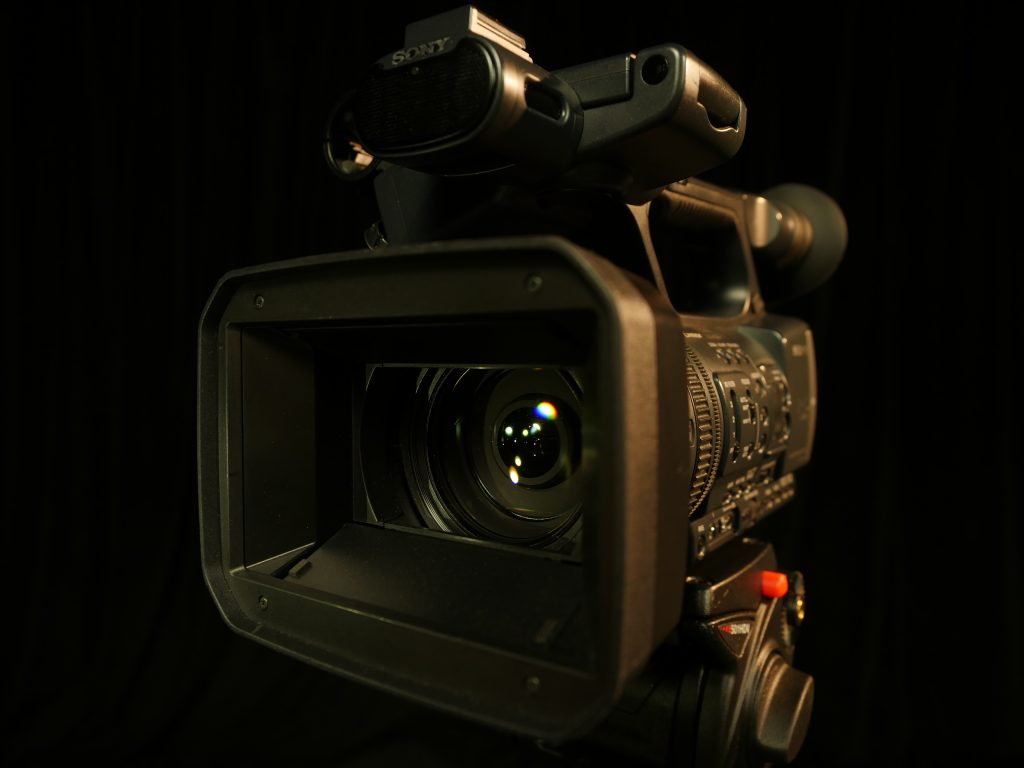
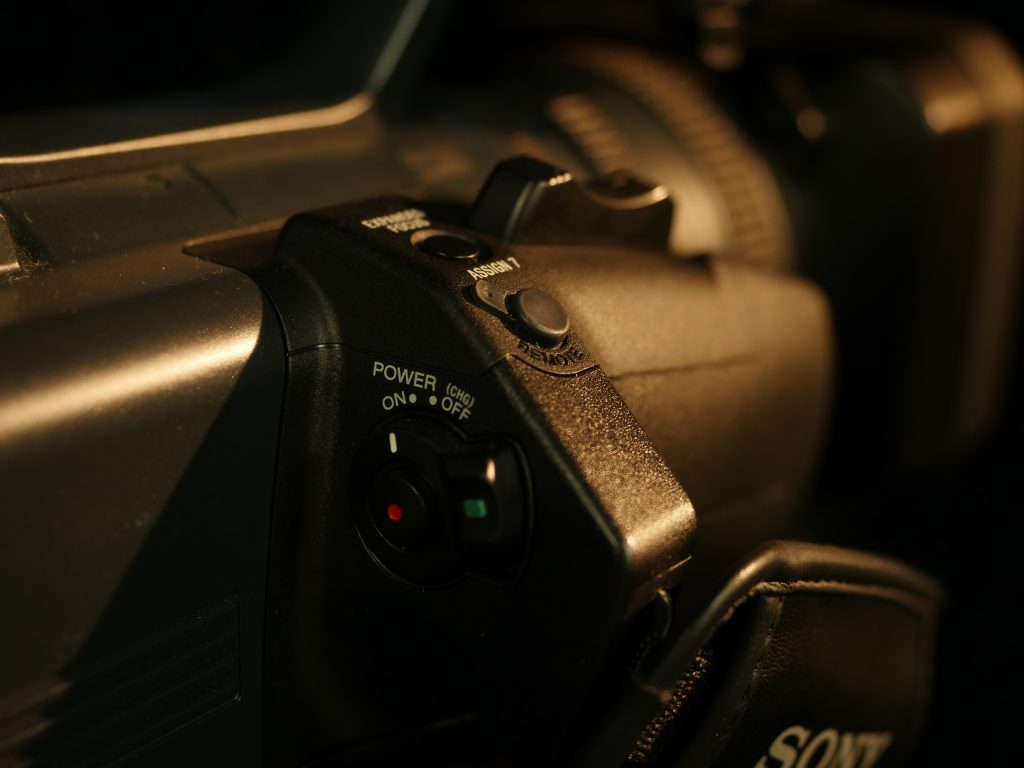
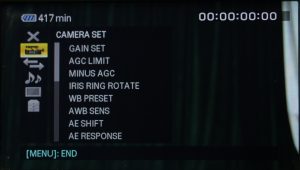
The body layout is slightly different here; there’s another flip-out screen, but it’s located at the top of the camera. Beneath the screen, you’ll find the menu and playback controls. I find the AX2000 menus a bit more logical than the AF100 – there are sections labeled CAMERA, REC/OUT, AUDIO, DISPLAY, and OTHERS. CAMERA allows you to adjust the gain settings and other options, but you shouldn’t need to change anything here. Note that the Sony measures gain in dB (like audio), as opposed to ISO.
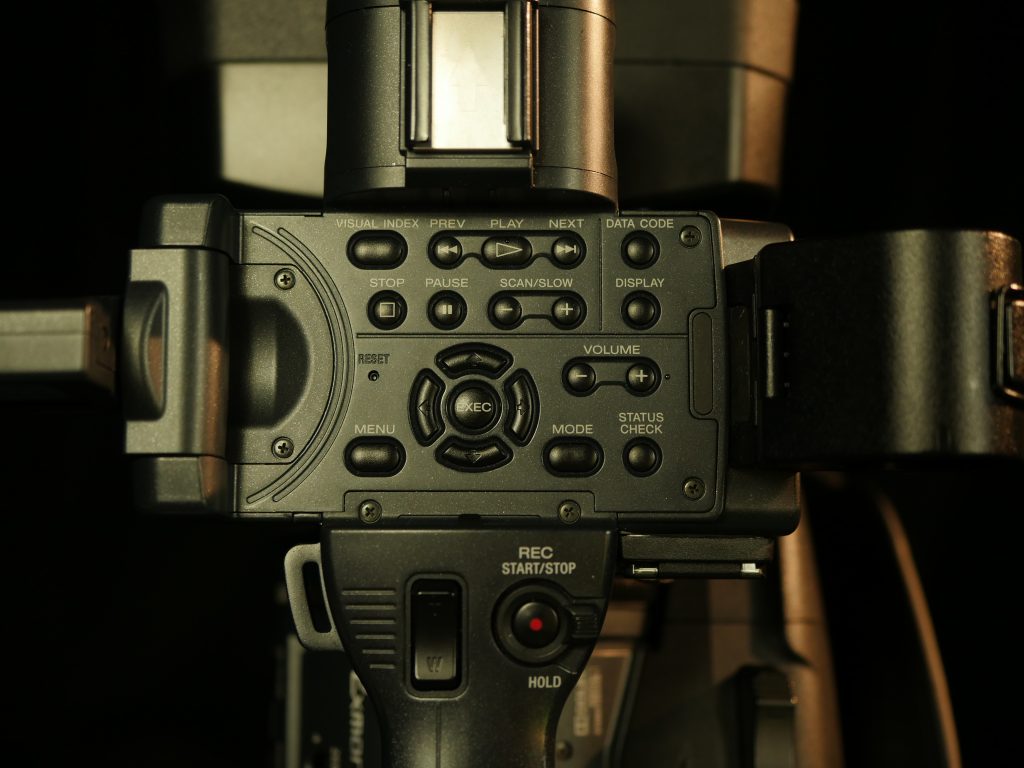
The next section, REC/OUT has the crucial resolution and frame rate options – you’ll most likely be using the 1080/24 setting. AUDIO and DISPLAY contain the settings you’d probably expect to find; again, most of these options can be set using buttons and dials on the camera body and you shouldn’t have to dig into these menus very often. The OTHERS menu has an ASSIGN BUTTON option, which can be used to customize the numbered buttons around the camera body. I like to set button 1 to focus peaking, just like USER 1 on the AF100.
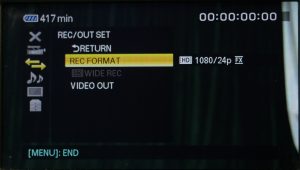
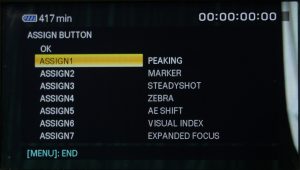
On the side of the camera body, you’ll find the now familiar gain and white balance preset switches. To set a custom white balance, you’ll need to point the camera at a white surface, press WHT BAL, then press the small button next to the preset switch. The IRIS, GAIN, and SHUTTER SPEED buttons will switch the camera between manual and automatic modes for those settings.
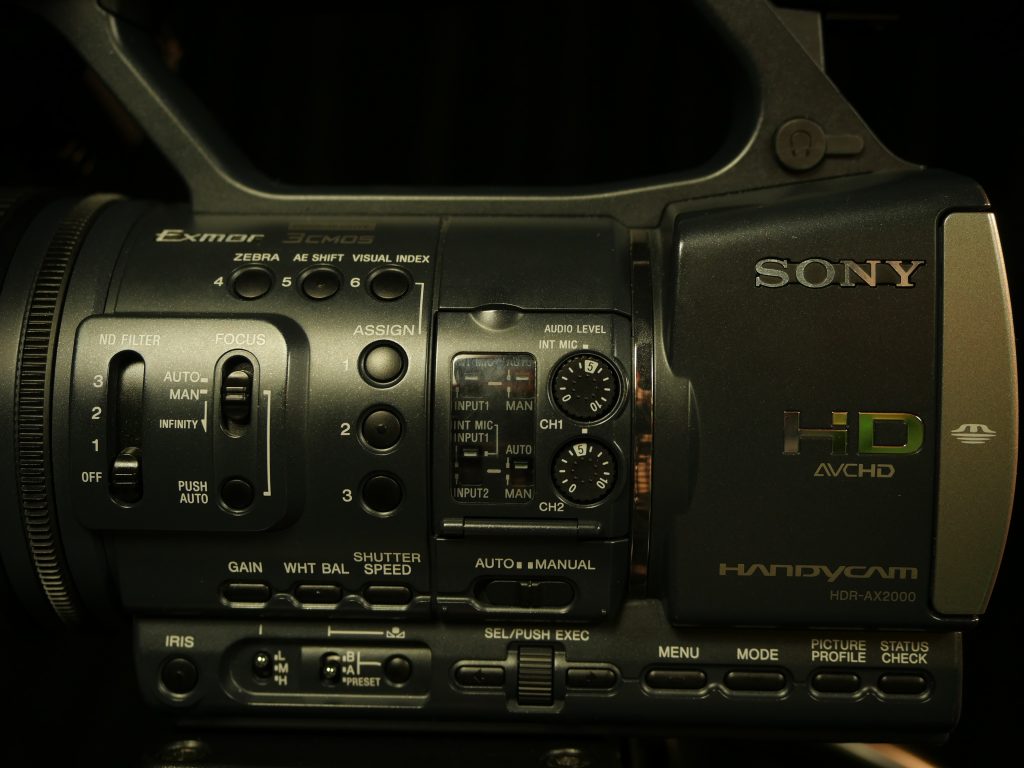
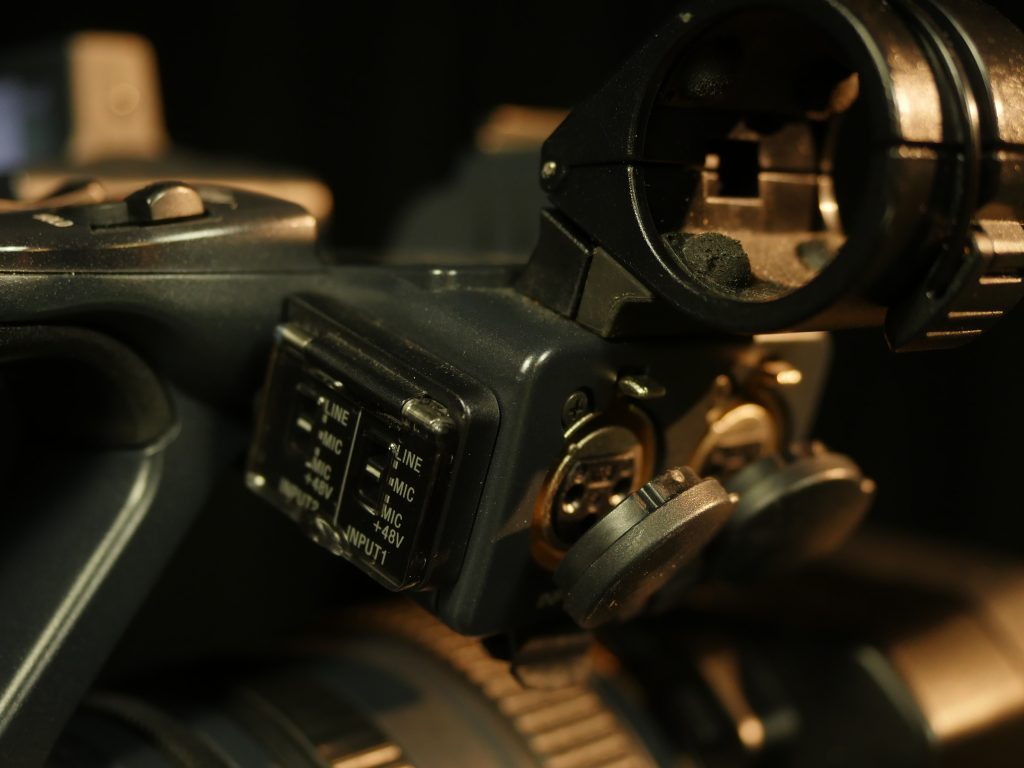
Like the AF100, the AX2000 has two powered XLR audio inputs controlled by individual dials. The input assignment and levels are set using the controls on the side (there is a small door that flips down). The line/mic/mic with 48V power modes are set near the XLR ports, which are located near the front of the camera. The headphone port is hidden under a cover near the viewfinder.
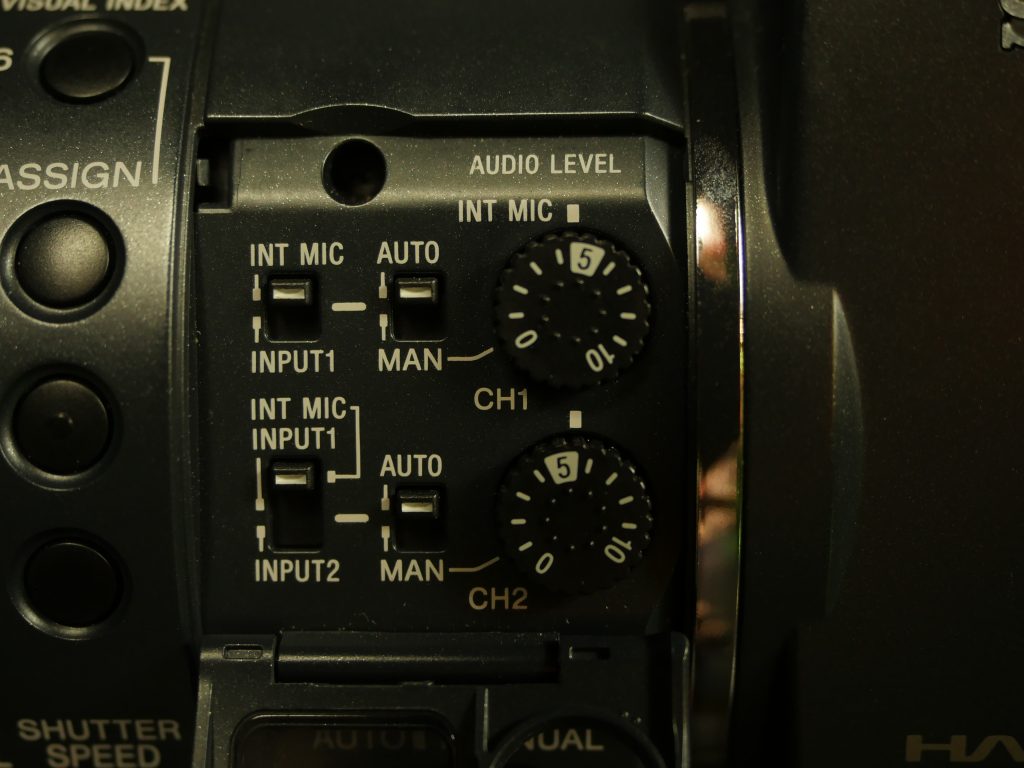
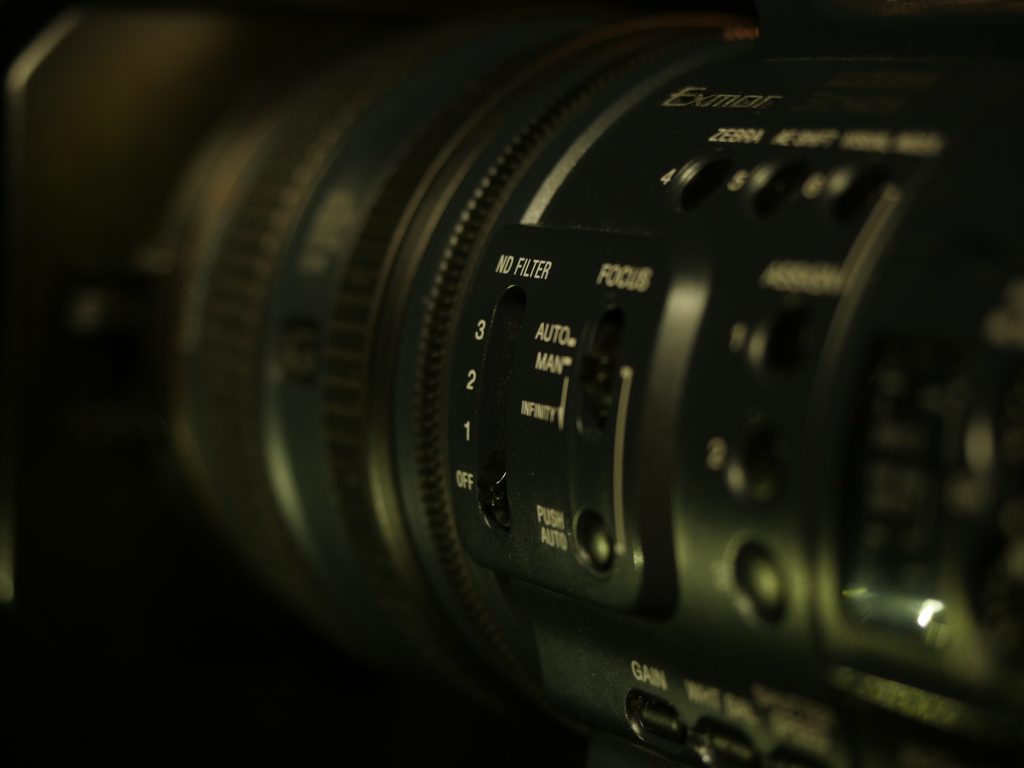
Also like the AF100, the AX2000 has built-in ND filters. These are controlled by a switch instead of a dial, but work exactly the same otherwise.
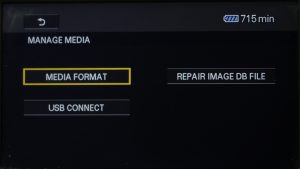
For playback, you can press the VISUAL INDEX button on the side of the camera or use one of the MODE buttons. You also use the MODE button to enter the MANAGE MEDIA menu section, which is used to format the SD card. On the back of the camera are HDMI and A/V outputs, but no SDI.
Best Practices
As I mentioned in the instructions for Project 2, two situations where’ll you’ll see cameras like these used a lot are formal interviews and event videography. Without getting too deep into cinematography and sound design, there are some basic tenets that you should follow when you’re filming in these situations.
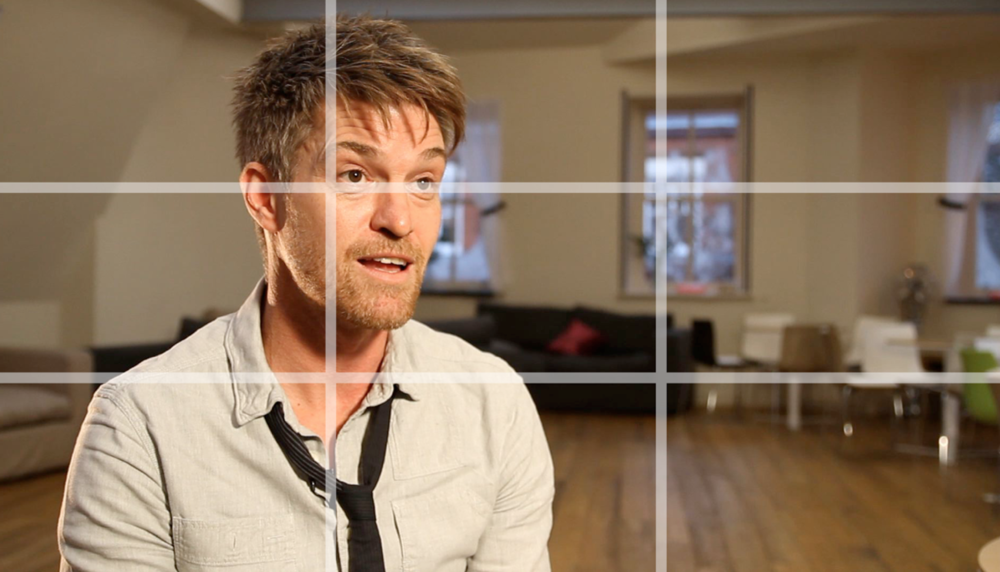
If you spend any time at all studying film, you will probably hear the term “rule of thirds,” which involves arranging your image around an imaginary grid that divides the frame into thirds. For an interview, the “classic” framing is a medium close-up with the subject placed slightly off-center; their body is centered roughly on a vertical third line and their eyes fall on the top horizontal third line. The subject should (generally) face “into” the frame, angled towards the empty third line. This creates an image that is visually pleasing and natural-looking. Don’t put your subject too close to a wall behind them – bringing them away from the background allows them to stand out as the most prominent part of the image.
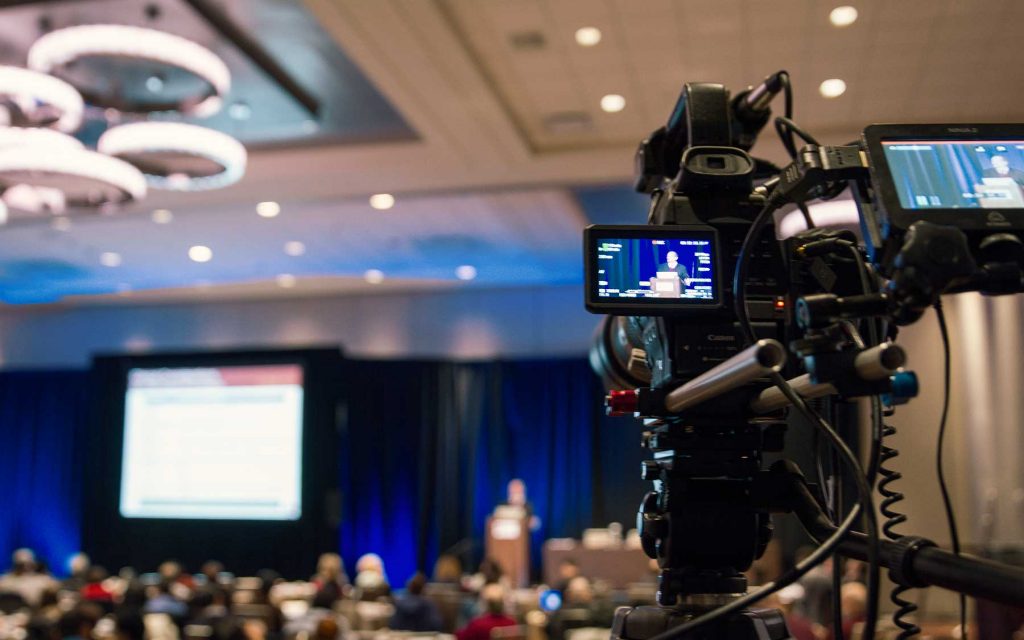
When you are recording an event – a wedding, lecture, awards ceremony, whatever – you will probably need to fight the natural impulse to constantly zoom and pan around the frame. Follow the action, but do so gently – don’t move the camera in sudden, jerky movements. When you decide to zoom in or out, do so for a reason: to highlight a point or show a detail, not because you are bored or restless. Try to anticipate what is happening in the event and plan your movements accordingly – for example, you might begin to zoom out as someone finishes a presentation, in order to see the audience clapping. Fast pans, tilts, and zooms can make your audience feel queasy, so move the camera slowly and deliberately.
When you are monitoring audio, it’s important to capture sound that is loud enough to be clear, but not so loud that it becomes distorted. It’s actually better to record sound that is too quiet than it is to record sound that is too loud. The general rule is that the levels for spoken audio should fall somewhere between -12dB and -6dB and most cameras have onscreen audio meters to help with this. If audio “peaks,” or gets too loud for the camera, you will see the meters go into the red. That’s a sign that you need to turn down the levels.
Of course, you should always use headphones when recording audio. Meters will tell you how loud something is, but they won’t tell you what it actually sounds like. If someone has a problem with their microphone, for example, you need to be able to correct the issue.
A Brief History of Digital Video Cameras
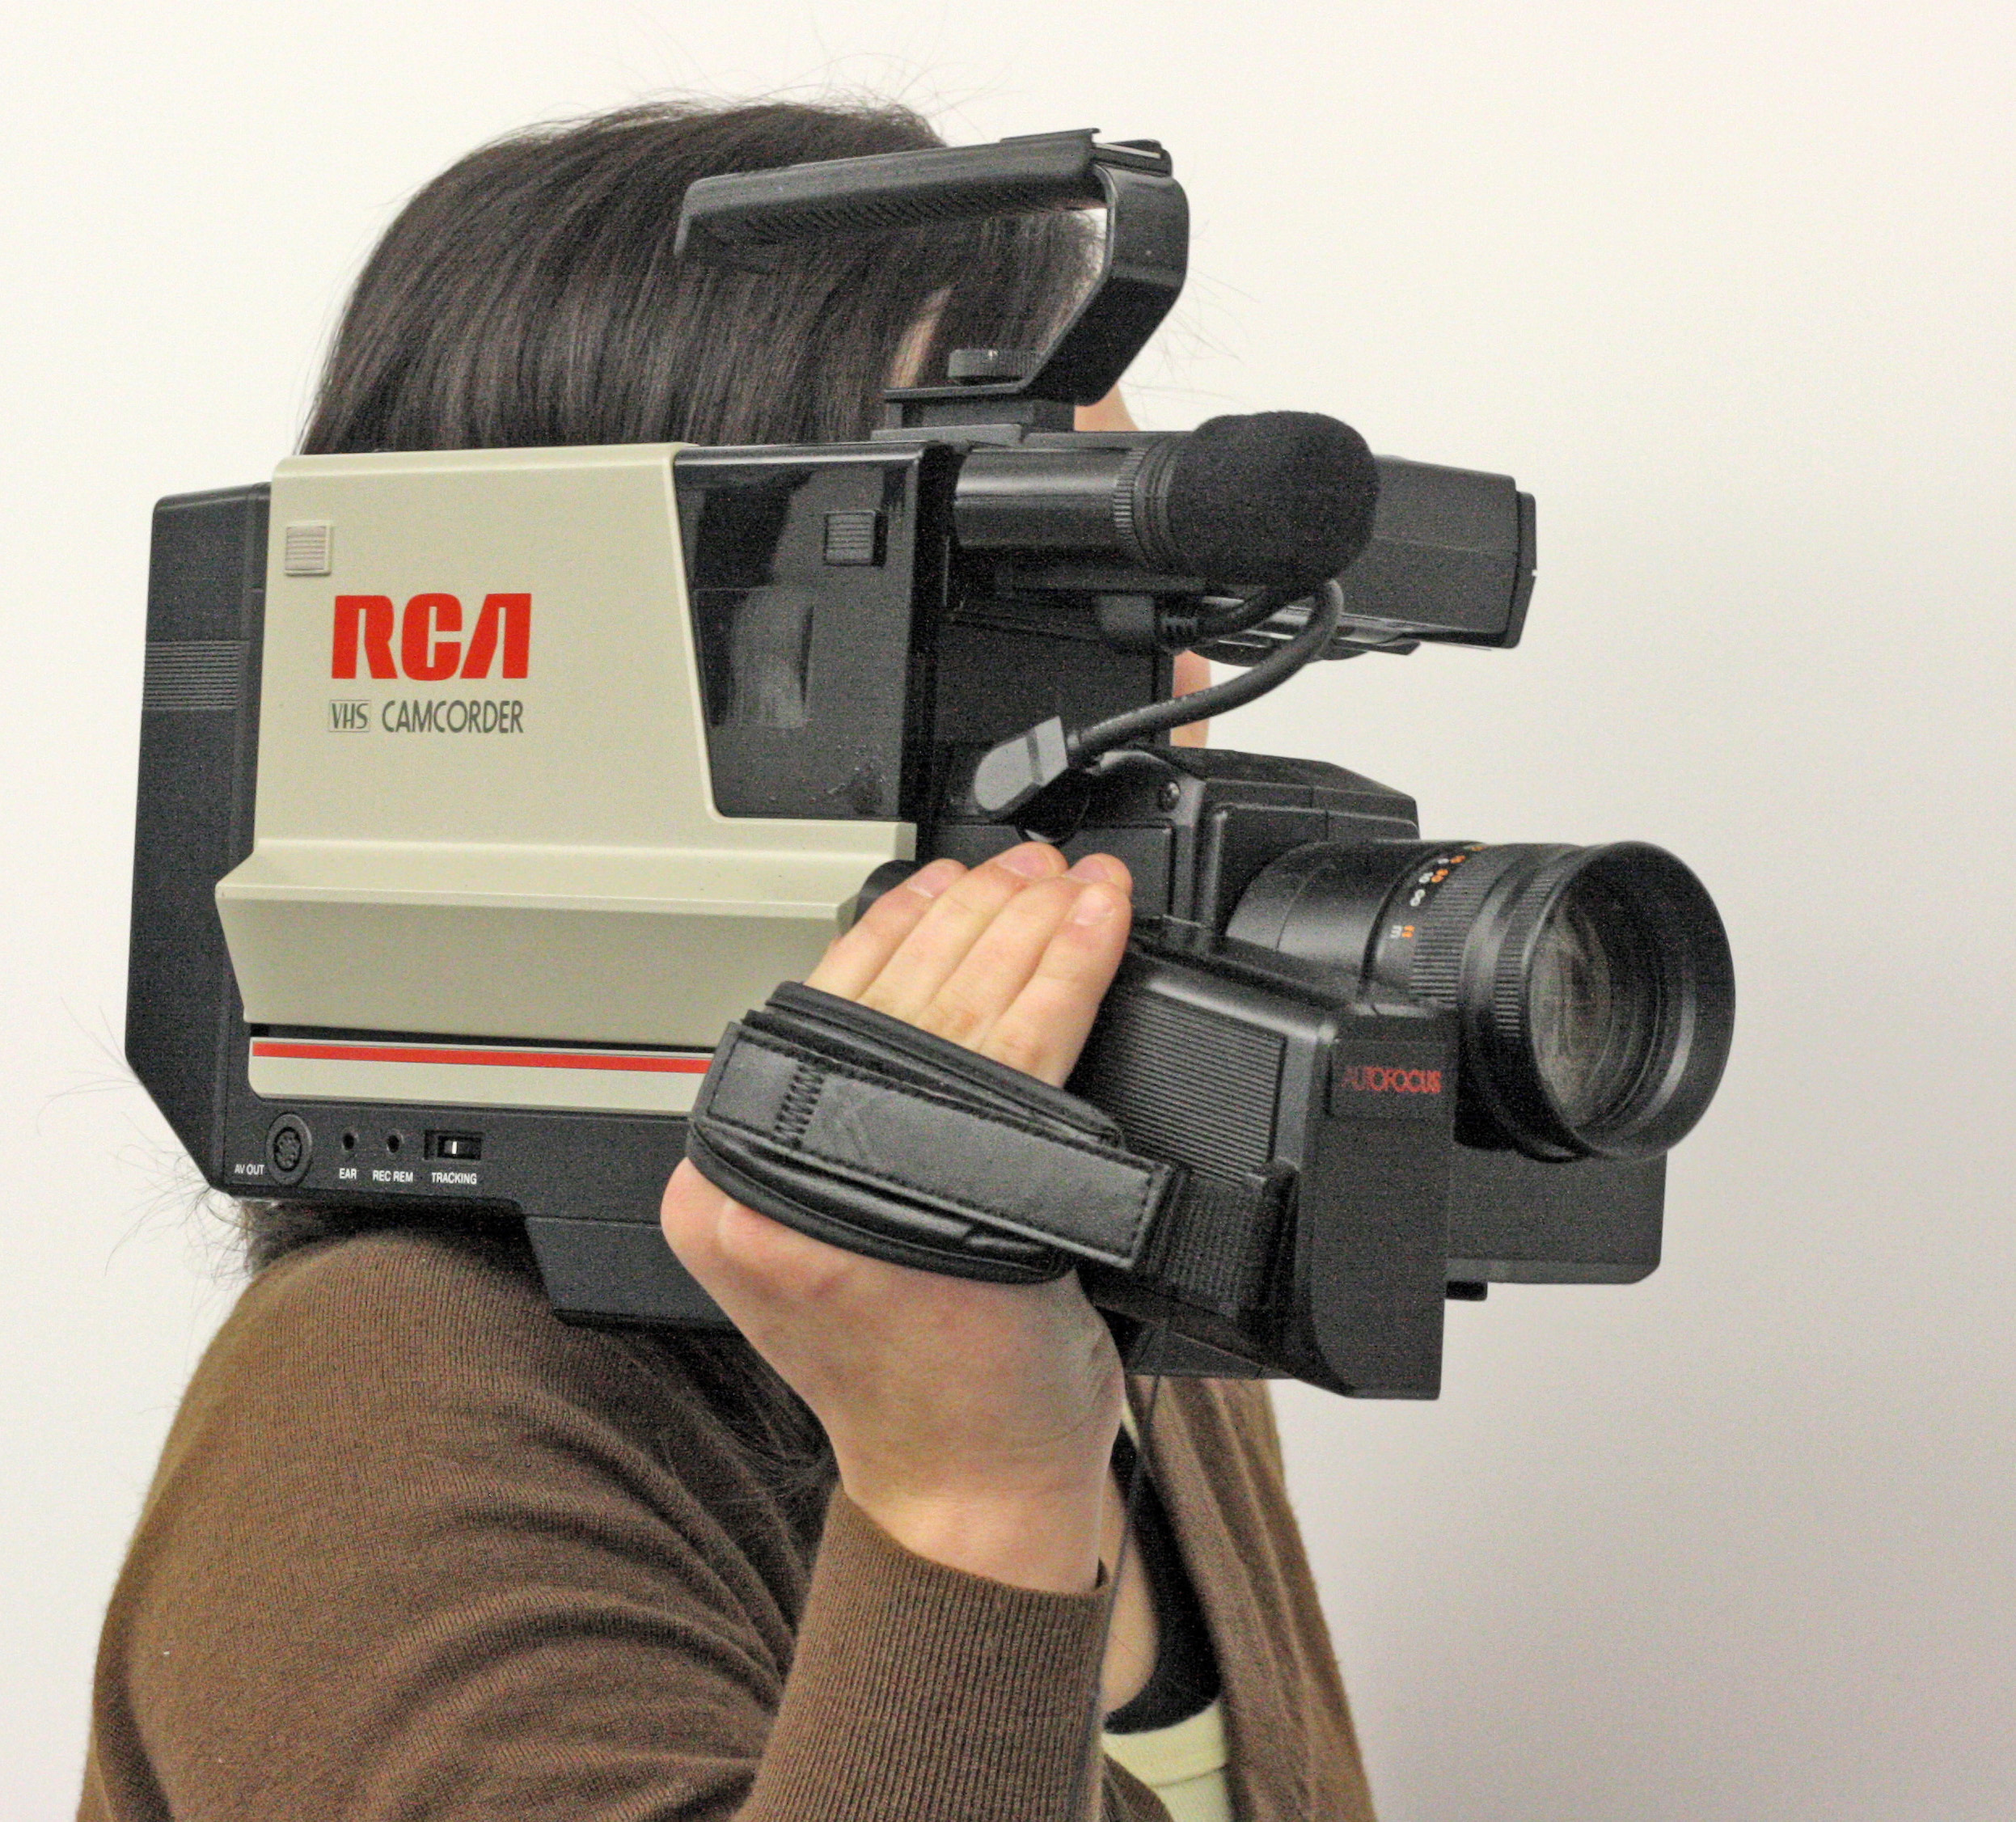
The term “camcorder” has sort of an unfortunate connotation; it calls to mind the low-quality home movie cameras that were ubiquitous in the 1990s and early 2000s, before video-capable DSLRs shook up the industry. In reality, a camcorder is just a digital camera with video capture as its primary purpose – the word itself is a combination of “camera” and “recorder.” In the early 1980s, camcorders began to appear on the market, propelled by advances in home video technology, such as VCRs.
The development of home video devices allowed for two parallel changes in the world of cinema. One was the aforementioned evolution of the home video camera from the 8mm or 16mm film camera. The other was the birth of the home video market. Before the development of video tape, owning a copy of a popular movie was a much more complicated prospect. Instead, films stayed in theaters for much longer and revival screenings were fairly common. VCRs and Betamax decks allowed consumers to screen films in their homes in a simple, inexpensive way for the first time.
It also allowed them to create movies in a much more streamlined way. The first consumer video camera was released by Sony in 1983. It was a behemoth that recorded to Betamax tapes, but couldn’t play them back from the camera. Other manufacturers followed suit, some recording to Beta, some to VHS, others to speciality formats such as VHS-C. These evolved into smaller cameras with more compact media such as MiniDV, BetaSP, DVCam, and other tape-based formats. Eventually, internal hard drives and card-based media (such as the SD cards most cameras use now) were adopted.
An important distinction to keep in mind when discussing the history of the camcorder is the difference between the professional and consumer markets. Camcorder technology was developed primarily to allow consumers to capture home movies – simple recordings of family memories. The limitations in image quality, frame rate, resolution, audio fidelity, and record times were negated by the fact that these recordings were always meant to be viewed on a home television set. Filmmakers weren’t bothered by these factors, because filmmakers shot on film. It would take decades for video to become incorporated into professional production work.
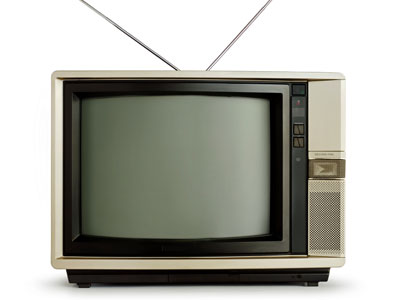
However, eventually video technology advanced to the point where professional features could be incorporated into consumer devices. I think that one big motivating factor behind this was the release of HD video-capable DSLRs – which were always intended for professional use, but were still accessible to home users. In the last decade or so, we’ve seen camcorders with different frame rate options, high end audio inputs and controls, interchangeable lenses, and, of course, HD recording and beyond. The video camera – the camcorder – has slowly evolved into a device that is suitable for professional work.
Benefits of a Dedicated Video Camera
I’ve spent a fair amount of time over the last few weeks extolling the virtues of hybrid cameras and talking about how revolutionary video-capable DSLRs were for the world of filmmaking. With all of that in mind, is there still a place for the humble camcorder? If video/stills hybrid cameras are so good, do we still need dedicated video cameras?
While the market has certainly shifted over the last ten years, we definitely still do need video cameras. There are two major areas where video cameras are still – and may always be – vastly superior to hybrid cameras: handling and audio.
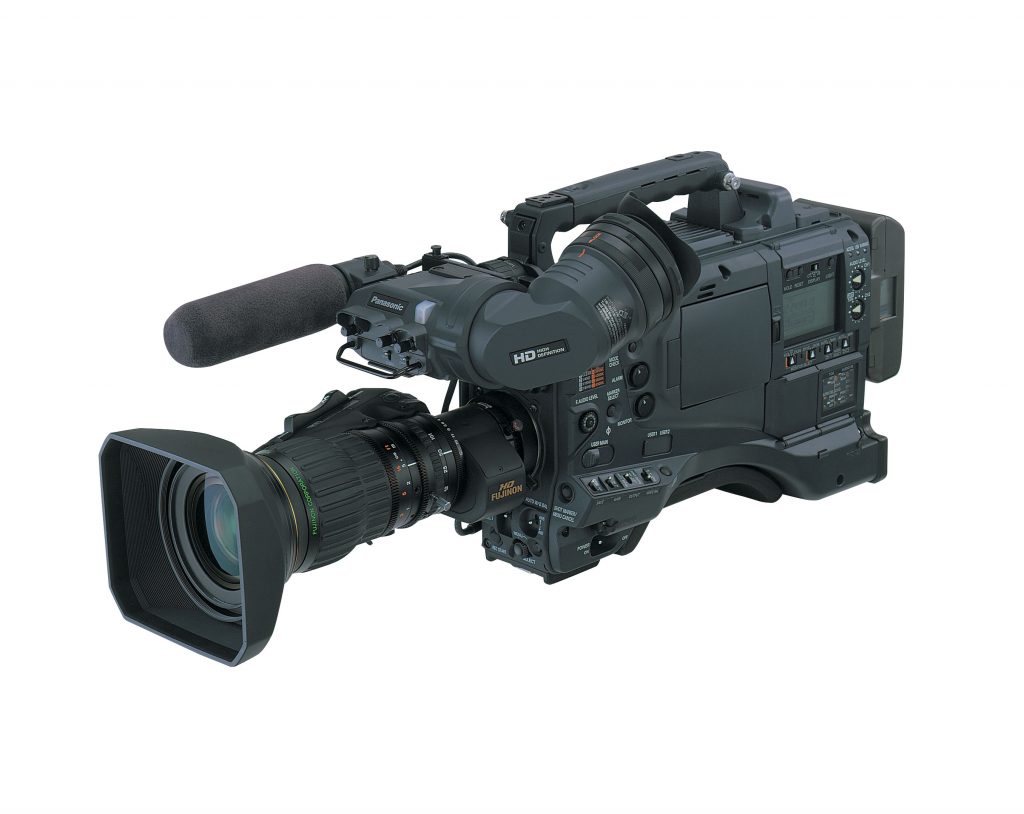
Handling is something we’ve touched on before. A stills camera – and, therefore, a hybrid camera – was designed to capture one image at a time, a fraction of a second in length. Video cameras need to capture footage for several seconds, several minutes, or longer – and they need to remain steady as they do so. That’s why video cameras have body designs that are different from stills cameras. The best example of this difference is in ENG-style cameras. ENG-style cameras are designed for news gathering, so they need to be sturdy, versatile, and adaptable for long shooting days. ENG-style cameras generally sit on the operator’s shoulder and have a prominent viewfinder.
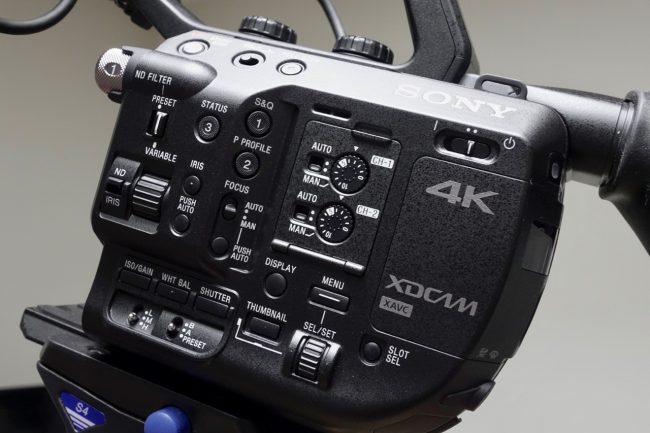
The handling benefits of a dedicated video camera also extend to its external controls. Most video cameras have a number of dials, knobs, switches, and buttons to help the operator quickly change the record settings. White balance, gain (ISO), audio levels, peaking, zebras, focus magnification, and playback options often have dedicated controls. Internal neutral density filters – which are possible because of the larger body of a camcorder – also have dedicated controls on many video cameras. On hybrid cameras, these features (when they are present at all) are usually buried somewhere in the menus.
As I previously mentioned, audio is another huge differentiator between hybrid cameras and video cameras. Since stills cameras were never originally intended to capture sound, audio has always been something of an afterthought on hybrid cameras. A few hybrid cameras – such as our Sony RX10 II – have accessories that increase the audio capabilities of these cameras, but a dedicated video camera is still usually better in this regard. A good camcorder will feature multiple XLR inputs, phantom power, independently adjustable levels, mic and line level settings, on-screen meters, and mounting points for on-camera microphones. On a hybrid camera, you are lucky if you have both a 3.5mm microphone jack and a headphone jack.
The more robust audio features present on a video camera mean that it is often possible to record sound directly to the camera itself. On hybrid cameras, it’s often wisest to use an external audio recorder in order to compensate for the functionality missing on the camera itself. This obviously makes the entire process more complex and may even require additional crew members. For single operators, a dedicated video camera is often the most efficient choice.
Lights, Hybrid, Action!
Need some filmmaking inspiration? Courtesy of Lights Film School, here are five independent feature films shot on DSLRs and mirrorless hybrid cameras.
For reference, Diamond Flash was filmed on the Panasonic GH2, Tiny Furniture and Like Crazy were filmed on the Canon 7D, and Hell and Back Again and For Lovers Only were filmed on the Canon 5D Mark II.
https://youtu.be/VJoMWj47KP0
The Science Behind Lenses
In these videos, the gang at Fstoppers debunk some of the common misconceptions about sensor size and lens properties.
Project 1 – Filming with Hybrid Cameras
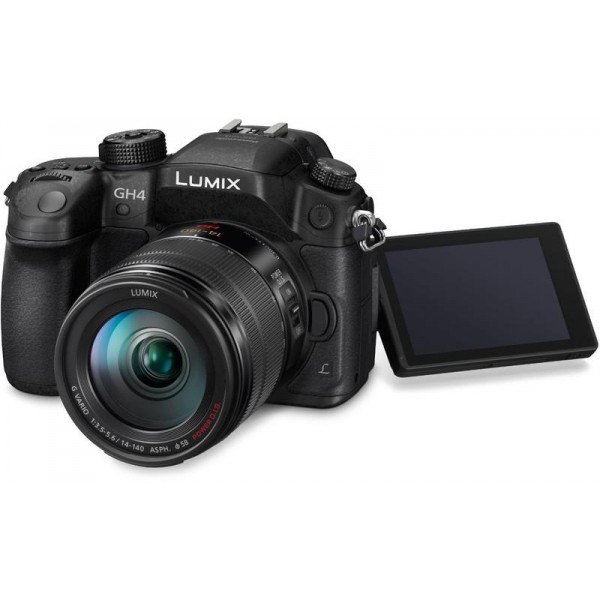
For this project, you’ll be working in groups of two. Using either a Panasonic GH3 or GH4, I’d like you to create a short film that is between 20 and 60 seconds long and contains between three and ten shots. The theme of this project is “Action/Reaction.”
It should be a “silent” film – you can use ambient noise, sound effects, and music, but no lines of dialog. You will only be using the camera for this project (no tripod or rigging equipment) and part of the project should take place in a public space. You should only use available light sources, no light kits.
The reason I’ve given this project so many parameters is that I’d like you to focus on the unique strengths of hybrid cameras – their size, portability, and versatility. Pay attention to the light in the environment you are filming in and be sure to set your white balance correctly. Filming in a public space can be challenging, so be polite (and, whenever possible, discrete). The finished video is due 11pm on Monday, September 10. We’ll look at everyone’s work on Tuesday.
Once again, here are the parameters:
Getting to Know the GH3 and GH4
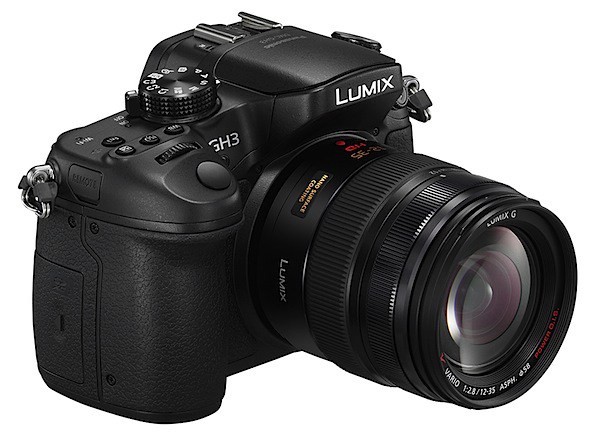
At a glance, these cameras are basically identical; the GH4 has a locking mode dial and an extra setting on the drive dial, but that’s basically it. That makes it fairly easy to move from one camera to the other, but there are a few key differences between them that we’ll discuss shortly.
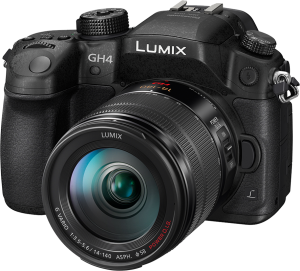
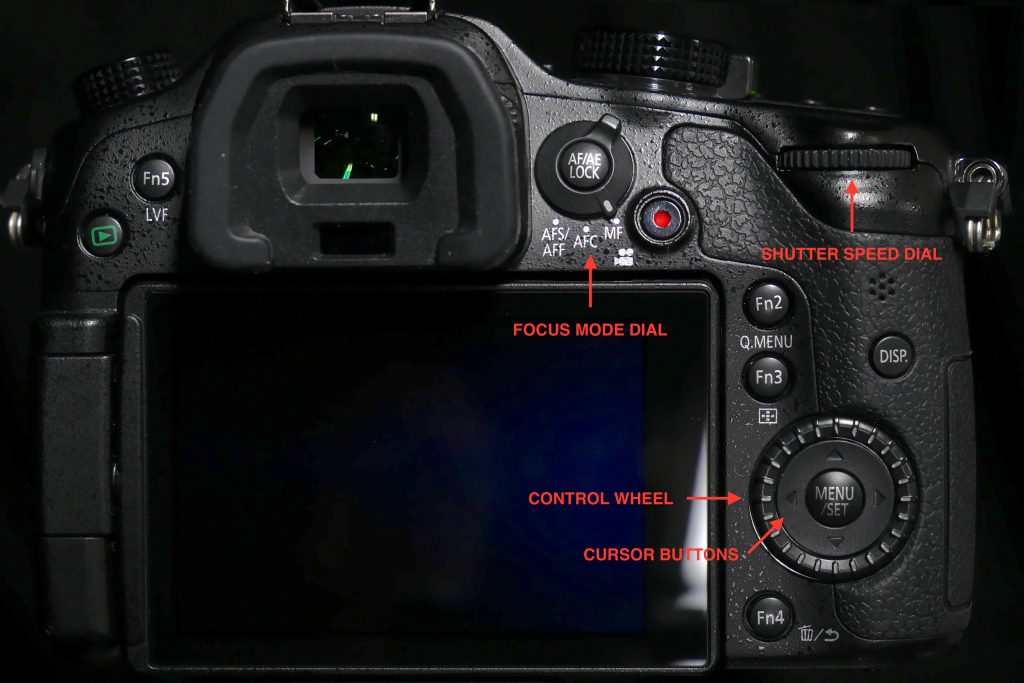
We’re starting with Panasonic hybrid cameras because they offer a lot of manual control, but are still fairly simple to use. The menus are straightforward and most buttons are clearly labelled. This kind of camera is a “twin dial” setup, which means there is one dial for aperture adjustment and one for shutter speed. The white balance, ISO, focus mode, and several other options can also be set using buttons on the camera body without digging into the menu system.
Setting Up the Cameras
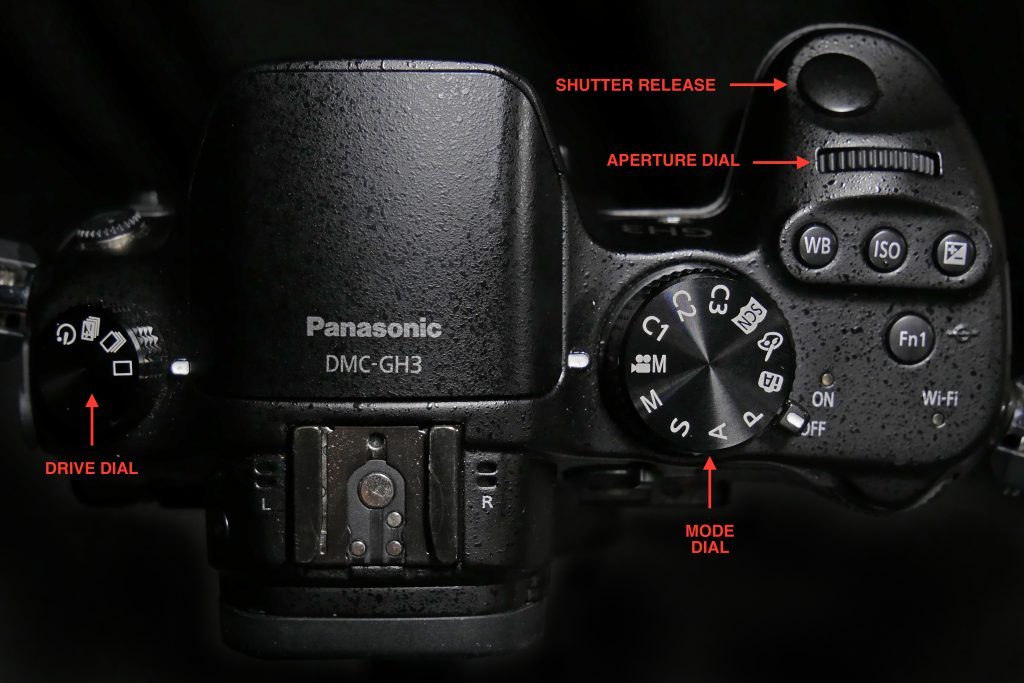
Looking at the bodies of these cameras, you’ll find several dials and buttons. On the top left is a drive dial – this is more often used for stills photography than video, so it can generally stay at the “single shot” setting, which is one rectangle. The large dial on the top right is the mode dial. The P, A, S, and M modes are, again, primarily used for stills – for video, go to the setting with a video camera icon and the letter “M.” Before we start filming, though, there are some settings we should change in the camera’s menu. With the mode dial turned to the video setting, press the button on the back labeled MENU/SET.
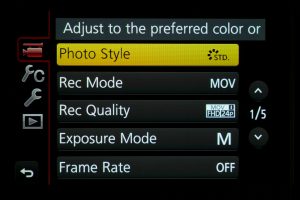
I’m not going to go through every option of each page of the menu – there are just too many options and many of them aren’t crucial. In general, the menus of these Panasonic cameras are intuitive and easy to navigate. The four sections of the menu (in video mode) are Motion Picture (the camcorder icon), Custom (the wrench icon with the letter “C”), Setup (the wrench icon), and Playback (the play button icon).
Most of the settings we’re going to change are in the Motion Picture section. First, since these cameras can record at a variety of frame rates and resolutions using several different codecs, you should make sure that those specifications are where you want them to be. For most situations, stick with the .MOV format and use either 4K (on the GH4) or 1080HD (on the GH3) at a frame rate of 24. If you still have multiple options, choose the one with the highest data rate.
You can change the overall look of your footage using the Photo Style setting. This gives you the option to use preset looks with varying levels of contrast, saturation, and tint. However, I would recommend keeping the Photo Style fairly neutral – the Standard and Natural settings work well – and handling your color work in post-production. Feel free to play with these options, though – each of the preset looks can be further customized as well.
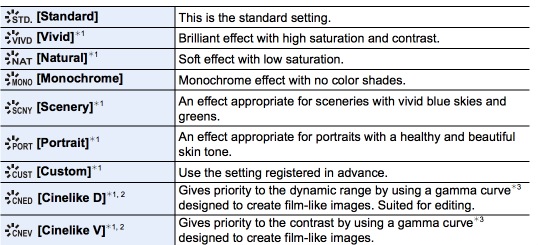
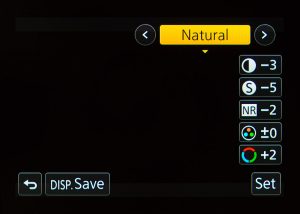
Next, it’s very important that you change the exposure mode to M, for manual control. P is an automatic setting, S is shutter priority, and A is aperture priority. M is the only setting in which you have complete control over the aperture, shutter speed, and ISO of the camera when recording video.
On the second page of the Motion Picture menu, you’ll find a setting for Continuous AF (autofocus). Turning this on let’s the camera hunt for focus continually while recording. Since the autofocus on these cameras isn’t very reliable when recording video, this should be set to OFF.
There are also settings related to audio in the Motion Picture menu. You can turn meters on and off (Mic Level Disp.) and set the levels (Mic Level Adj.). The GH3 and GH4 are cameras that actually do have headphone ports, so be sure to monitor your sound as well as watching the levels. There are some automatic settings such as Wind Cut and a level limiter that I would recommend turning off.
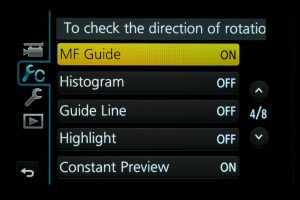
The Custom section of the menu lets you change what is visible on the screen (guide lines, a histogram, etc.) turn focus peaking and zebras on and off, customize the buttons and menus, and more. One important setting is Constant Preview, which should be turned on. Constant Preview makes the camera’s display show exactly what a recorded image would look like, whether or not the camera is recording. If this setting is turned off, the camera will adjust the exposure automatically until the record button is pressed.
The other important setting in the Custom menu is Shoot w/o Lens, which should be turned on. This setting allows you to use lenses that do not communicate electronically with the camera. This is necessary for using adapted lenses, such as our Nikon mount primes.
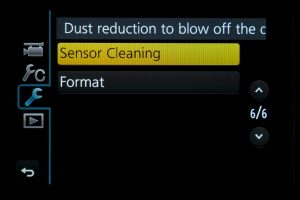
The Setup section of the menu can be used to set the date, time, and timezone, as well as things like the brightness of the display and the volume level. The most important option in the Setup menu is probably Format, which formats and erases the memory card. It’s generally a good idea to format your memory card before a shoot – provided you have the footage on it transferred and backed up somewhere!
Using the Cameras
Operating the GH3 and GH4 is fairly straightforward, once the menu settings listed above have been taken care of. The WB and ISO buttons on the top of the camera are used to change the white balance and ISO. There are several white balance presets, as well as the option to dial in a specific Kelvin value. Auto white balance is available as well, but you should probably set it manually, especially when recording video.
There are also two thin dials on the camera – one near the shutter button and one on the back. This “twin dial” setup is very common on stills cameras. By default, the dial that naturally rests beneath your index finger controls the aperture of the lens, while the dial that rests under your thumb controls the shutter speed. You will probably want to set your shutter speed to roughly double the frame rate (using the 180 degree shutter rule) – the GH4 will actually let you use shutter angle instead of shutter speed, if you want to get really precise.
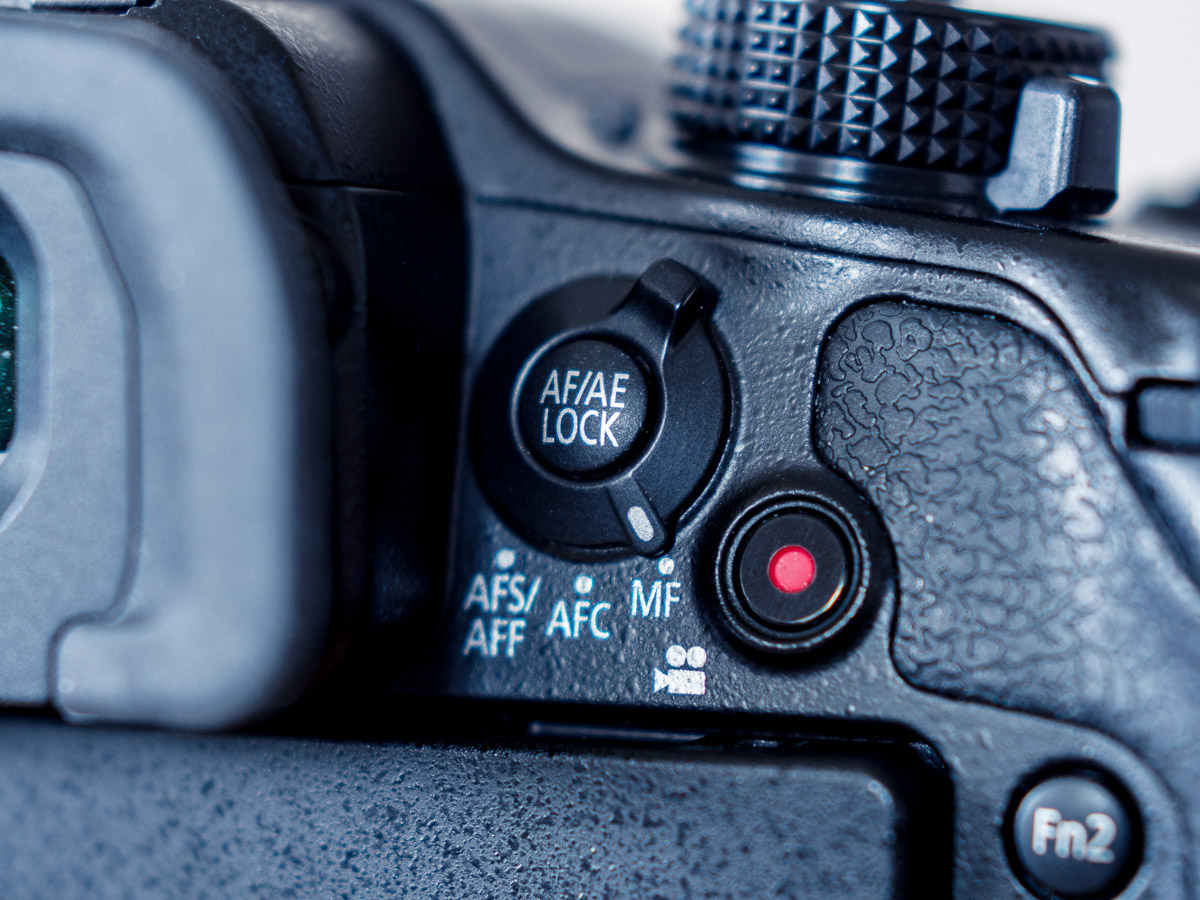
You can change your focus from automatic to manual using the dial on the rear of the camera next to the video record button. There are also different autofocus modes that can be used, such as single point, area, and face-detection. Single point and area can be useful if you need to move very quickly, but I’d strongly recommend using manual focus for most of your video work.
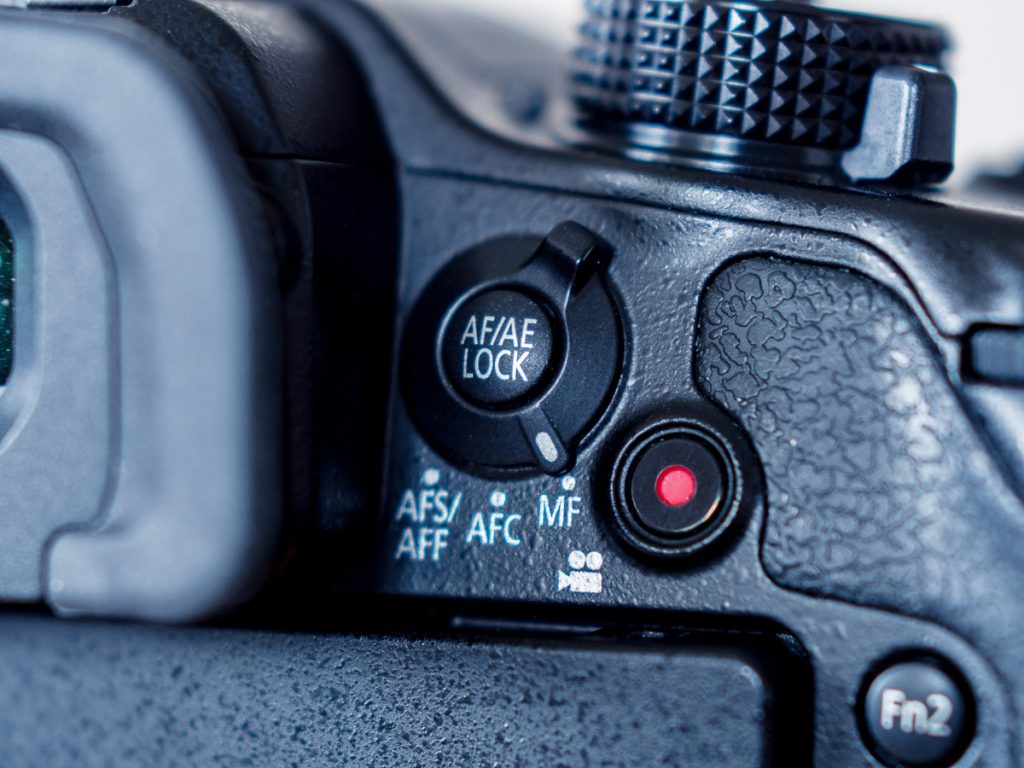
With the camera properly set up and your exposure dialed in, using the GH3 or GH4 is really pretty simple. You can start recording with the dedicated video button or the shutter release. Many hybrid cameras have video recording time limits (due to complicated taxation issues, of all things), but the GH3 and GH4 will record continuously until the memory card is full. These cameras also have very good battery life for their size, so they are a versatile choice overall.
Naturally, the challenges of using hybrid cameras are still present here. The GH3 and GH4 have headphone ports for audio monitoring (which you should use!), but you’ll need to use some sort of adapter if you want to use high-end XLR microphones.
Furthermore, you need to remember that this style of camera body was designed to capture still images, not video. Support the camera as much as possible in order to keep it steady – you may want to use the viewfinder instead of the rear screen. Check out the following video from Peter McKinnon for some additional tips:
Differences Between the Two
So far, just about everything we’ve discussed can be applied to either the GH3 or the GH4 – the two cameras are nearly identical from the outside and handle exactly the same. However, there are some key differences between the two.
The GH4 was Panasonic’s much-anticipated follow-up to the GH3, so it has some new features. The biggest addition was 4K video recording, which was a brand new flagship feature when the camera was released. You may not need 4K recording – most video is still released in 1920 x 1080 HD – but it can be nice to have. Footage shot in 4K can be rescaled and cropped when edited on an HD timeline. 4K footage is also very sharp when downscaled to HD and the added resolution is helpful for things like green screen photography.
There are also some additional slow motion options on the GH4. While both cameras can shoot HD at 60 frames per second, the GH4 has VFR (variable frame rate) settings that allow HD recording at up to 96 frames per second. VFR recording is only available with some recording formats (they are labeled in the menu) and no audio is recorded while filming in VFR mode.
There are a few other minor differences between the two cameras. Both have time-lapse modes, but only the GH4 has a dedicated stop-motion setting. Finally, the GH4 has assist functions like zebras and focus peaking. All in all, the GH4 is a more capable all-around camera, but there are many times when you may not need the additional functionality it offers. In terms of HD video quality, the two are virtually indistinguishable.
Hybrid Life
Let’s start diving into the specific features of the cameras in our collection. This week, we’re focusing on two very similar hybrid cameras from Panasonic – the GH3 and GH4. I want to start with hybrid cameras for a few reasons. First, these cameras are fairly straightforward to operate; there are lots of external buttons and dials for manual controls and most are labeled in a logical way. Second, as these small cameras have become more powerful and more common, their use in video production has increased across the board; it’s now very normal to see small hybrid cameras alongside (or replacing) dedicated video cameras on large and small productions. Finally, these kinds of cameras are the ones you are mostly likely to purchase for your own use – or you may already own a stills-style camera with video capabilities. Most recent stills cameras from Canon, Nikon, Sony, Panasonic, Olympus, and Fuji have the ability to record high quality HD video.
There are challenges to using hybrid cameras for video, however. Put simply, a video camera was designed, first and foremost, to capture video – and stills-style cameras were not. Stills cameras were designed to be portable and to be hand-held for exposures lasting only a fraction of a second. Video cameras, on the other hand, need to be stable and they need to capture for a long period of time. This is the reason that camcorders and stills cameras look different; they were designed to do two different things.
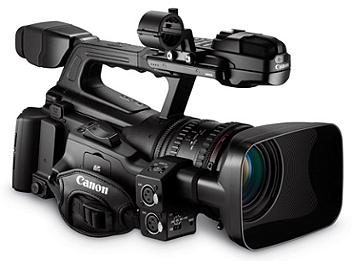
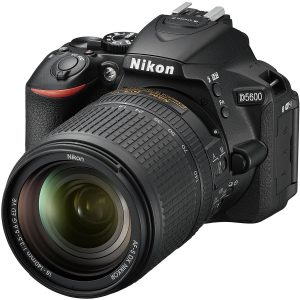
Audio is another big challenge for hybrid cameras. Again, this goes back to the original purpose for these cameras: stills cameras were not originally intended to record sound and video cameras were. A decent dedicated video camera will have advanced audio features such as XLR inputs, phantom power, physical controls for levels, on screen meters, and a headphone jack for monitoring. Hybrid cameras have gradually added more and more audio functionality, but it has been a very slow development and advanced audio features are still uncommon on stills-style cameras. Most – but not all – hybrid cameras have 3.5mm inputs, but none that I know of have built-in XLR inputs. Only high-end hybrid cameras have headphone ports for monitoring. This severely limits your audio options, unless you are willing to add some additional accessories or record to an external device.
Rigging Nightmares
Of course, hybrid cameras are still very much worth using for video production – you just need to be thoughtful of their inherent limitations. An entire industry has developed to supplement hybrid cameras with accessories designed to enhance their video capabilities. Many of these items are expensive and over-engineered; a few are genuinely useful.
A quick search reveals all manner of horrifyingly over-built camera rigs. You can even check out shittyrigs.com for a curated collection of the worst in DIY filmmaking.
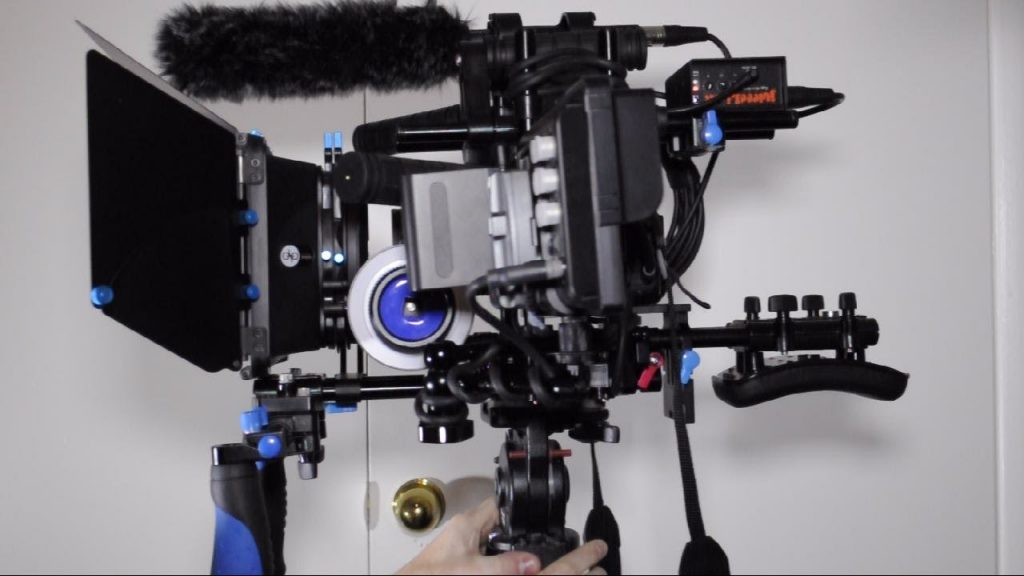
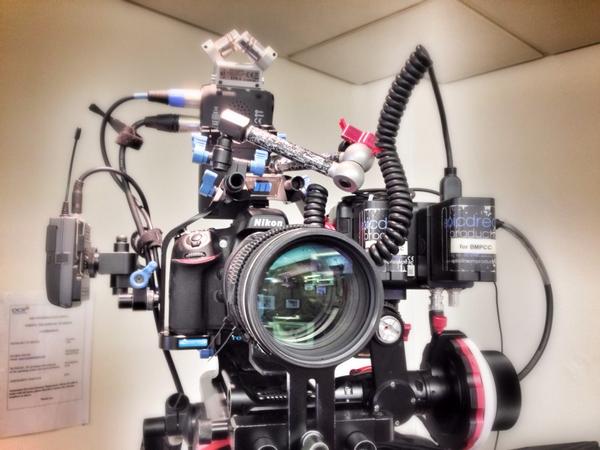
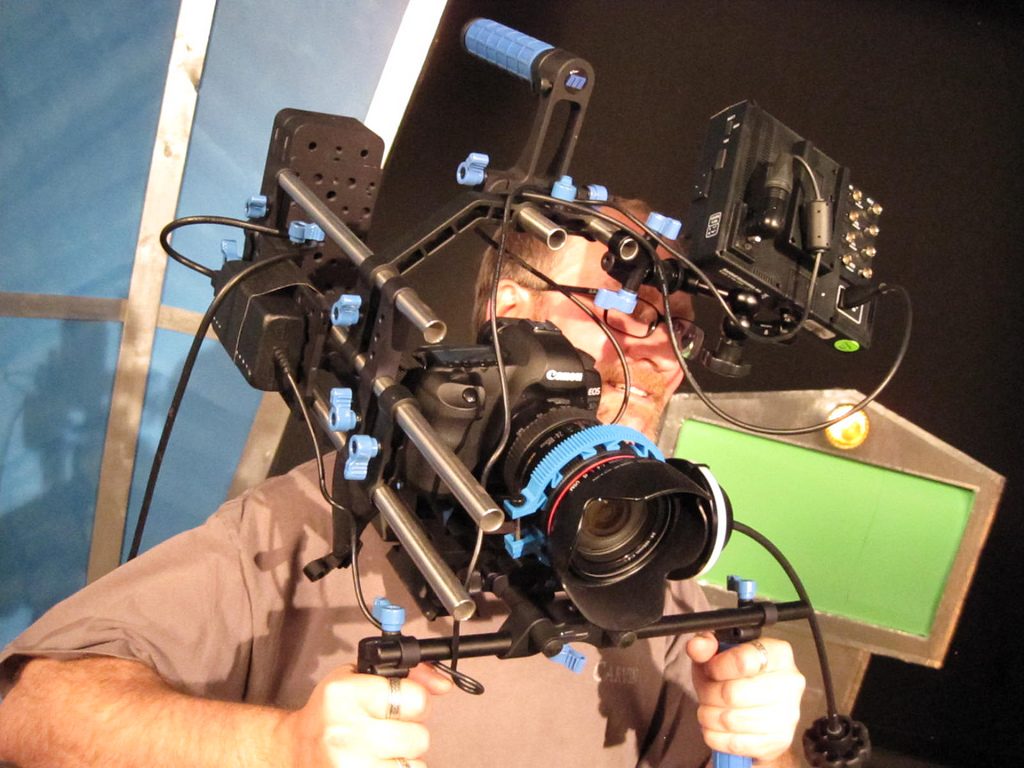
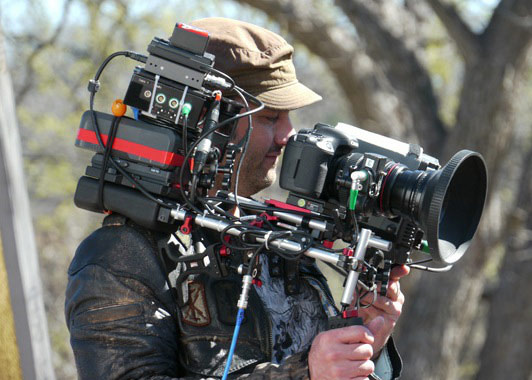
These unwieldy Franken-rigs are taking the “kitchen sink” approach to accessorizing a camera and ignoring some of the key benefits of using a hybrid: their size, weight, and ability to be used discreetly. They are also capitalizing on the potent desire that many photographers and filmmakers have – myself included! – to constantly purchase new gear.
That isn’t to say that rigging a hybrid camera is always a bad idea, because it absolutely can be helpful. However, you need to be mindful of what you’re actually filming and how to most efficiently meet those needs. We’ll dig deeper into rigging cameras for movement later in the semester, but here are a few basics.
Cages and Rails
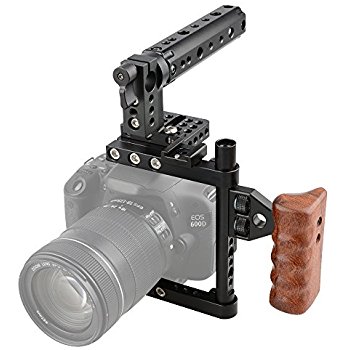
The easiest way to add accessories to a hybrid camera is using the flash mount – called a hot shoe – on the top. You can use the shoe mount to add a microphone, light, small monitor, or other accessories. However, the hot shoe isn’t a particularly strong mounting point and if you want to add multiple accessories, you’ll need another option.
A camera cage is a metal frame that adds more mounting points and provides a level of protection to the camera. These can be generic or designed for a particular camera. I have slightly mixed feelings about cages since they add functionality, but at the expense of weight and bulk.

The other common option for accessorizing a camera is a rail system. This is a standardized set of accessories that utilize 15mm rods to mount items such as a matte box, follow focus, handles, or shoulder pad. Using various connectors and rods, you can basically build up whatever system you like for your camera. Just try not to go overboard.
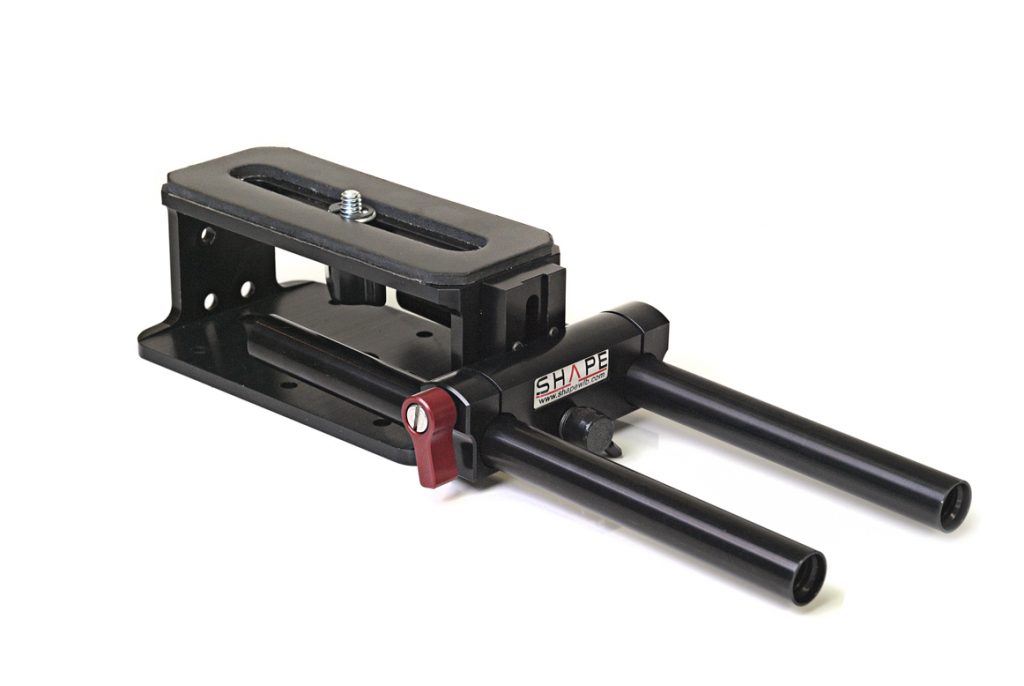
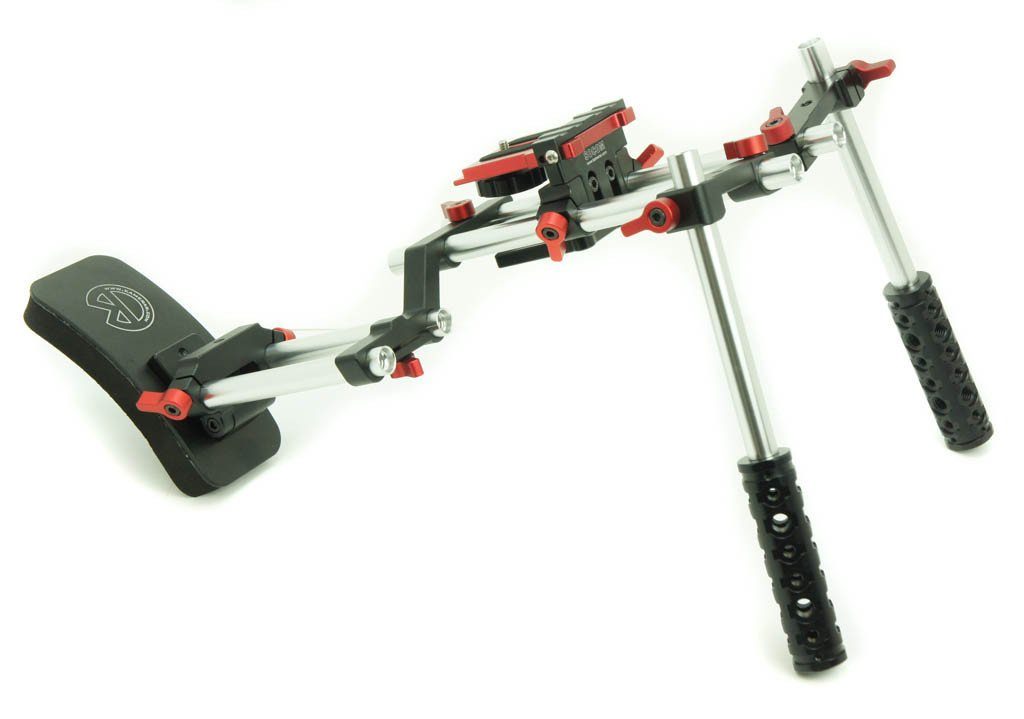
Again, think about what it is you’re going to be filming and what accessories you need. If you need to add a follow focus, then you need a rail system. If you need to record audio, you could add a microphone using the hot shoe, or rig something onto a rail system, or record to an external device. If you need more stability, you could add a shoulder rig, or use a pistol grip handle, or use a tripod. Or you might not need anything!
It’s Complicated.
There is some debate in the filmmaking community – even among professionals – as to whether sensor-size crop factor should be applied to aperture. As you may recall, the size of a camera’s sensor affects the apparent focal length of a lens – so, a 25mm lens on a four-thirds sensor has the same field of view as a 50mm lens on a full frame sensor. Is aperture affected in the same way?
The answer is… sort of. Aperture is the measure of the size of the opening in the lens through which light enters the camera, which affects brightness and depth of field. The size of the sensor does not change the size of a lens’s aperture, so the overall brightness does not change. However, depth of field is directly affected by focal length – long lenses produce a shallower depth of field than short lenses. So the depth of field (the amount of background blur) is affected by by crop factor since, for example, a 25mm lens will always produce less background blur than a 50mm lens at the same aperture. In short, depth of field is affected by sensor size (indirectly), but overall brightness is not.
Sensor Size and Equivalence
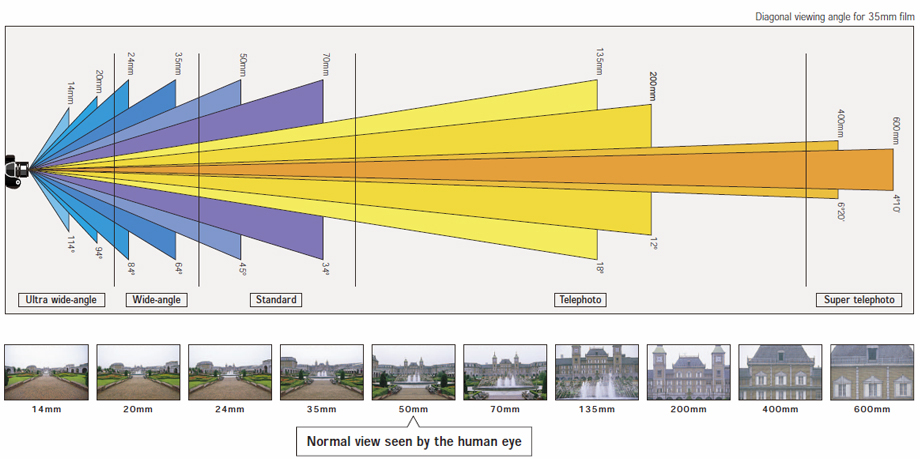
We’ve already discussed how the focal length of a lens affects field of view. A 24mm lens will see a wider angle of view than a 70mm lens. However, there is another factor that affects angle of view – the size of the sensor inside of the camera being used.
The focal length of a lens is the distance between the focal plane within the lens (basically, the point at which the light is gathered) and the sensor of the camera. That’s an absolute measurement that dramatically influences angle of view – when the focal plane is near the sensor, the area seen is wider. To visualize how this works, imagine holding a cardboard tube in front of your eye. When the tube is near your eye, you can see a wide area through the tube. When you hold the tube at arm’s length and look through it, you can only see a narrow area through the tube. This is similar to the way a lens’ focal length determines its angle of view.
After the light enters through a camera’s lens, it hits the camera’s sensor. If that sensor is large, a wider image is captured; if the sensor is smaller, a smaller image is captured. To visualize this, imagine a projector shining an image onto a screen; the image is the light coming through the lens and the screen is the sensor of the camera. If you were to replace the screen with a smaller one (without changing its position), some of the original image would be cut off and you would see a narrower angle of view.
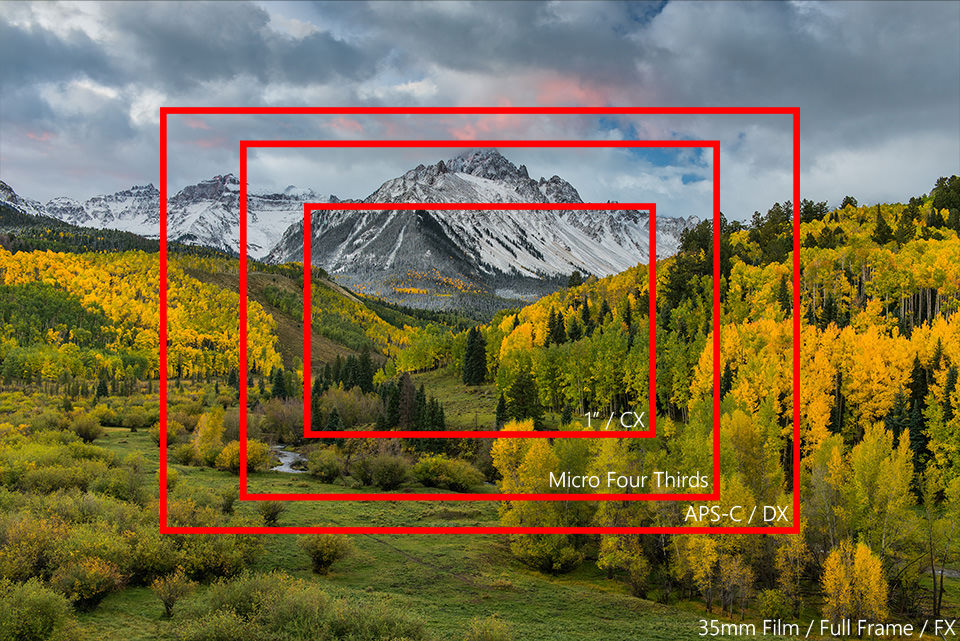
This means that the angle of view in a frame of video is determined by both focal length and sensor size. A 24mm lens has a wide angle of view on a camera with a large sensor, but will look zoomed in on a camera with a small sensor, since some of the image is cropped out. In order to make sense of these variables, we often talk about lens equivalence.
Equivalence uses a universal standard to describe the angle of view a lens produces. Since film was the default format for stills photography for so long, most photographers think in those terms – we refer to camera sensors the same size as standard film (also known as 35mm film, which is the size of the film, not the focal length) “full frame.” On a full frame camera, lenses with a focal length up to around 35mm are considered wide angle; around 50mm is considered mid-range; and 70mm and up is considered zoom or telephoto.
When we talk about lens equivalence, what we are actually doing is figuring out what focal length we would need to use to get the same angle of view on a full frame camera. For example, on a micro four thirds sensor camera, 50% of the image is cropped out compared to a full frame camera. That means that a 25mm lens is a 50mm full frame equivalent. To put it another way, a 25mm lens on micro four thirds captures the same angle of view as a 50mm lens on full frame.
Because we are determining how much of the angle of view is cropped out, this is also referred to as a camera’s “crop factor.” Micro four thirds cameras have a crop factor of 2 – you must multiply the focal length of a lens by 2 to get the full frame equivalent. APS-C is a popular sensor size in Canon, Nikon, and Sony cameras – they have a crop factor of about 1.6. Cameras like our Sony RX10 ii have a 1 inch sensor and a crop factor of 2.7; our BlackMagic Pocket Cinema Camera has a crop factor of 2.9, with its Super 16-sized sensor.
Most lenses are labeled with their actual focal length – not their equivalent one. This means that you need to take a camera’s crop factor into account when choosing a lens. Our Nikon prime lenses can be mounted on our BlackMagic Pocket Camera, our Panasonic Gh3 and GH4 cameras, and our Sony FS5 – all of which have different sensor sizes and different crop factors. A 28mm lens will look wide on the Sony and telephoto on the BlackMagic. Cameras with a fixed lens (like our Sony RX10 ii) tend to list the equivalent focal length instead of the actual focal length, which saves you the trouble of doing the math.
Of course, all of this confusion could be avoided if we just talked about angle of view instead of focal length. Focal length has been the standard for a long time, though, and it doesn’t seem to be going away any time soon.
The Exposure Triangle
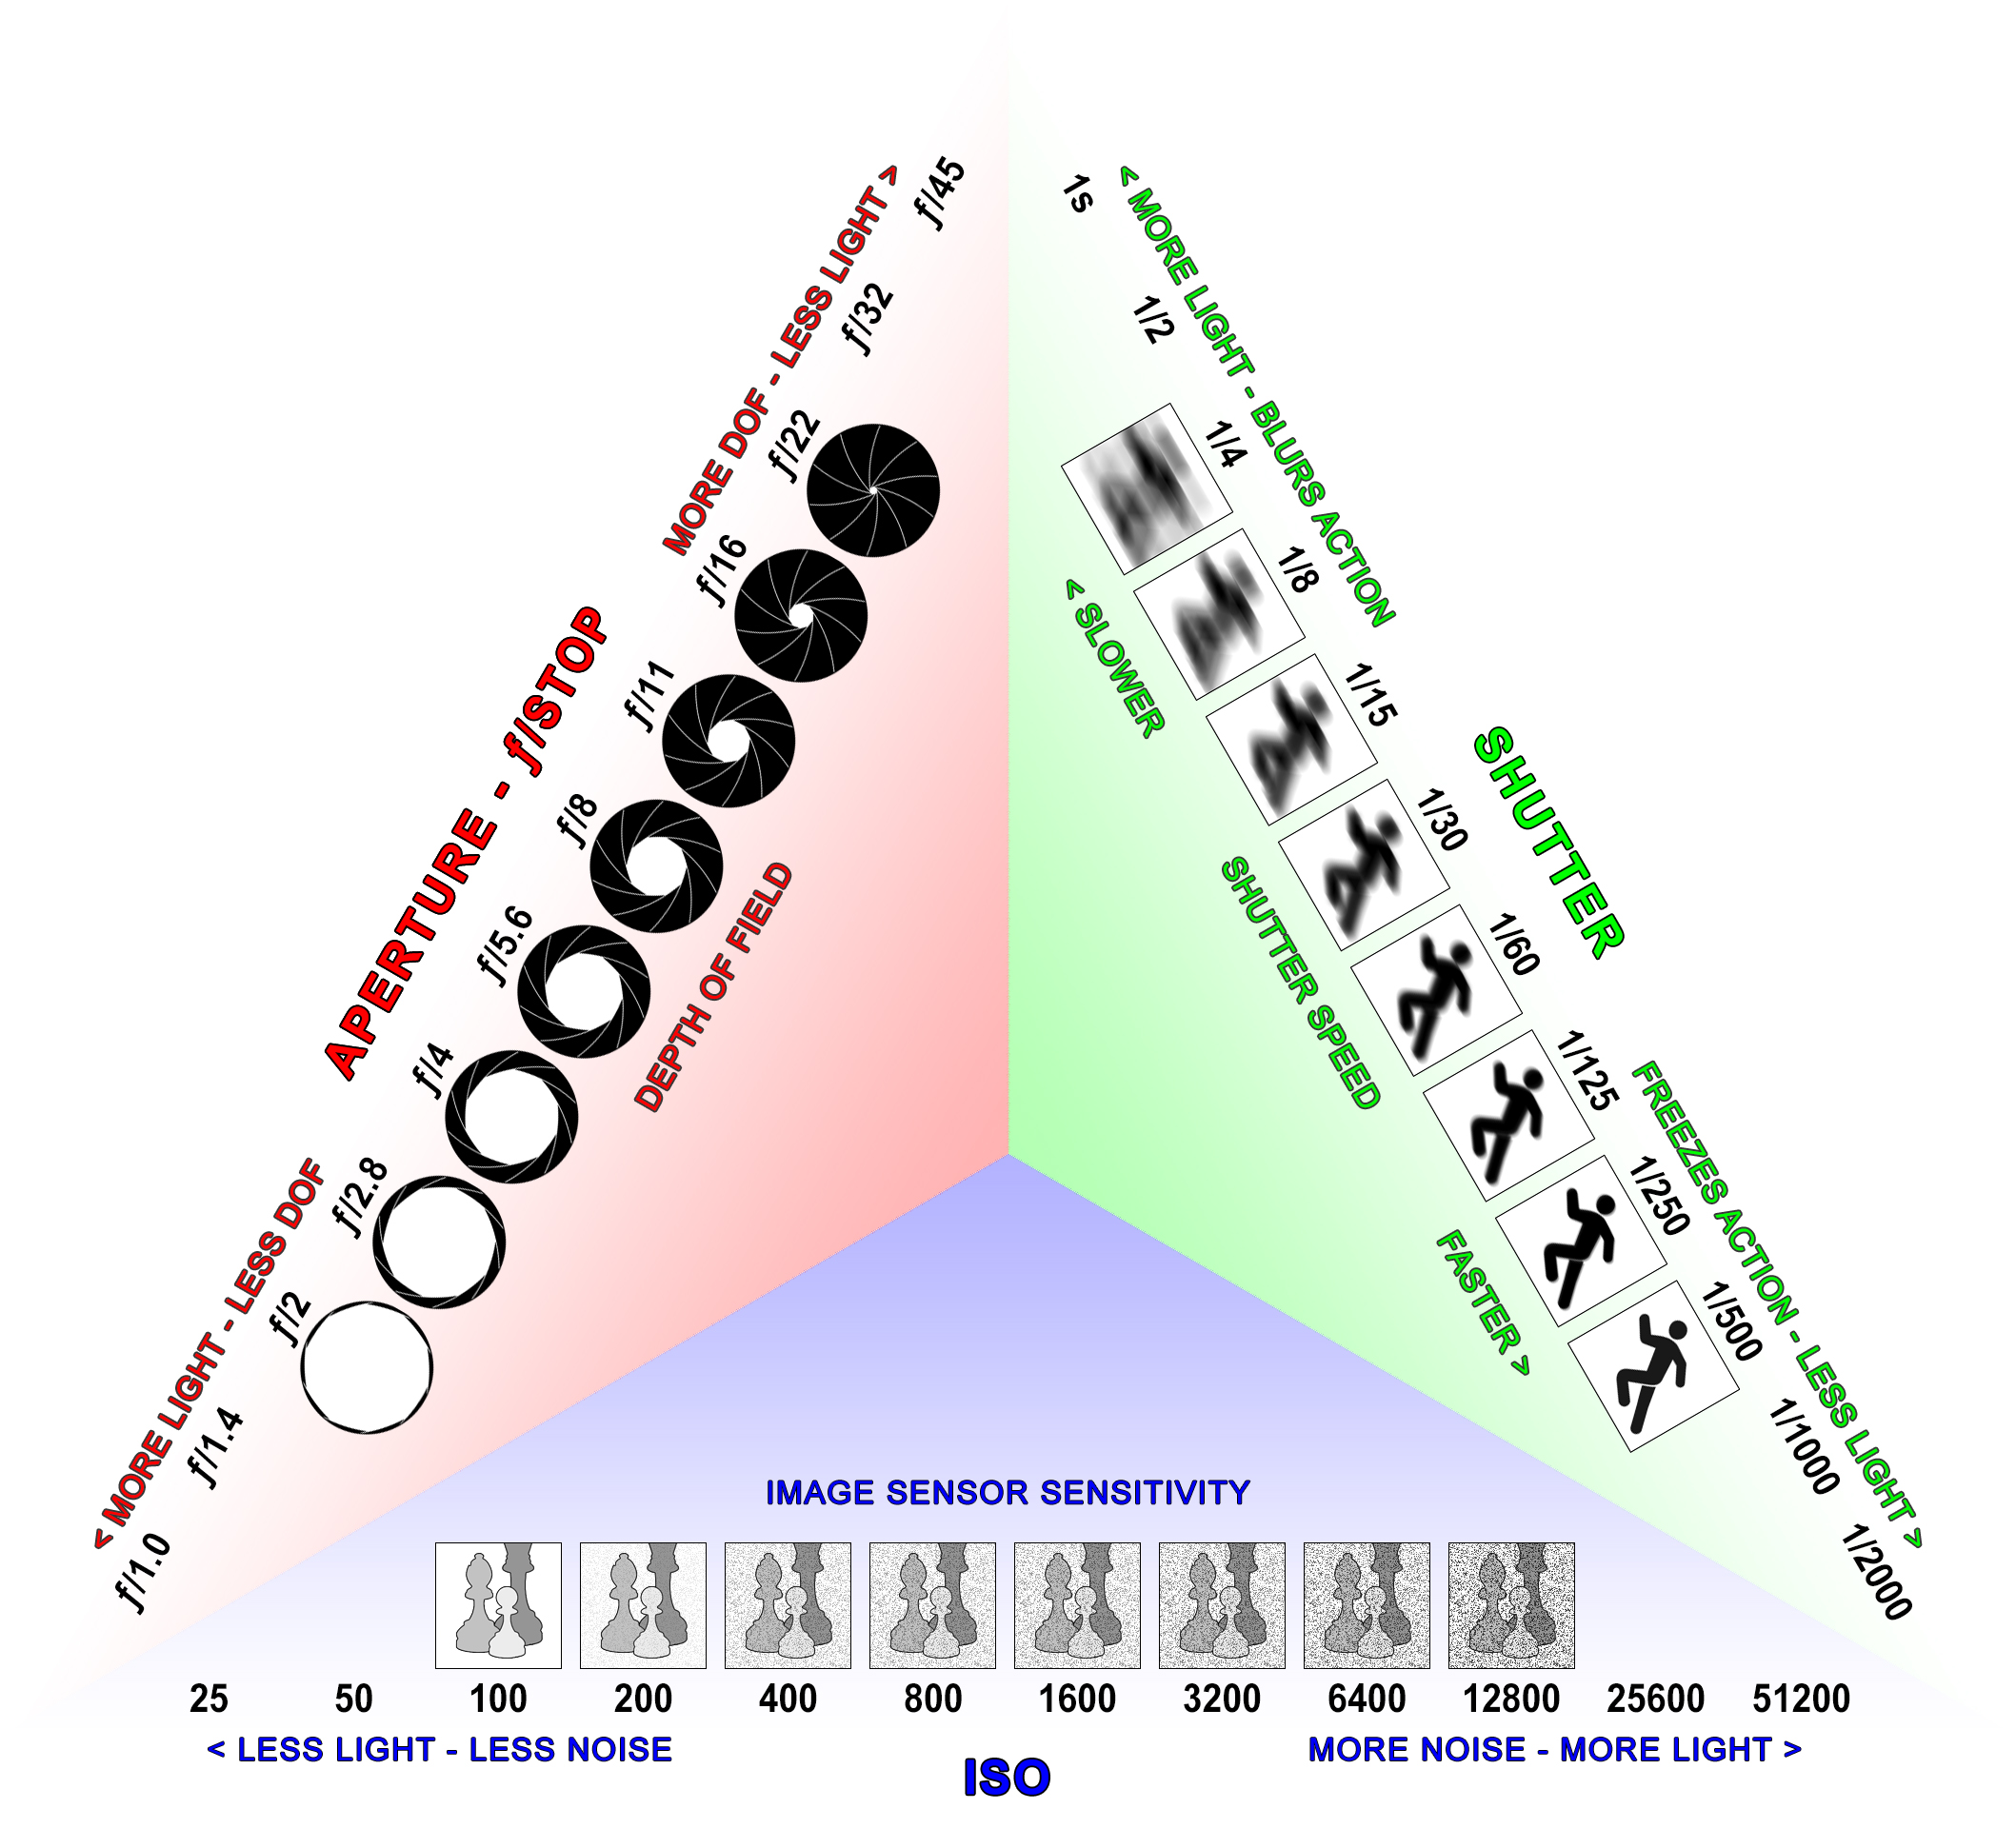
Let’s switch gears now and talk about actually capturing images with a camera. There are three primary settings that we use to control the image captured by a camera: aperture, shutter speed, and ISO. Of course, there are other factors to consider when setting exposure; for example, you might simply add more lights to a scene, move from the sunlight to the shade, or use an ND filter in front of the lens. However, aperture, shutter speed, and ISO are the three settings that you will always make to the camera and lens, so they are especially important. These three settings are often referred to as the exposure triangle.
Each side of the exposure triangle has costs and benefits. Opening the aperture lets in more light and makes the image brighter, but it also makes the depth of field shallower. Using a longer shutter speed lets in more light, but it also adds motion blur. Using a higher ISO makes the sensor more light-sensitive, but it also degrades the overall image quality by adding grain and noise. The inverse of all these is also true: a smaller aperture creates a darker image with a deeper depth of field; a shorter shutter speed creates a darker image with less motion blur; and a lower ISO creates a darker image with less noise. Understanding these tradeoffs is a really important part of knowing how to use a camera effectively.
Here are some basic guidelines for using the exposure triangle: Start by setting your shutter speed to twice the frame rate, using the 180 degree rule. So, if you shutter speed is 24 frames per second, set it to around 1/48 of a second. There is definitely some wiggle room here, but doubling the frame rate will give you a natural looking amount of motion blur: not too blurry and not too jittery. Your aperture should be set according to the kind of shot you are trying to capture. If you want a dramatic, shallow depth of field, use a wide aperture (low number) and if you want to see both the background and foreground clearly, use a small aperture (high number). You can then set your overall brightness level by controlling the ISO: a high ISO to make things brighter and a low ISO to make things darker. However, you should also take care not to raise the ISO too high, since the quality of the image will degrade. For most of the cameras we’ll be using, I’d recommend keeping it under ISO 1000 and lower if you can. If your image is still too dark, you probably want to consider the external factors, such as the lights you are using and the environment you are filming in.
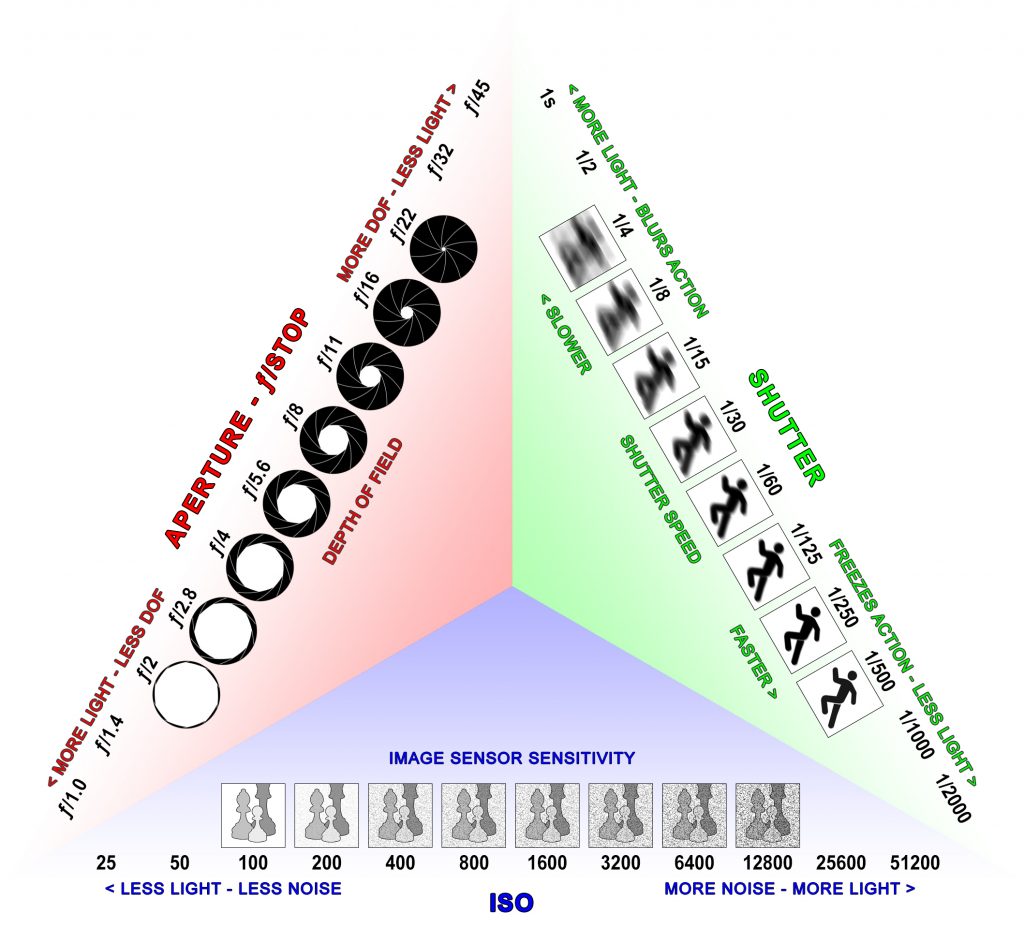
As you (hopefully) recall from our lesson on camera vocabulary, an f-stop represents a doubling or halving of the amount of light being captured. The cool thing about the exposure triangle is that you can use the different settings to compensate for each other. If you change your aperture from f/2.8 to f/4, that means you lose one f-stop of light. You can then raise your ISO from 400 to 800, gaining one f-stop of light and retaining your overall brightness level. This may seem a little confusing at first, but it can quickly become second nature and it’s extremely useful when filming.
Need a quick refresher on the basics of exposure? Check out these fun videos on aperture, ISO, and shutter speed.
What’s In A Lens?
Let’s discuss some of the basic properties of camera lenses.
A camera lens is primarily defined by three qualities: its focal length (or focal range), maximum aperture (or maximum aperture range), and mount. A prime lens only has one focal length; it cannot zoom in and out. As mentioned in the last lesson, the focal length is the distance from the point of light convergence within the lens to the camera sensor. This distance determines the angle of view that the lens is capable of taking in. A zoom lens can be set to different focal lengths to change the angle of view. Generally speaking, zoom lenses are more convenient and prime lenses create higher quality images.
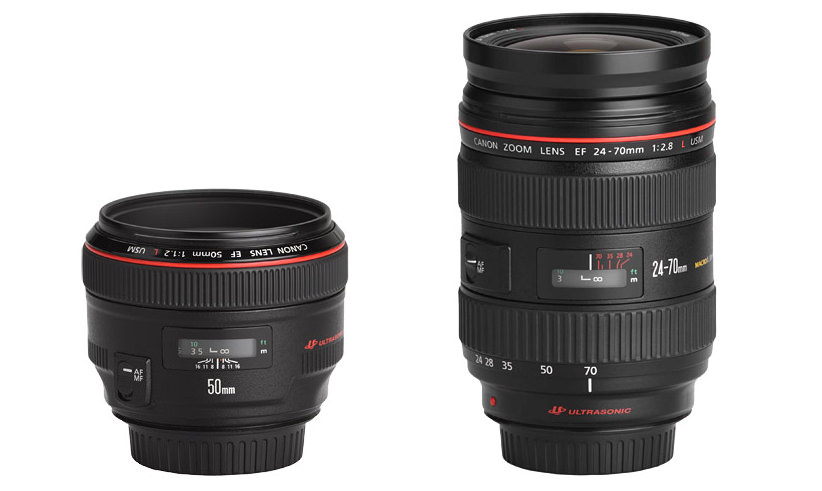
The maximum aperture of a lens is the measurement of how wide the iris of the lens can open. It is, confusingly enough, measured in a ratio: the focal length of the lens divided by the diameter of the aperture opening. The resulting number is called the f-stop and most lenses use the following sequence: f/1.4, f/2, f/2.8, f/4, f/5.6, f/8, f/11, f/16, f/22. Again, a smaller number f-stop is a larger aperture and a larger number f-stop is a smaller aperture. Speaking very generally, a lens that can open its aperture to f/2.8 or wider is considered “fast” and a lens that can only open to f/4 or narrower is considered “slow.”
The bizarre sequence of numbers used to measure f-stop represent stops of light – going from f/2 to f/1.4 doubles the amount of light and going from f/4 to f/5.6 halves the amount of light entering the camera. Each sequential number is (approximately) the previous number multiplied by 1.4. It’s admittedly confusing and the math isn’t really important. What is important is that you understand that an aperture of f/2 is wider than an aperture of f/8. The f/2 will let in more light and create a shallower depth of field.
You will sometimes see lenses that measure aperture in t-stops instead of f-stops. The “t” in t/stop stands for transmission – it’s a measurement of the actual amount of light coming through the lens. T-stops are used to account for the optical imperfections that might make lenses with the same f-stop behave slightly differently. T-stops use the same sequence of numbers and the two terms can be used fairly interchangeably.
Finally, the lens mount determines what kind of camera it can be attached to; this is usually specific to the camera manufacturer. Canon uses the EF mount; as well as EF-S, for crop-sensor exclusive lenses (more on that later); and EF-M, for their small mirrorless line. Vintage Canon lenses use the FD mount and aren’t compatible with newer cameras. Nikon uses the F mount, as well as the G mount, which is the essentially the same thing without a manual aperture control ring. Sony uses the E and A mount; Fuji uses the X and G mount; Pentax uses the K mount; Leica uses M and R; and Olympus, Panasonic, and some BlackMagic cameras use the Micro Four Thirds mount. There are also high-end PL mount cinema lenses and tons of old-school options, such as the M42 and C “screw on” mounts.
That’s a lot of different lens mounts and a lot of random letters. The most important takeaway is that there are many different kinds of lenses for different kinds of cameras– if you just say “Nikon mount” or “Fuji mount,” you will probably be understood just fine based on the context. Micro four thirds is interesting because it’s a standard used by multiple camera makers. In our collection, we have mostly micro four thirds and Nikon lenses.

Adapters and Focal Reducers
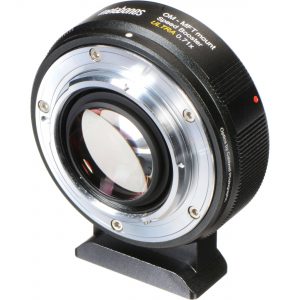
When you use a lens on the camera mount for which it was specifically designed, we say that is a “native” lens. If you wanted to use a native lens on one of our Panasonic GH4 cameras, you would select a micro four thirds lens. When you use a lens that was designed for a different camera system, we say that it is an “adapted” lens. Adapted lenses require the use of – you guessed it – an adapter and not every lens can be adapted to every camera.
Native lenses usually offer the most functionality; many lenses have electronic connections to the camera for things like aperture control, autofocus, and image stabilization. When you connect a lens to an adapter, you often lose that functionality. However, some lens adapters offer other benefits. For example, our Metabones Nikon to micro four thirds adapters actually have glass elements in them that help gather more light and increase the angle of view. The use of adapters allows us to use one set of high quality Nikon mount lenses on our Sony, BlackMagic, and Panasonic cameras. Since these particular lenses are fully manual anyway – they have no electronic controls – we don’t lose out on any functionality by adapting them to other cameras.
Coverage and Compatibility
Adapting lenses is extremely helpful because it really expands your toolset. You can use one set of lenses across lots of different cameras! However, not every lens can be adapted to every camera. We’ll talk more about sensor size in the next lesson, but some lenses are designed for smaller sensors and just aren’t physically large enough to cover bigger ones.
Flange distance is also a concern: different cameras are designed to have their respective lenses mounted different distances from the sensor. You can’t put a lens with a long mount on a camera with a short mount – there just isn’t room.
What all of this means is that some lenses are more easily adapted and some cameras can more easily accept adapted lenses. Cameras with a micro four thirds mount (like our BlackMagic Pocket and Panasonic cameras) can accept lots of different lenses using various adapters because of the mount and sensor size. We also own lots of Nikon mount lenses – even though we don’t own any Nikon cameras – because the mount, sensor coverage, and manual controls make Nikon lenses easy to adapt.
Filter and Hoods
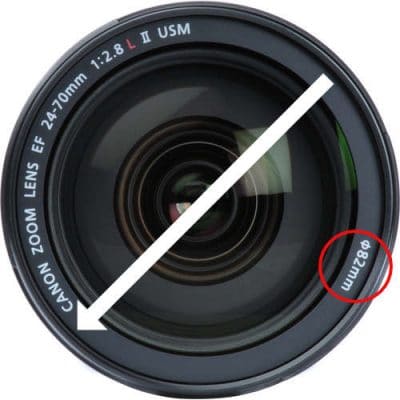
Most lenses have a threaded area at the very front that can be used to attach filters and other accessories. Since lenses vary greatly in size, these filter threads can be found in a variety of sizes as well. Filter threads are measured by diameter in millimeters – which can be confusing, since focal length is measured in millimeters as well. For example, our Panasonic 12-35mm zoom lens takes 58mm filters, so all three numbers (as well as the aperture) can be found on the front of the lens. You can usually identify the filter size by an icon that looks like a circle with a line through it.

There are many different kinds of filters that can be attached to a camera lens. Some of the most widely used are ND filters, which cut down the overall amount of light entering the lens – ND filters are like sunglasses for your camera. There are also circular polarizers, which can be used to cut down on glare and reflections and tinted filters, which can be used for specialty shots.
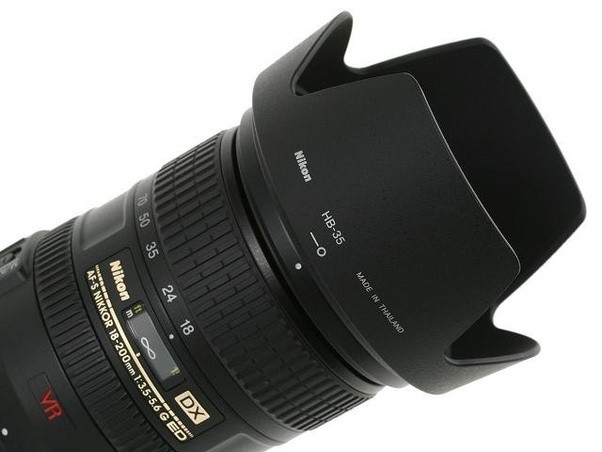
Many lenses also have hoods as optional accessories – and a few have hoods permanently attached. Lens hoods help to cut down on things like flares from direct light sources. Hoods may be attached either using the filter threads or using a “bayonet mount” on the outside of the lens barrel.
Cinema Vs. Stills
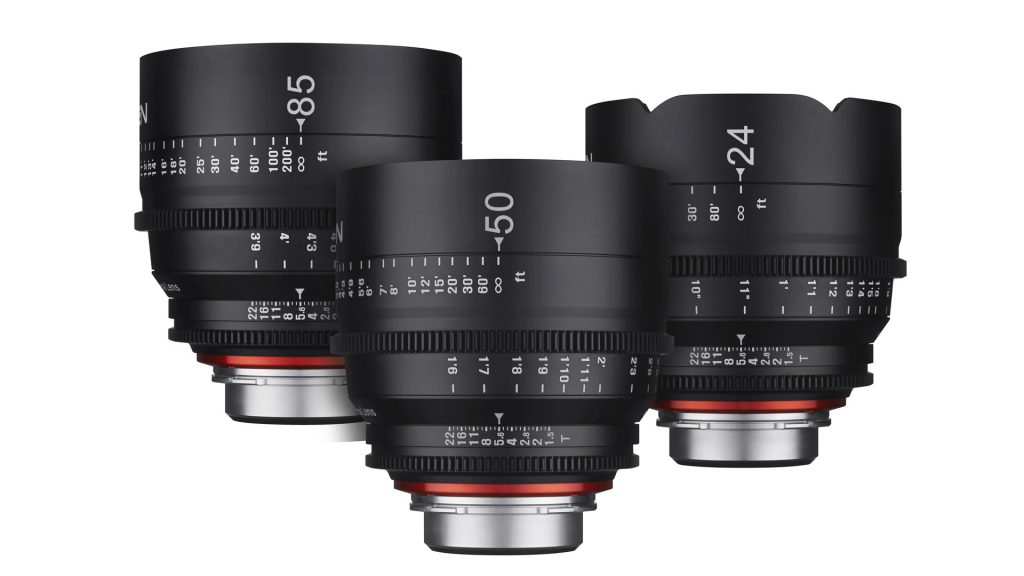
Generally speaking, lenses designed for stills-photography cameras work just fine for video as well. However, there are lenses that have been designed specifically for video use that have some added benefits. The most noticeable difference is that cinema lenses usually have gear teeth on their focus and aperture rings. This allows the lenses to be used with a follow focus (a tool used for precisely changing focus during filming) without additional accessories.
Cinema lenses also have click-less aperture rings. Many stills lenses don’t have aperture rings at all – on most Canon and Panasonic lenses, for example, the aperture is controlled electronically using a dial on the body of the camera. Cinema lenses have aperture rings on the lens itself – and that ring can be adjusted smoothly, without clicked stops at the different settings. This allows a camera operator to subtly adjust the aperture while filming. The aperture on a cinema lens is also measured in t-stops instead of f-stops – the numbers used are the same, but t-stops represent an accurate, measured amount of light that takes into account light lost due to optical imperfections.
You might also notice that the markings on a cinema lens are usually on the side of the lens, rather than the top. This is so that a separate operator can see and adjust the lens settings.
Finally, some cinema lenses are available as a set with front filter threads that are the same size. This allows the same accessories to be used on multiple lenses. Because of this, cinema lenses tend to be larger and heavier than stills lenses.
Lenses may sound complicated, but remember that we’re really only looking at a few things: how wide or zoomed in the lens is (the focal length); how much light the lens lets in (the aperture); and how the lens attaches to the camera (the mount). We usually use these three factors when describing a lens – you might ask for a Nikon 50mm f/1.4, or a Panasonic 12-35mm f/2.8.
Want to learn more – much more – about camera lenses? Check out the following three videos from Filmmaker IQ:
Livin’ Life 24 Frames Per Second
The always informative John Hess of Filmmaker IQ delivers a stirring defense of the standard film frame rate – 24 – in this new video. While frame rates of 48, 60, and higher are great for video games, virtual reality, and sports, 24 is still the ideal for cinema. Strap in for an epic rant as Hess explains why.
What Does It All Mean?
As we discussed briefly in the first lesson, SD cards are labeled in a maddeningly confusing way. This video from Gerald Undone breaks down the various symbols, rates, numbers, and abbreviations.
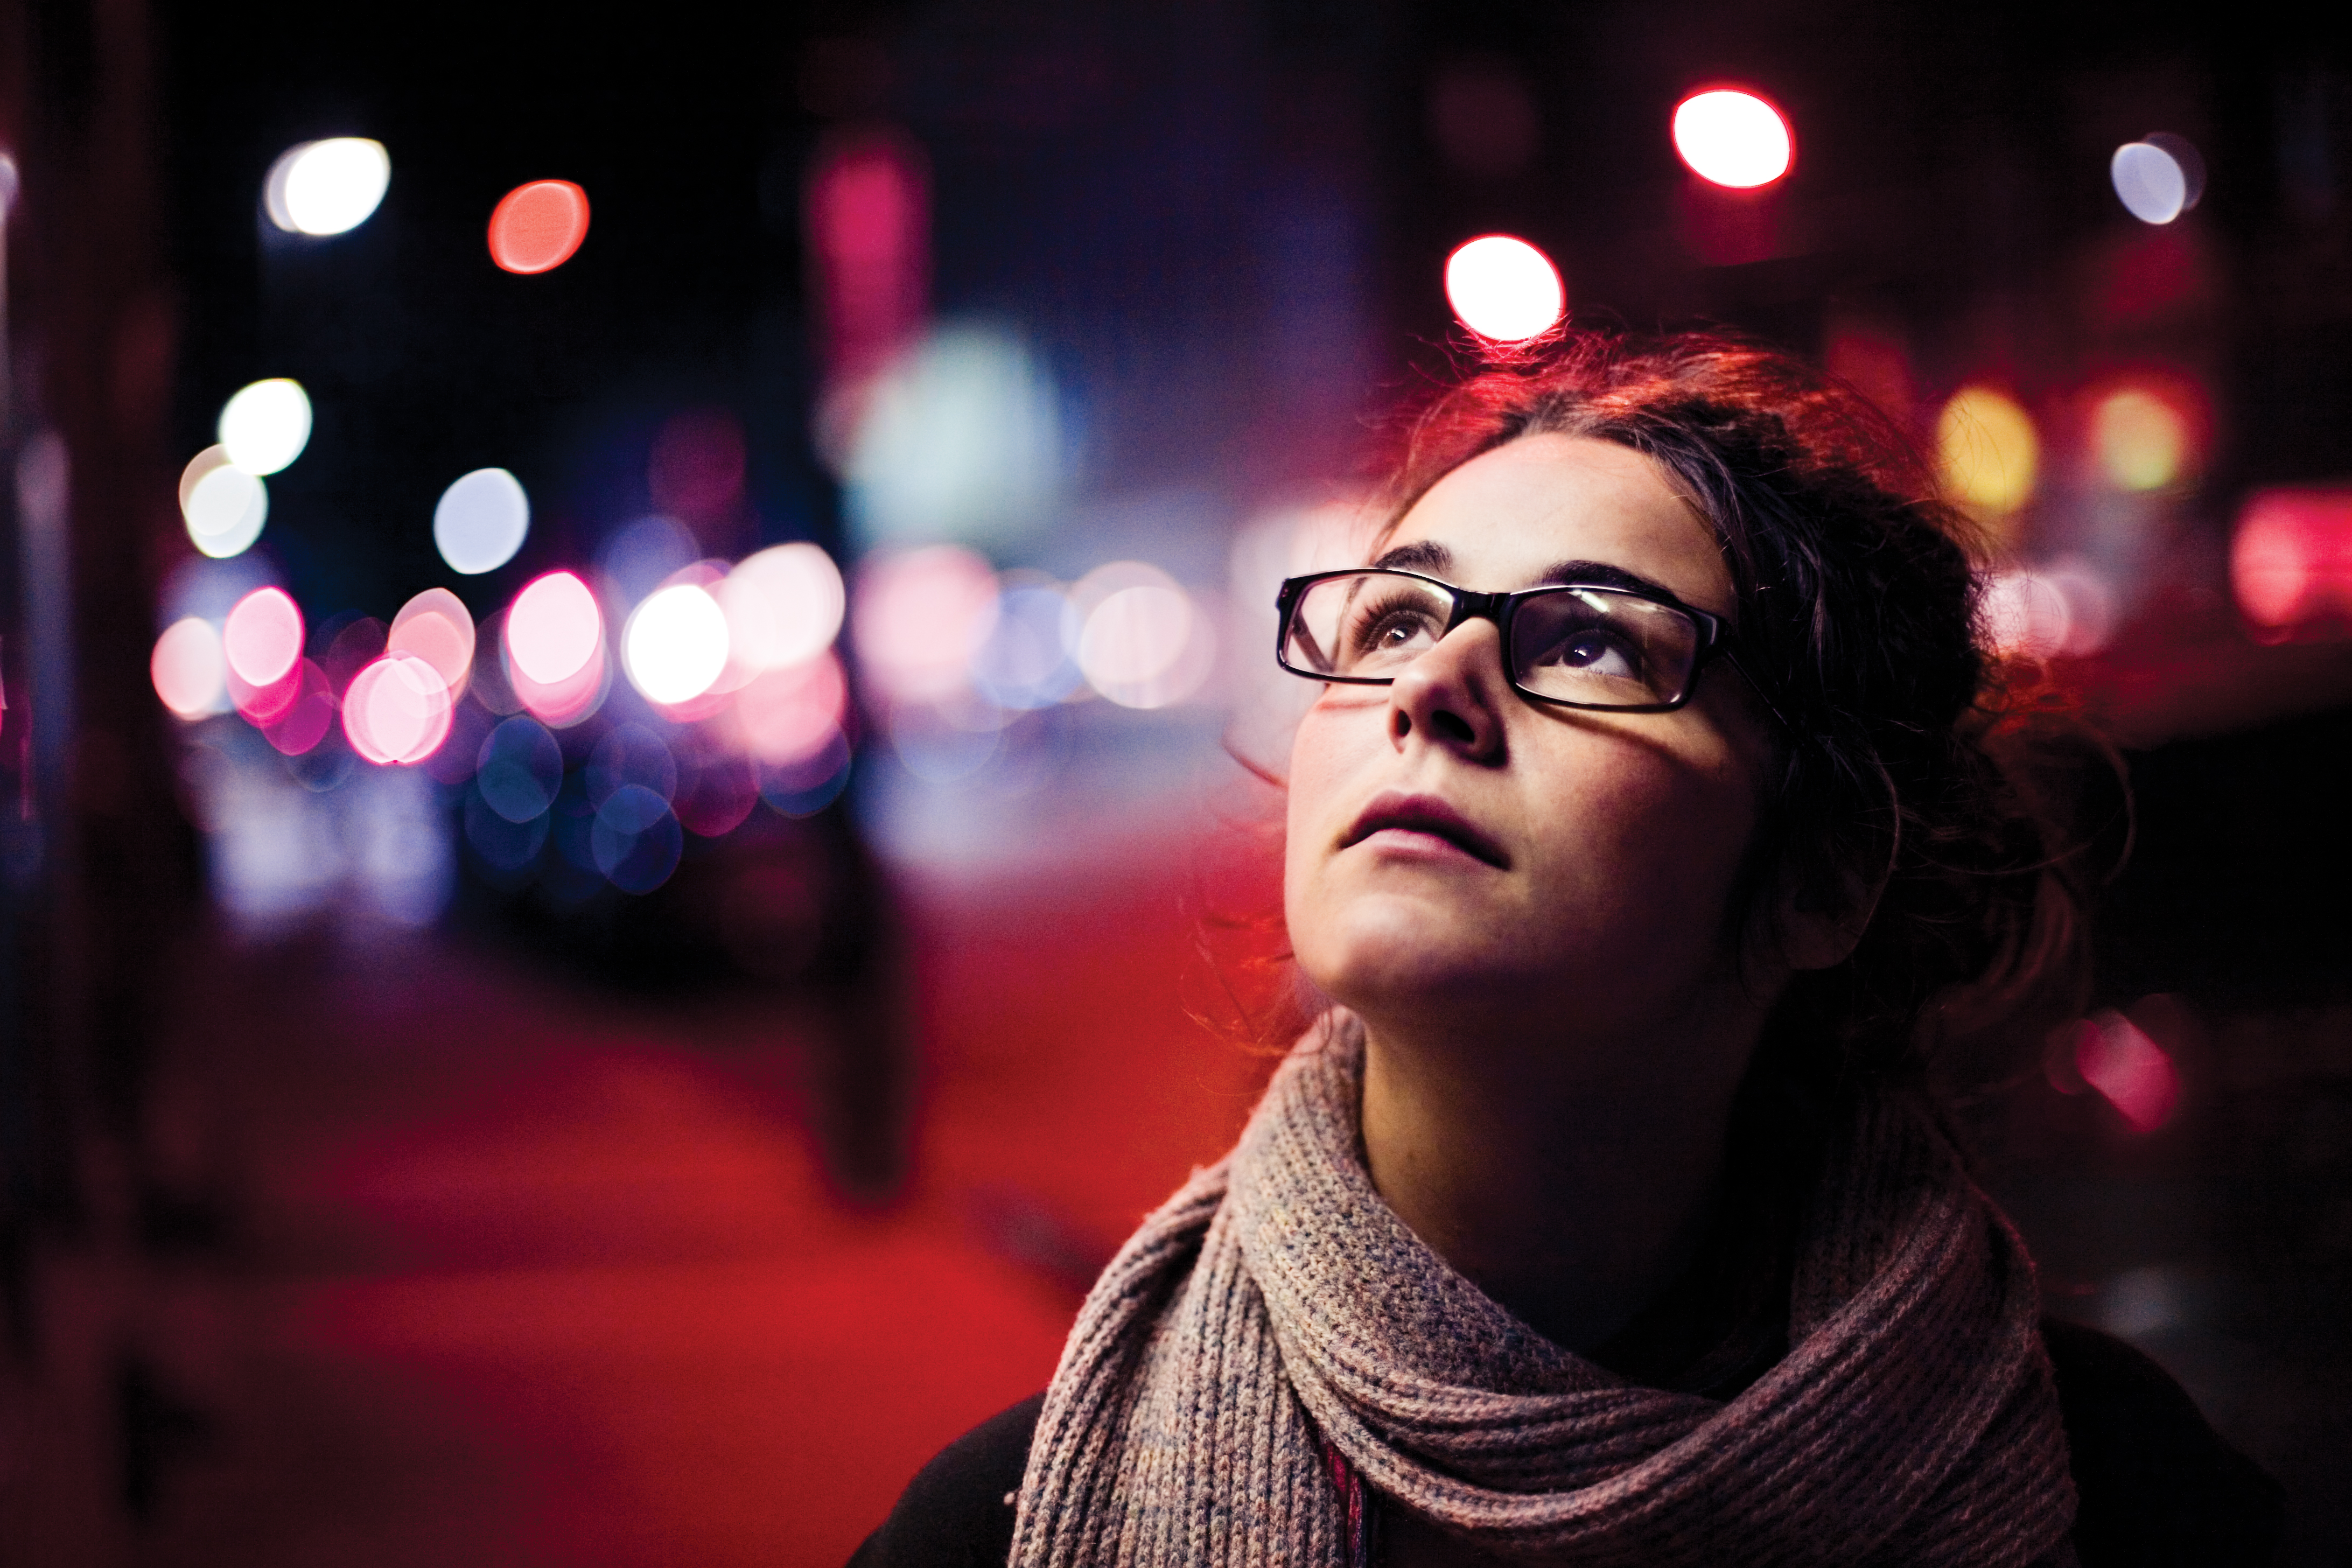
Camera Terminology
Before we discuss the way specific cameras work, we should spend some time defining the terms that we’re going to be using.
Stop of Light – When we talk about exposure, we are really talking about the amount of light in a shot. That light is measured and qualified in a number of different ways, so we use the term “stop” to describe the process of increasing or decreasing the light in an image. A stop of light has no fixed value; instead, doubling the overall amount of light is the same as going up one stop and halving the overall amount of light is the same as going down one stop.
ISO, ASA, and Gain – ISO, ASA, and gain all measure the sensitivity of a digital sensor – or piece of film. As the sensitivity is raised, the image becomes brighter – but noise and grain also become more prevalent, which makes the overall quality of the image worse. ISO is the most commonly used of the three terms, especially in stills photography. Most cameras have ISOs that start at around 100 – going up in stops, this number goes to 200, then 400, 800, 1600, 3200, 6400, and so on. As a general best practice, you should keep your ISO as low as you can, to ensure the best quality image. ASA is an outdated term that was used before ISO was adopted, but you may still find it on some older cameras. Gain is used more often on dedicated video cameras and is usually just measured as low, medium, or high.

Frame Rate – Frame rate describes the number of frames in a second of film or video. The standard frame rate for cinema is 24 frames per second and that is the frame rate we will use the most often. Television in the US is broadcast at 29.97 frames per second (long story – check out the video below for the details), whereas television in the UK is broadcast at 25. The higher the frame rate, the smoother video will look – some video is now recorded and presented at 60 frames per second in order to show more subtle movement. There have been experiments with showing cinema at higher frame rates, but most viewers actually prefer the look of 24. Video can also be recorded at a high frame rate – 60, 120, 240 or greater – and then converted to a lower frame rate (usually 24) to create slow motion footage.
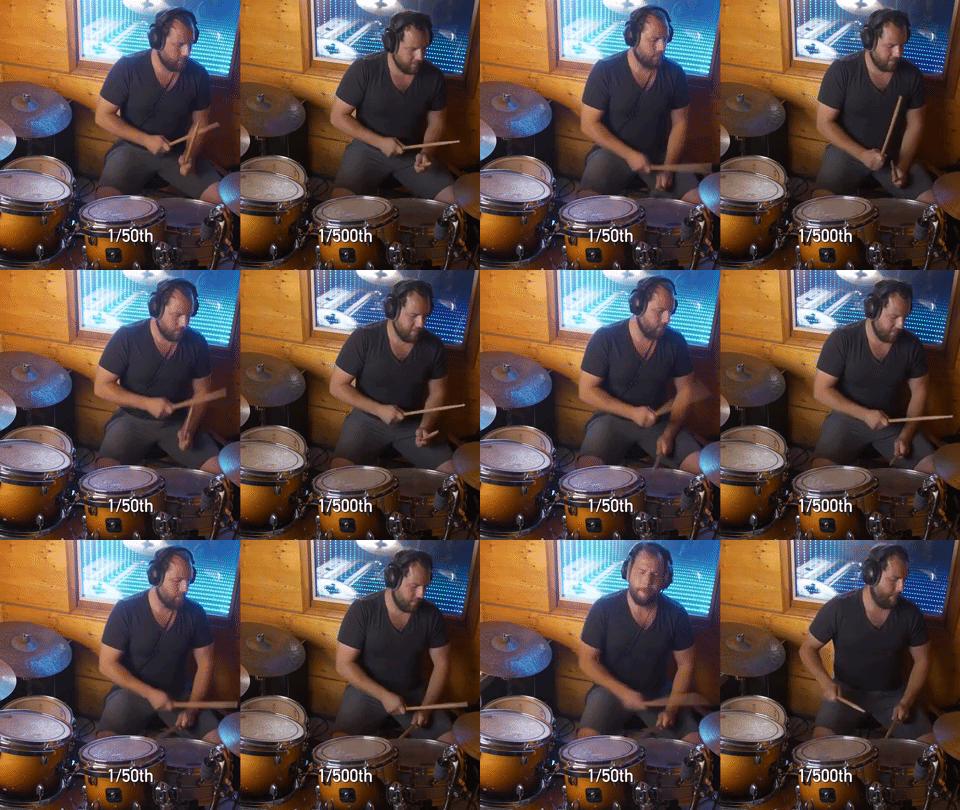
Shutter Speed and Shutter Angle – We know that each frame of video is a still image – a photograph. The exposure time for each frame is called the shutter speed. Shutter speed is measured in fractions of a second: 1/30, 1/60, 1/125, 1/250, 1/500, and so on. In still photography, using a fast shutter speed – say, 1/500 of a second – will freeze the action. Using a slow shutter speed – say, 1/10 of a second – will create more motion blur. In video, the same principle applies: using a fast shutter speed will result in “jittery” footage without motion blur and using a slow shutter speed will result in footage with lots of motion blur.
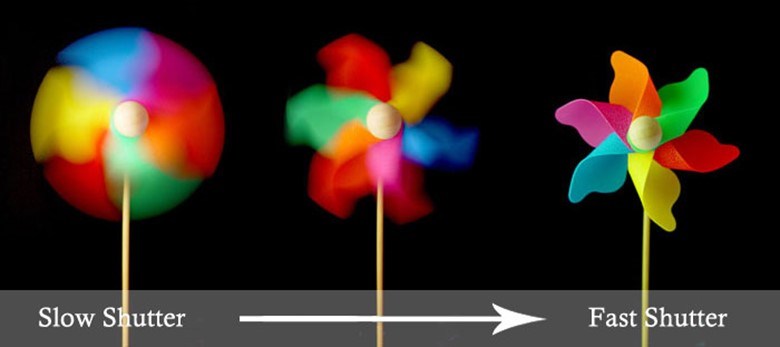
There are a few things to keep in mind when setting shutter speed for video. The first is that your frame rate will affect the minimum shutter speed you can use. If you are filming at 24 frames per second, then the slowest shutter speed you can use is 1/24 of a second. The general rule for “natural” looking footage is to use a frame rate of roughly double your shutter speed – so footage shot at 24 frames per second will look normal at 1/48 or 1/50 of a second.
Shutter speed also affects the brightness of the image – slower shutter speeds allow more light to hit the sensor (because the shutter is open for longer) and create a brighter image; faster shutter speeds do the opposite.
Shutter angle is a film and video-specific term that describes the same thing in a slightly different way – it measures exposure time relative to the frame rate. Mechanical film cameras use round shutters that rotate past the exposed film. A 180 degree shutter creates an exposure of double the frame rate – 1/48 of a second when filming at 24 frames per second and 1/60 when filming 30 frames per second. A 90 degree shutter creates an exposure of four times the frame rate – 1/96 when filming at 24frames per second and 1/120 when filming 30 frames per second. You can use the following formula to convert the shutter angle to shutter speed: (Frame Rate x 360) / Shutter Angle = Shutter Speed. If that’s too much math, just remember that a 180 degree shutter is double the frame rate and you should be fine.
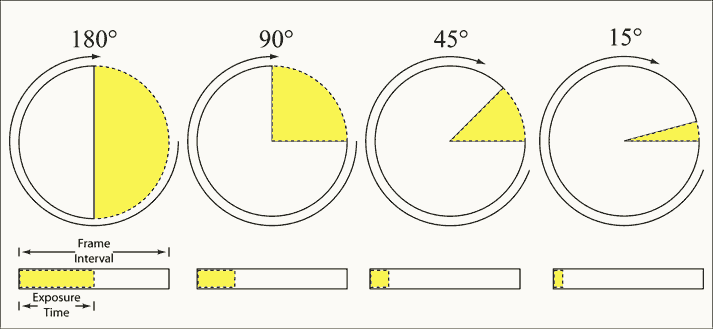
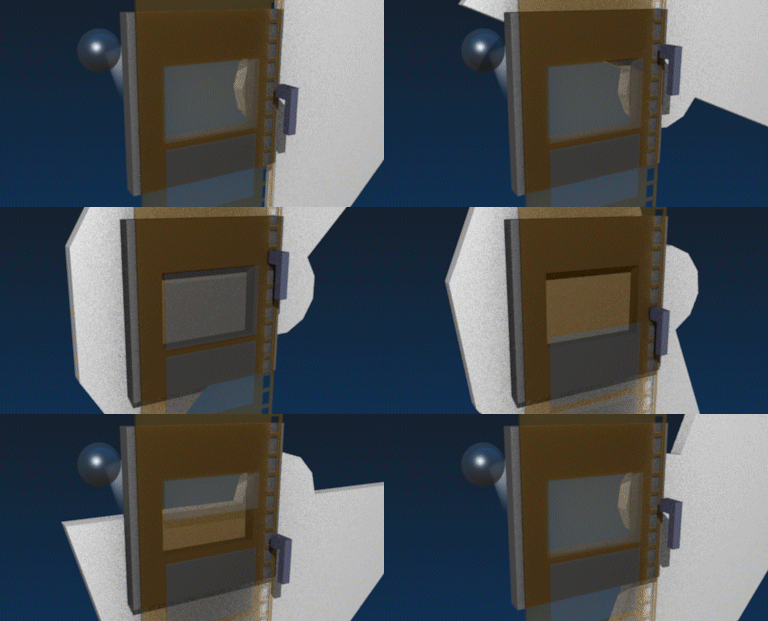
Aperture and Iris – Before light enters the camera, it passes through the aperture – also known as the iris – of the lens. The aperture is an adjustable opening used to control the amount of light entering the camera. As the aperture gets bigger, more light enters and the image gets brighter. However, a larger aperture also means that a narrower area of the image will be in focus. If you are filming an interview and you want the background to be blurry and only the subject to be in f0cus, you should use a larger aperture; if you want both the subject and the background to be in focus, you should use a smaller aperture. We’ll discuss the way aperture is measured later, but you should know that a lower number is a larger aperture and a higher number is a smaller aperture.
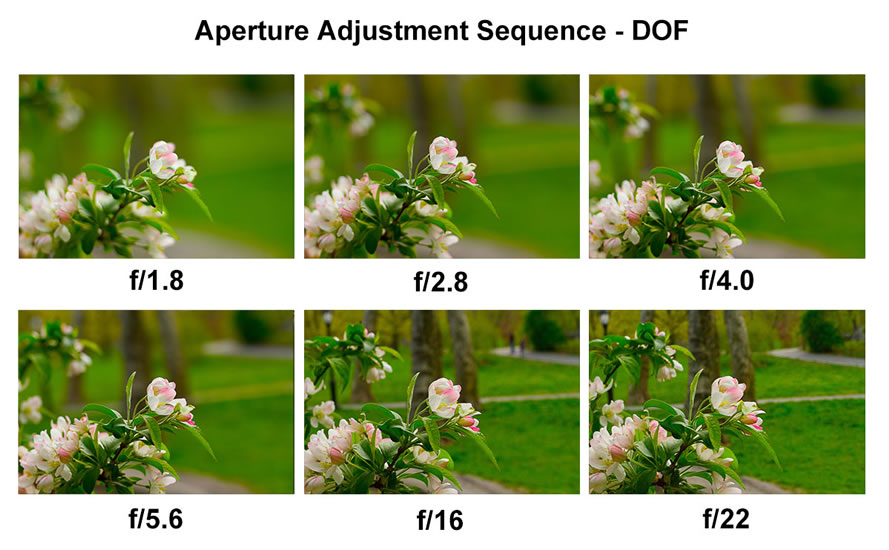
Depth of Field – A camera’s lens is focused at a specific distance; many lenses have focus markings in feet or meters. This measurement is the distance between the area in focus and the sensor of the camera. The amount of space around that in-focus distance is the depth of field. A large depth of field has a large area in focus; a shallow depth of field has only a narrow area in focus. As discussed above, depth of field is controlled by adjusting the size of the aperture.
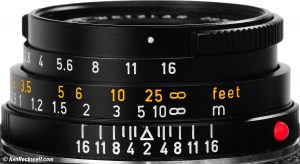
Bokeh – Bokeh describes a specific characteristic of images with a shallow depth of field: the round areas of out-of-focus light. The quality of bokeh is something you will likely see discussed if you read a review of a camera lens – desirable bokeh is generally smooth and symmetrical. Cheaper lenses tend to produce bokeh that is either asymmetrical or hexagonal. Bokeh is very subjective, but it’s discussed often, so you should know the term.
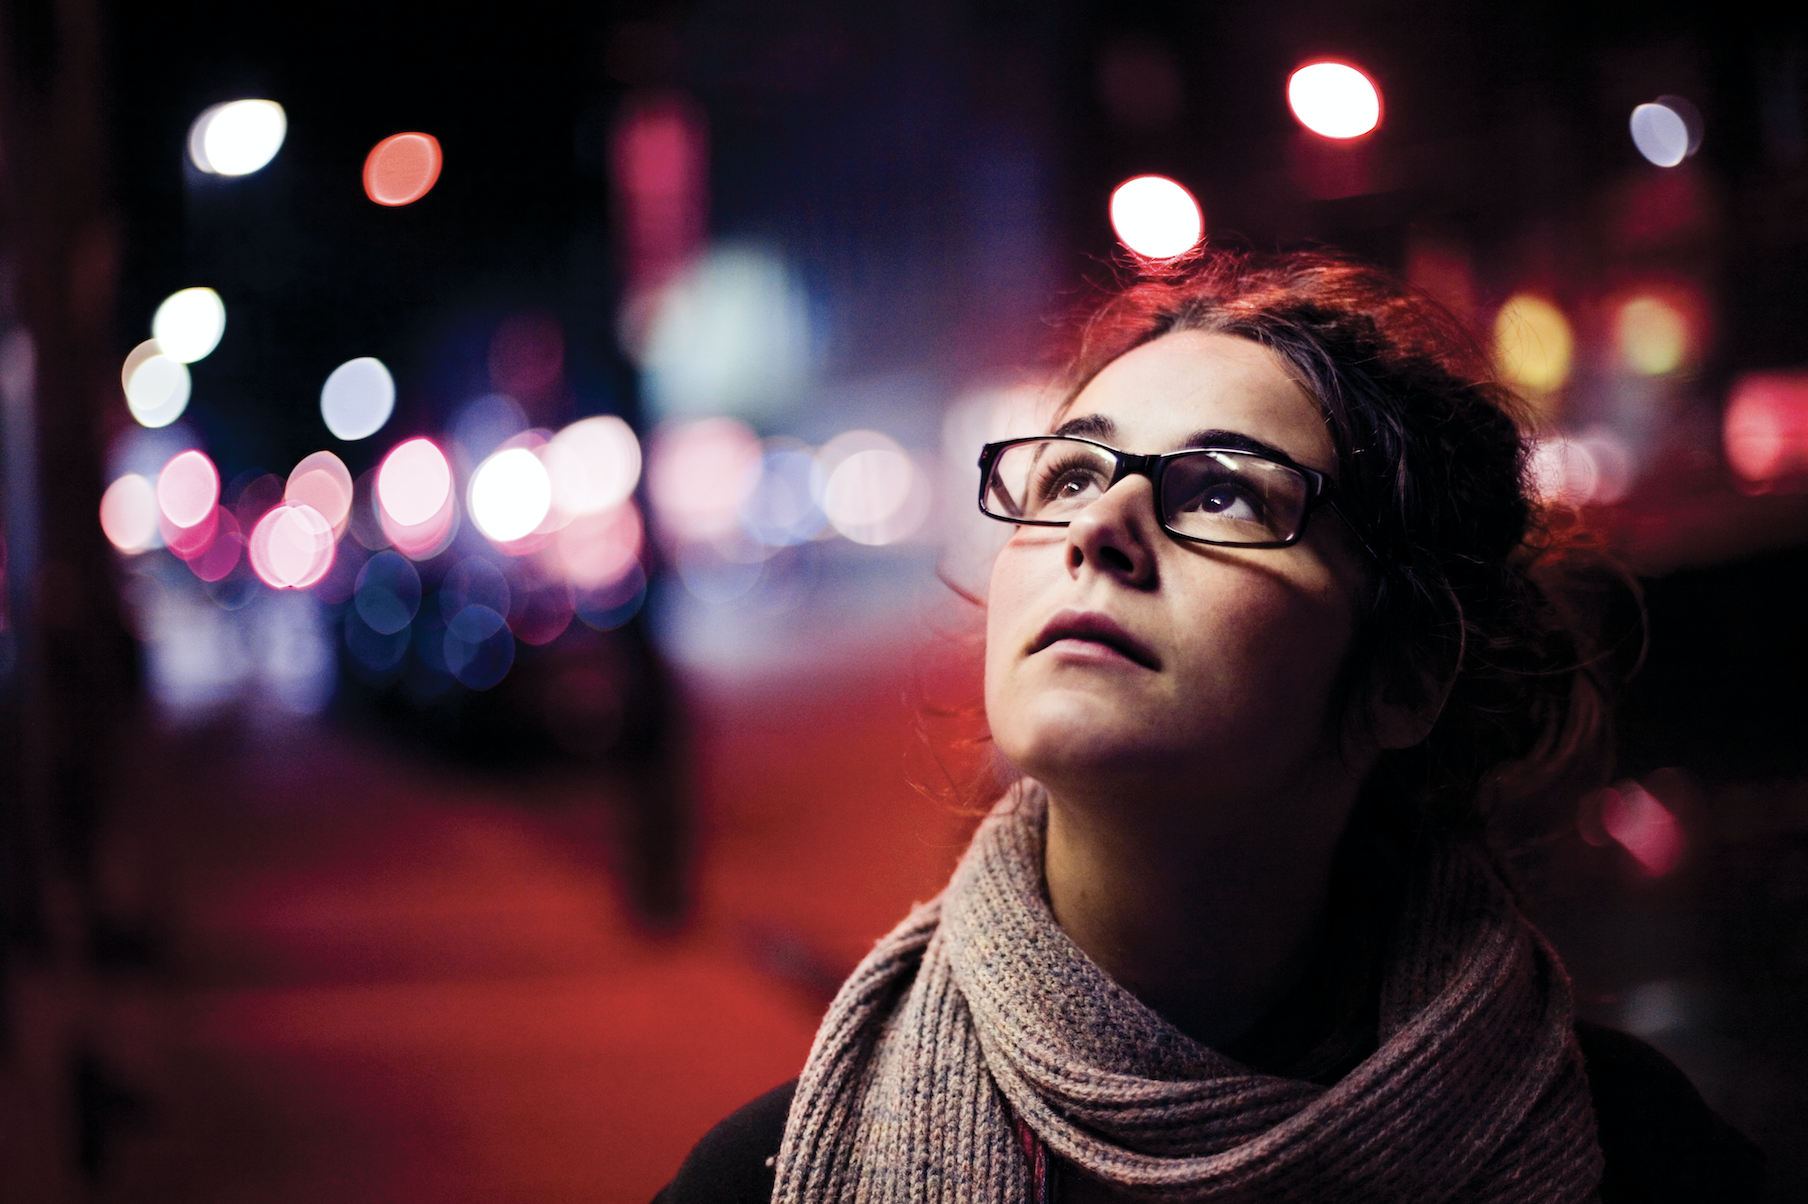
Focal Length and Angle of View – Both focal length and angle of view are used to describe the image captured by a lens. A lens with a short focal length will capture a wide field of view and a lens with a long focal length will only capture a narrow field of view – in other words, short focal lengths are “zoomed out” and long focal lengths are “zoomed in.” Focal length is measured in millimeters and it describes the distance between the point where light converges within the lens and the sensor (or film) of the camera.
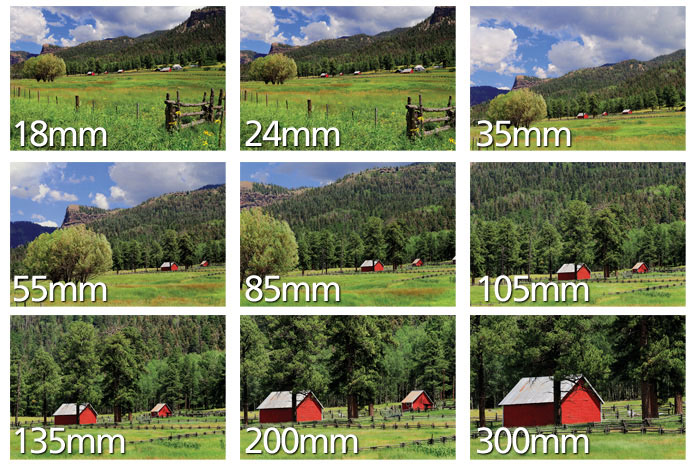
What the focal length doesn’t take into account is the size of the sensor being used in the camera. We’ll get deeper into sensor sizes later, but it’s important to understand that cameras with smaller sensors “see” less of the image and therefore look more zoomed in. So, the exact same lens might look different on two different cameras. We can get around this by converting focal lengths to a universal equivalent – or by simply using angle of view. Angle of view is a measure of how much of a scene is visible – in the image above, the 18mm shot represents around 100 degrees and the 300mm shot represents around 8 degrees. Around 50 degrees is considered a “normal” angle of view, since it closely mimics the way our eyes naturally see.
