Greatest Hits
Thanks for all of your hard work and creativity this semester! Here’s a short highlight reel with clips taken from projects completed over the last few months.
Greatest Hits
Thanks for all of your hard work and creativity this semester! Here’s a short highlight reel with clips taken from projects completed over the last few months.

Behold the Trinity
Want to combine the benefits of a gimbal, Steadicam, and crane in a single package that can handle a heavy cinema camera? Check out the ARRI Trinity and Maxima system – it’s a bargain at $60,700.
Still Rolling…
Can’t get enough long takes? Check out Cinefix’s list of the top twelve best, StudioBinder’s three strategies of utilizing them, and Aputure’s four-minute tutorial on how to create them yourself.
Don’t Ditch That Slider Just Yet…
Gimbals allow filmmakers to capture a variety of moves, including variations on dolly and slider shots. However, that doesn’t mean that sliders are unnecessary. Here are a few videos comparing the two pieces of gear.
One and Done
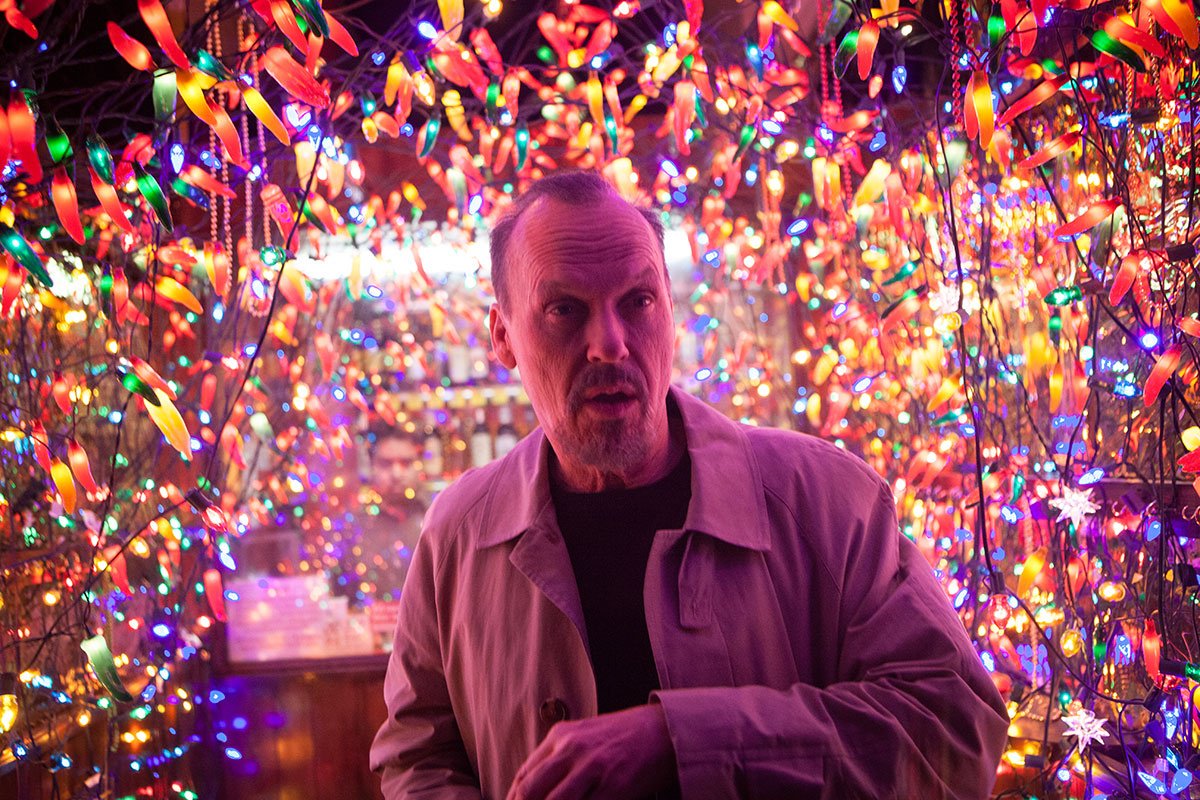
A long take or “oner” is when an entire scene is captured in a single, unbroken take. These are technically difficult shots that require a lot of planning and coordination. The history of cinema is full of incredible long takes; some frequently-cited examples are in Touch of Evil, Goodfellas, Boogie Nights, Children of Men, and Gravity, but there are many more. There are even films that appear to be a single continuous shot; Hitchcock’s Rope and Iñárritu’s Birdman use clever cutting to simulate a continuous take. Alexander Sokurov’s 2002 film Russian Ark is an ambitious, unconventional historical drama that was filmed in a single take at the Russian Hermitage museum.
There are also many notable long takes from recent television. The “Two Storms” episode of The Haunting of Hill House (discussed in a previous blog post) is comprised almost entirely of long takes; there’s an epic long take fight scene in the first season of Daredevil; and the first season of True Detective has an incredible long take in the fourth episode, “Who Goes There.”
Because they are so technically demanding, many long takes are actually simulated using editing (such as cutting on a whip pan or when the camera is blocked) or visual effects. The famous car chase in Children of Men is comprised of several shots captured over a three day shoot and Birdman actually has over 100 hidden cuts. Check out this video from Fandor for additional details:
Long takes are fun and flashy – they’re a way for the director and cinematographer to show off for the audience. Of course, that doesn’t mean that they are appropriate for every situation. Check out the following video from Now You See It, which analyzes the limitations of the oner.
Get Vertical
We’ve spent some time discussing “impossible” camera moves already – Steadicam and gimbal shots that give the impression of the camera floating smoothly through an environment. This week, we’ll be looking at another impossible move: the epic, bird’s-eye crane shot.
The “classic” crane shot gives a sense of scale by pulling away from the subject and revealing the wider environment. This can be done to gradually reveal the consequences of a conflict; or to emphasize a feeling of hopelessness in a character; or to show release after an intense trial. However, crane shots can also be subtler – for example, you might use a crane to follow a character as they descend a ladder in a relatively simple motivated move.
The following crane shot from the 1939 Civil War drama Gone with the Wind is one of the most famous in movie history. To achieve the shot, the filmmakers brought in a construction crane from a ship yard – conventional film cranes couldn’t reach the desired height. A concrete runway had to be poured to support the weight of the equipment and hundreds of extras were interspersed with hundreds of dummy bodies.
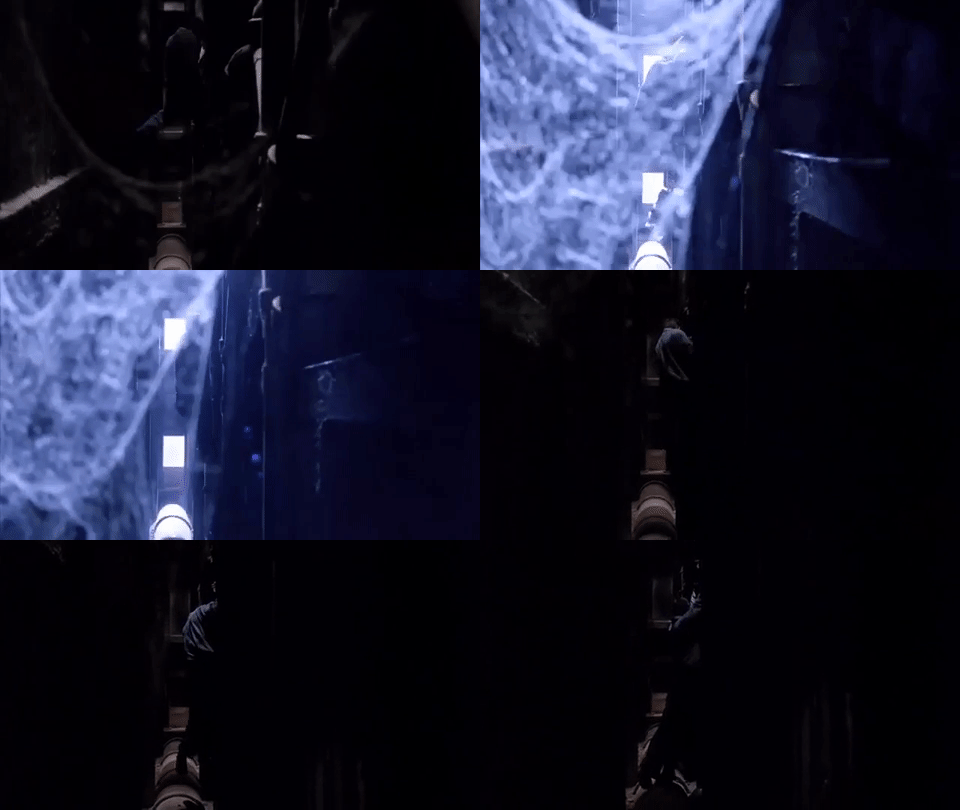
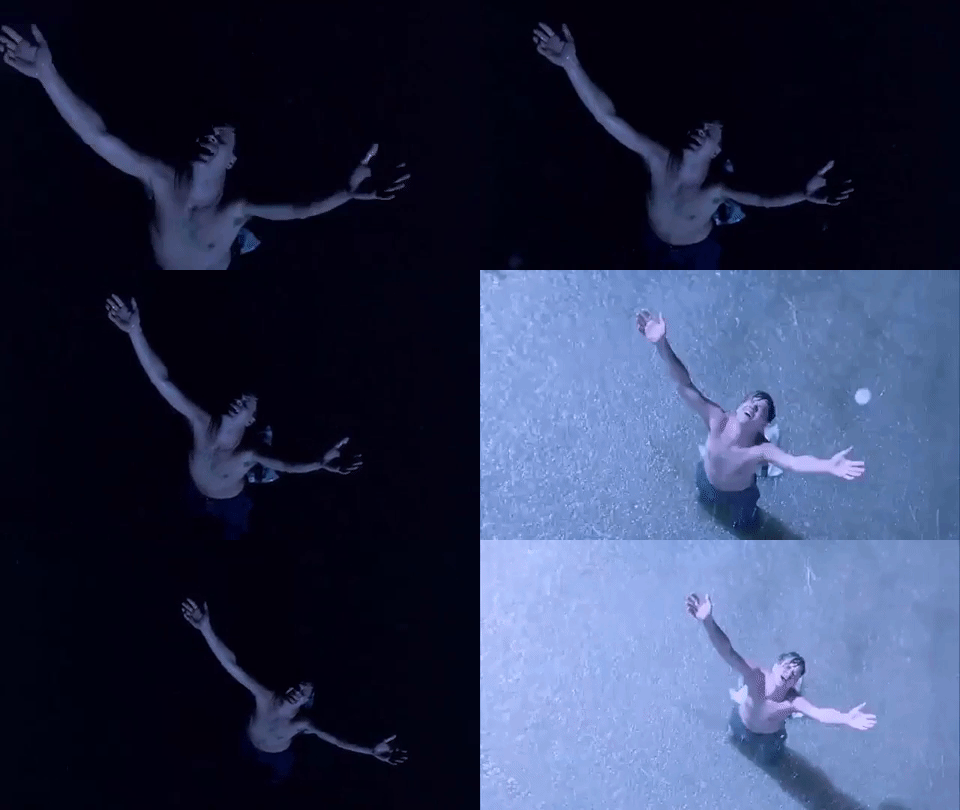
One of the other classic crane shots from cinema history takes place at the end of the 1994 film The Shawshank Redemption, when Andy Dufresne finally escapes the titular prison. The moment has been riffed on and parodied over the years, but it’s undeniably powerful. There are actually crane shots throughout The Shawshank Redemption – in the same sequence, the camera follows Andy vertically through the bowels of the prison. Moments like these aren’t as flashy, but they show the versatility of the crane as a movement tool and establish a pattern of camera movement that makes the final shot feel like a natural progression.
The Cut of Your Jib
We have a relatively compact crane in our equipment collection: the Porta-Jib Traveller, which folds down into two long cases for transport. The crane has a travel distance of about six feet. That might not sound like much (we won’t be recreating that Gone with the Wind shot any time soon), but it can still create very dynamic shots.
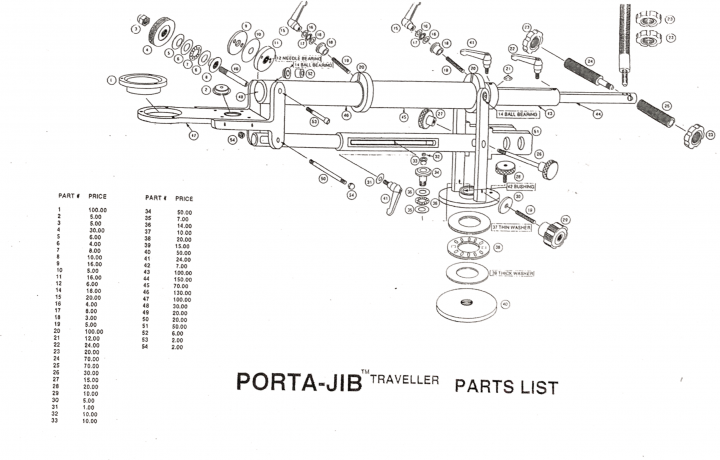
When you first pull the Traveller out of its boxes, it can seem dauntingly complicated. The jib folds up onto itself in order to fit into a case. There are a lot of moving parts, joints, and extensions. The crane is also fairly heavy, so it’s easy to pinch a hand in the machinery as you are setting it up. I recommend mounting the jib to its tripod base and then slowly unfolding the boom arm. Once you’ve assembled it once, it will start to make sense – just go slowly and be careful.
You can download the instruction manual for the Porta-Jib Traveller at this link. There’s also a painfully low-res assembly video below.
When you have the crane assembled, you can use the 100mm bowl mount to attach a fluid head for mounting the camera. You’ll also want to add weight to the back of the jib to balance the camera. You should be able to easily move the camera around the jib’s full range of motion when everything is balanced.
Here are some tips for getting successful crane shots:
Feeling Unmotivated?
Need a refresher on motivated and unmotivated camera movement? Check out this great video essay, which focuses on a small, but impactful moment in the film Frances Ha.

Project 8 – Collaborate and Create
We’ll continue to work on some in-class projects over the next few weeks, but it’s time to discuss the final project for this class, Lost/Found. This will be a collaborative project, so we’ll all be contributing to the finished piece.
There will be two main parts of the finished film: one representing the theme of “lost” and the other representing the theme of “found.” The class will work in two groups of three, with each group tackling one half of the story.
To keep things simple, I’m assigning the groups as follows:
Group 1/Lost: Koto, James, Gray
Group 2/Found: Blake, Alex, Julie
Brian will assist both groups as much as possible during production and will work with them to create music for the finished piece.
Here are the parameters:
Once More with Feeling
Here are a couple more videos on Spielberg: his “point of thought” shooting style and his use of long takes.
Project 7 – Recreating More Famous Moves
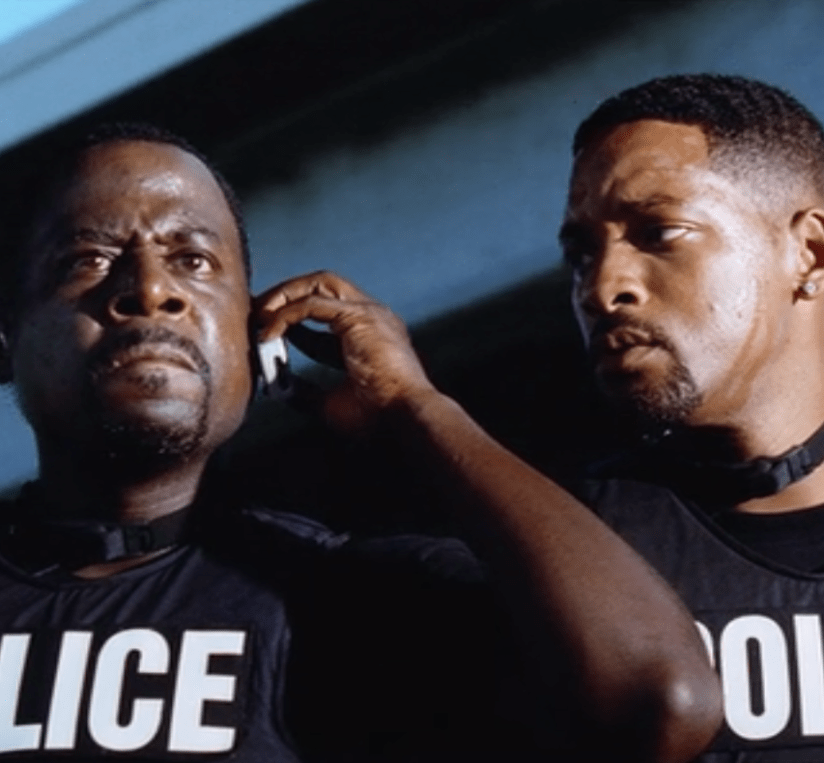
Let’s continue to recreate some famous camera moves! We’ll start out with Michael Bay’s epic slow motion spin; then we’ll try an epic crane shot, as seen in the The Shawshank Redemption.


So Smooth It’s Scary
Netflix’s The Haunting of Hill House is a spooky show with high production values. One standout episode of the first season was “Two Storms,” which was almost entirely comprised of very long takes filmed on a Steadicam. There are five long takes in total, ranging from five to seventeen minutes, each of which required meticulous planning and a very talented camera operator. Check out a featurette about the episode below and read through show creator Mike Flanagan’s account on Twitter (courtesy of Collider)
for more details.

Choices, choices…
At this point in the semester, we’ve gone over several different cameras and several different kinds of cameras. As a quick recap, let’s review what equipment is ideally suited to different filming situations.
Event video – When you film an event, you probably want long battery life and long recording times, as well as solid audio capabilities. That makes a dedicated video camera an ideal choice. In our collection, the Panasonic AF100 and Sony AX2000 probably have the best battery life and they both feature dual card slots for long recording and powered XLR inputs for audio capture. They also both have built-in ND filters, which makes them versatile choices for unpredictable situations.
The Sony FS5 would be another good option for event video. Its battery life is very good – although not as good as the AF100 and AX2000 – and it shares the other benefits of a high-end camcorder. It also has modern features such as slow motion recording and 4K resolution.
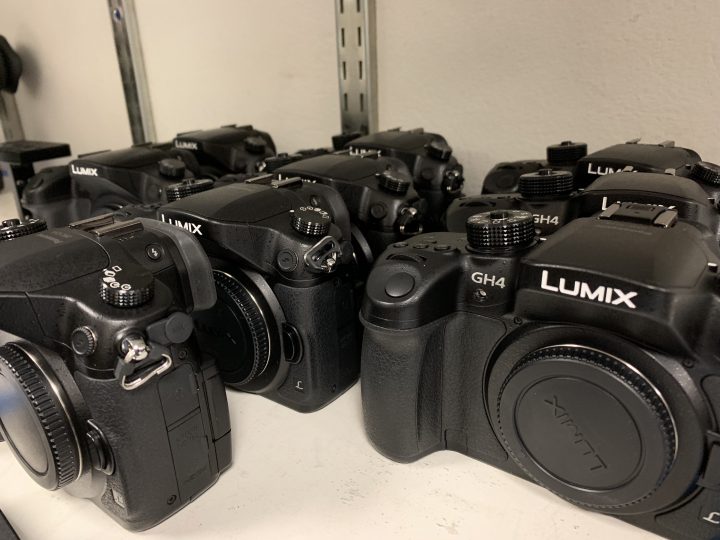
If audio isn’t critical for the event you’re filming – for example, if you’re creating a highlight reel from an event, rather than documenting the event – then a hybrid camera such as the Panasonic GH3 or GH4 might be a good option. If you need to navigate through a crowd, the size of a small hybrid camera is a real asset.
Whichever camera you use, I recommend carrying a versatile zoom lens for event video. The native Sony 18-105 f/4 is a good option for the FS5 and either the Panasonic 12-60 f/3.5-5.6 or 14-140 f/4-5.8 are ideal for the GH3, GH4, and AF100. These long zoom lenses aren’t ideal for low light, however, so you may want to bring along a fast prime lens if your event is taking place at night.
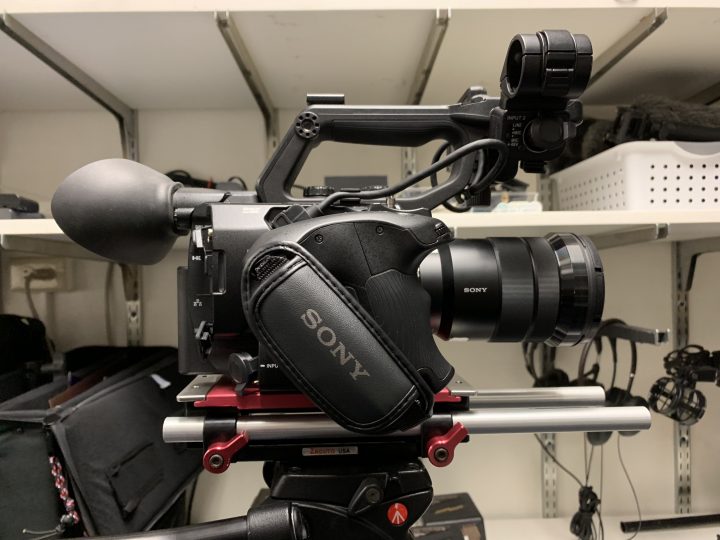
Interviews – When you’re filming an interview, the audio is probably even more important than the video. To ensure the best audio quality possible, you should use a camera with powered XLR inputs, like the Panasonic AF100, Sony FS5, or Sony AX2000. You could also use the Sony RX10 II with its optional XLR adapter, but the smaller sensor in that camera might not create the kind of depth of field you want for a formal interview.
Another option is to use a hybrid camera for the video and to capture sound to an external recorder. This approach works well, but it does create more work in post-production, as you’ll need to sync up the sound from two different sources.
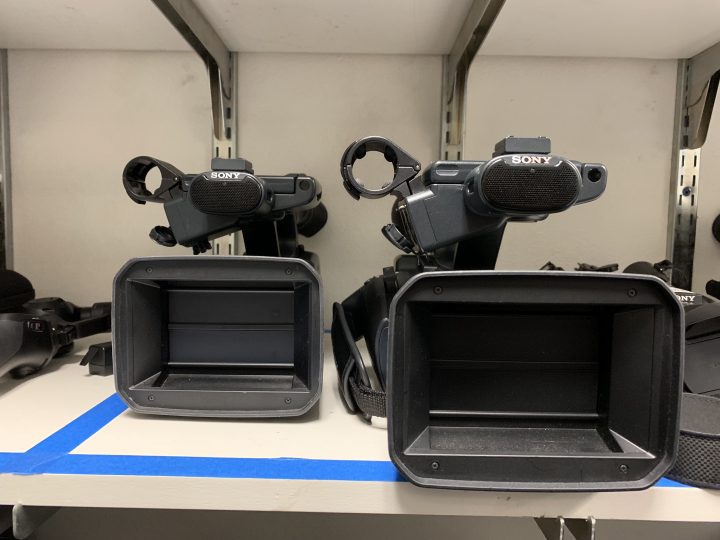
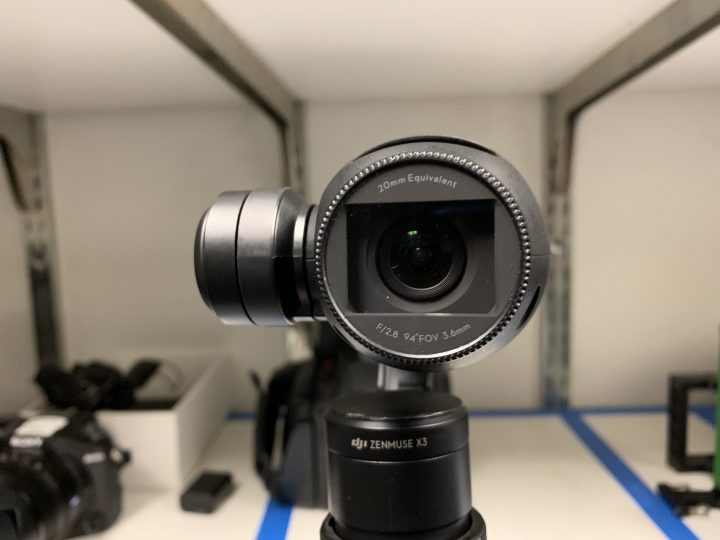
Music video – Music videos are a lot of fun to film, because you can really experiment and be creative. Since the audio will be replaced in the finished video, hybrid cameras like the GH3 and GH4 are great options. If you want some interesting specialty shots, such as dramatic slow motion or stabilization, you could also use the RX10 II or the DJI Osmo.
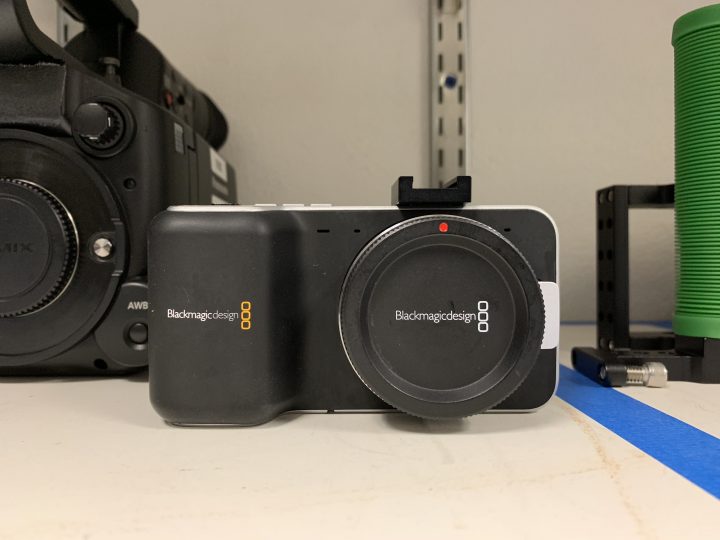
In my personal experience, music video shoots tend to be pretty fast paced – you are often trying to fit all of your filming into one hectic day and running around a lot to different locations. For that reason, I wouldn’t recommend using cameras that are too bulky or cumbersome. The BlackMagic Pocket Cinema Camera also probably isn’t the best option, since its battery life is so challenging.
Documentary – Documentary filming can take many different forms, so the best camera to use will vary a lot. If you’re filming in the field, you will probably want a small, versatile camera, such as the GH3 or GH4. For talking head interviews, you’ll want a camera with more advanced audio capabilities, like the AF100, AX2000, or FS5. You could also add an audio recorder to your setup.
Much like event video, documentary work often requires a versatile lens with a long focal range, with the option of a fast prime for low light work.
The Sony RX10 II is a good choice for documentary work, since the camera itself is lightweight and portable, it has a built-in lens with a wide aperture and a long range, and it can use powered XLR microphones through the use of its optional adapter. The camera does not have great battery life, however, so you should plan ahead and bring extras.
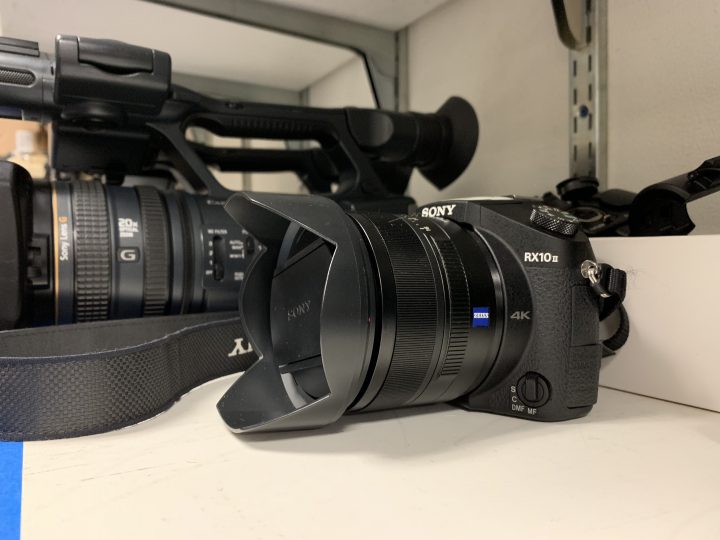
Narrative film – For narrative film, you usually want the best image quality possible. The BlackMagic Pocket Cinema Camera creates beautiful images and it’s a camera that was made to be accessorized for cinematic production. You should pair it with a good lens (probably a prime), an external audio recorder, external monitor, and any other necessary accessories to make the most of its capabilities.
The BMPCC isn’t always a practical choice, however. Provided your shots are well-lit and you use a good lens, the GH4 can also give you really beautiful footage. The FS5 will give you a better all-in-one camera solution and its easier to rig with cinematic accessories like a follow focus or matte box. Finally, if you need specialty shots, such as slow motion, you may want to consider the RX10 II.
Slow motion – As previously mentioned, the RX10 II is an ideal choice for slow motion. The FS5 has the same slow motion capabilities, but it comes in a much bulkier package and you may not need all of the FS5’s other advanced features. The GH4 can capture slow motion as well, although it tops out at 96 frames per second. The RX10 II can capture footage at ten times that frame rate, albeit at a much lower quality and only in two second bursts.
Time lapse and stop motion animation – The Panasonic GH4 has an excellent built-in time lapse app. You can set whatever parameters you like in terms of exposure settings, number of shots, and time between shots – the camera will take the predetermined number of images and then assemble them into a video file. If you’re interested in stop motion animation, the setting can also be used in a slightly different mode – you trigger the shutter manually and don’t choose the total number of images beforehand. As with the time lapse mode, the stop motion mode will then assemble the still images into a video file, which saves a lot of time in post-production.
Stabilized footage – Over the last few years, the weight capacity of three axis gimbals has gone up steadily. Our DJI Ronin S – a single-handed gimbal – can fly about seven pounds worth of camera gear. However, gimbals still work best with smaller cameras. While the Ronin S can technically carry the Sony FS5, you’d be better off using a Panasonic GH4, Sony RX10 II, or BlackMagic Pocket Cinema Camera. Of those three, the BMPCC will give you the nicest video quality, but the battery life and form factor of the camera make it challenging. I’d recommend either the GH4 or RX10 II. Both cameras can shoot in slow motion as well, which can help further smooth out footage. Of course, you could also use the DJI Osmo, which is designed to create smooth footage – just be aware of the limitations in terms of focal length and audio.
A Very Capable Camera
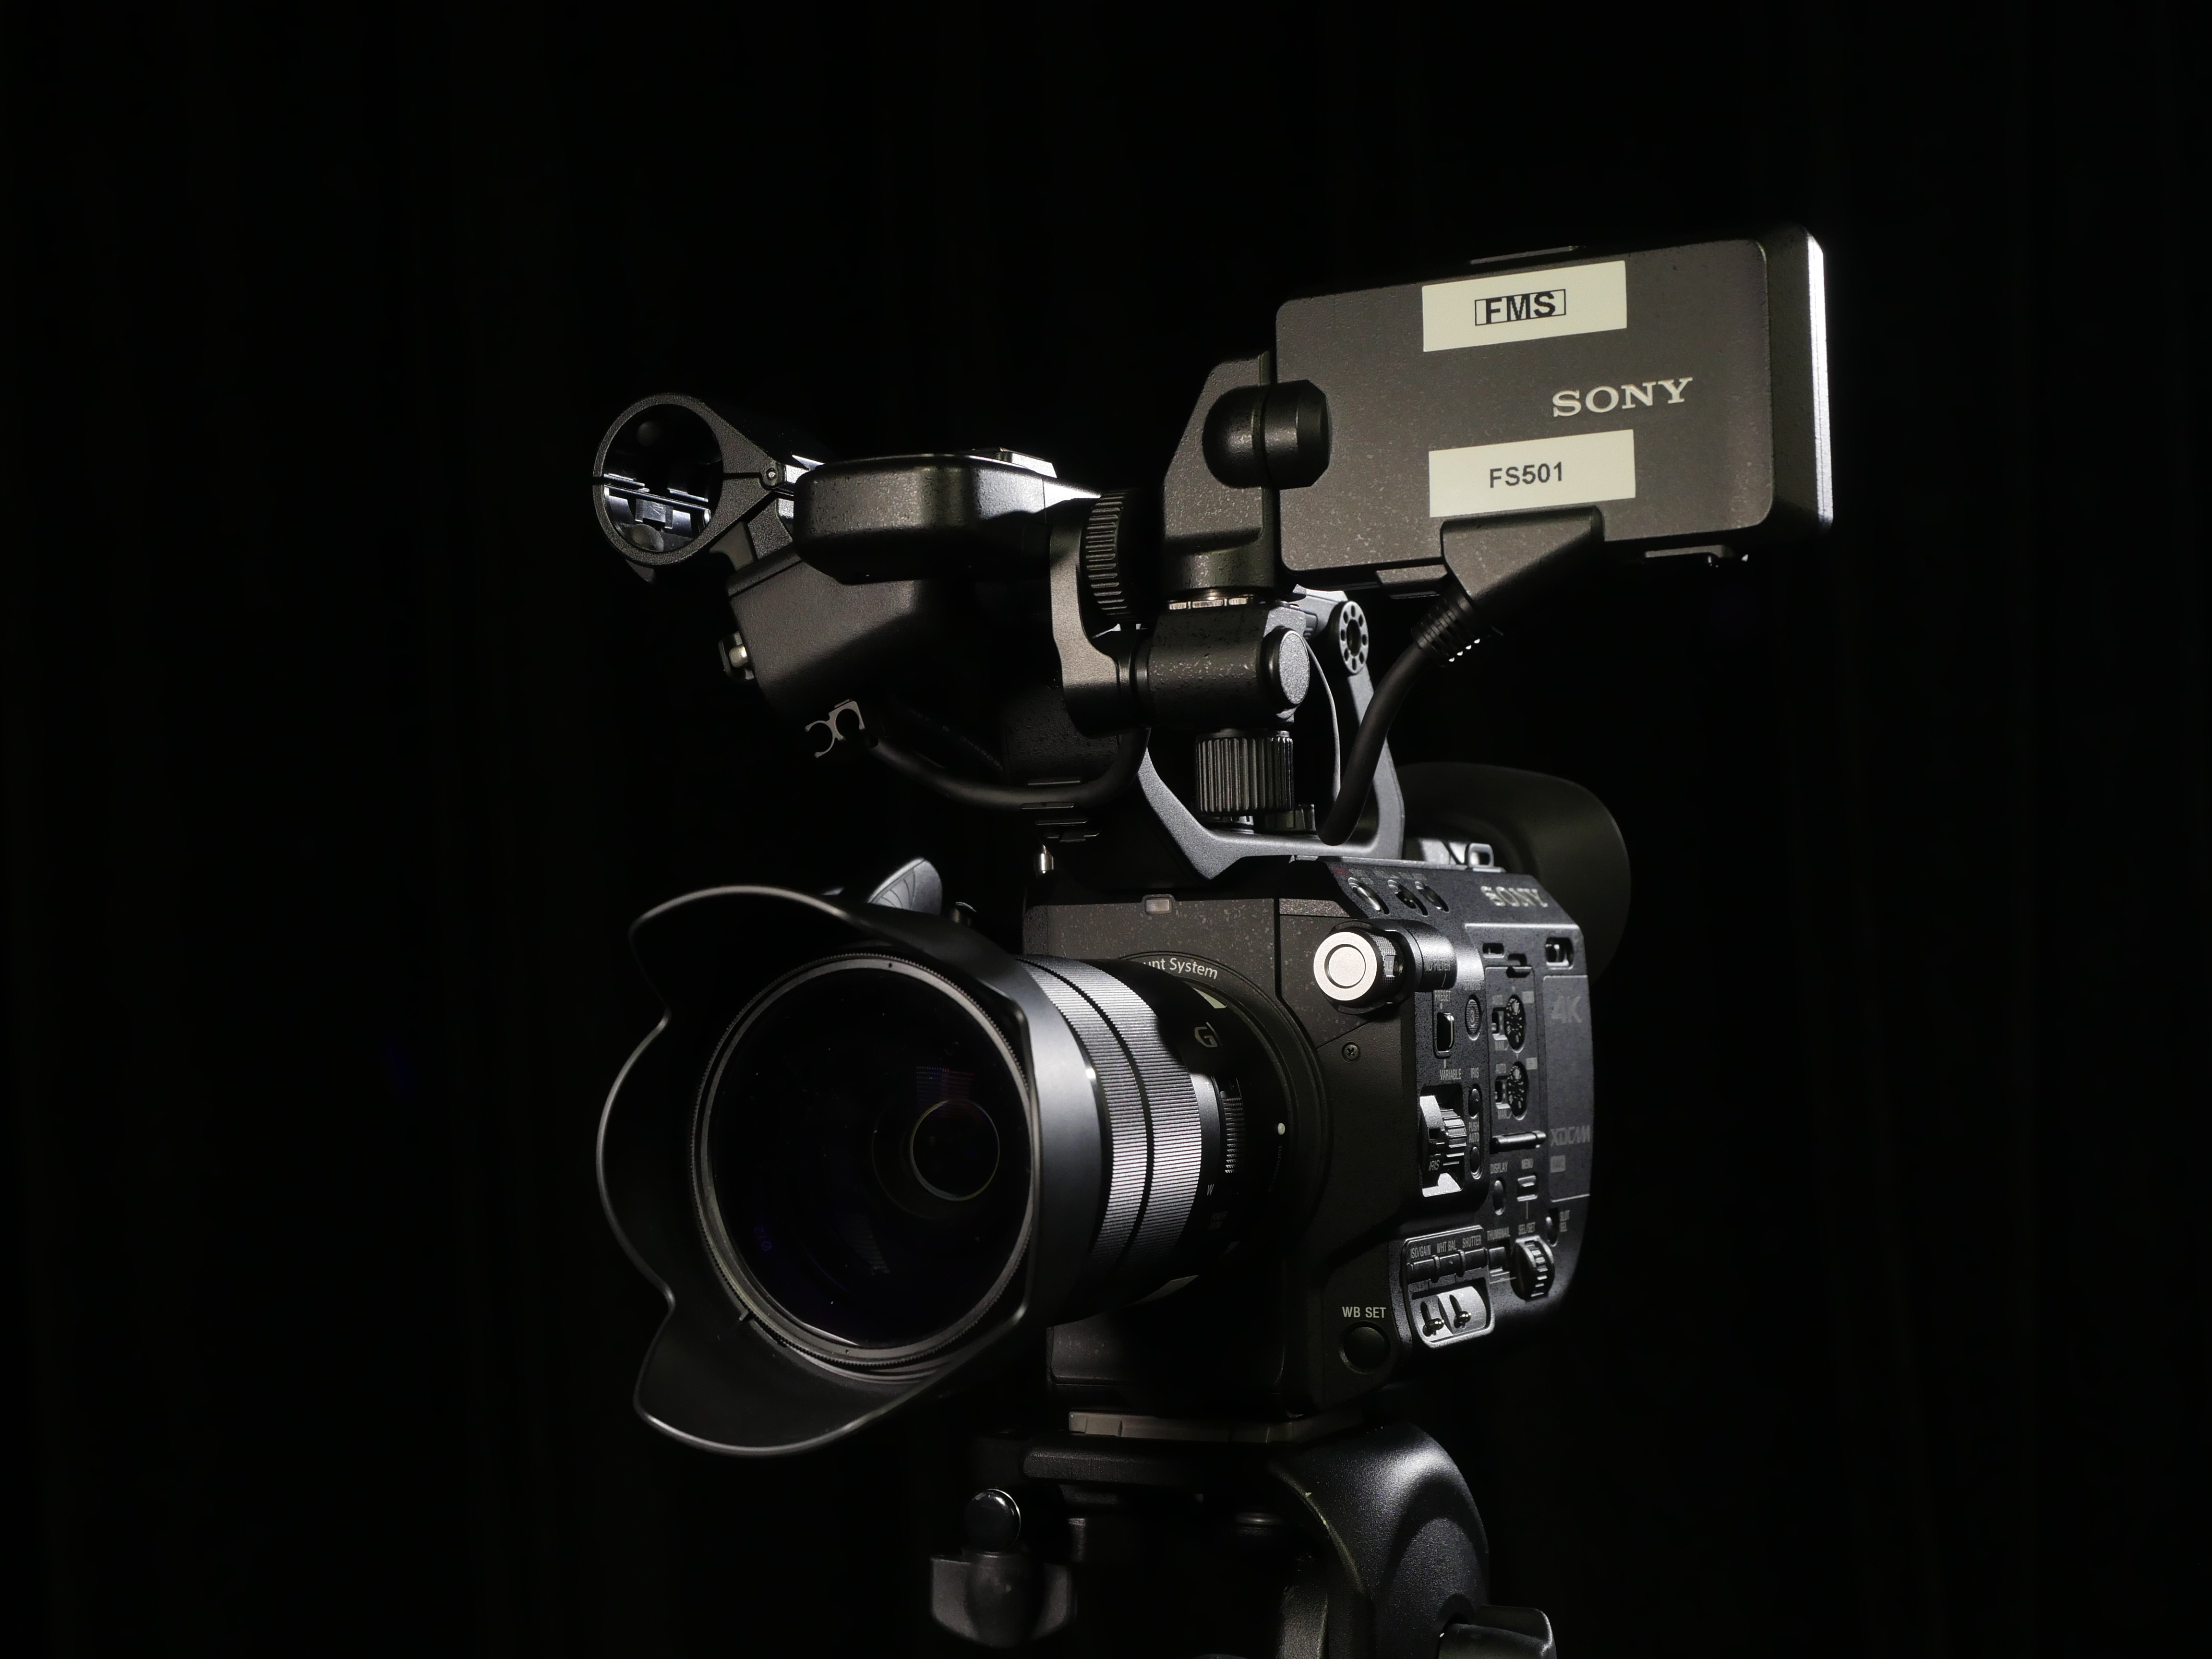
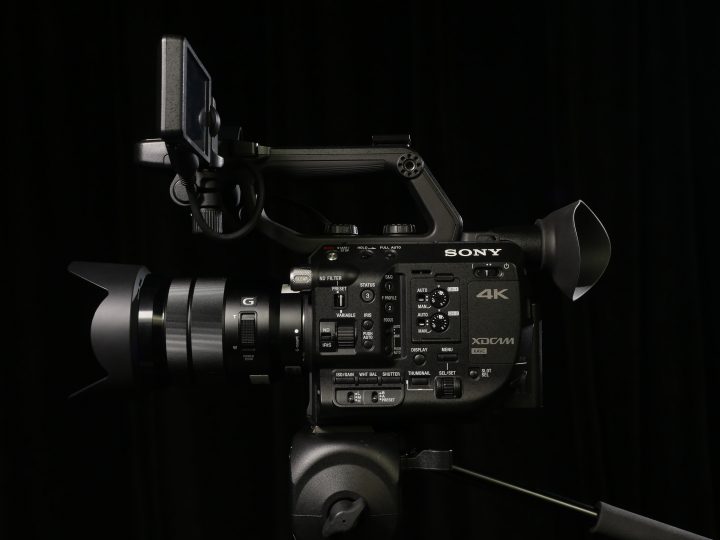
The layout and body style of the Sony FS5 should be familiar to you – it’s quite similar to the dedicated video cameras we looked at before, particularly the Panasonic AF100. The viewfinder, monitor, audio controls, and external buttons and dials are all in similar positions. The FS5 is essentially the same kind of camera as the AF100, but with newer features and updated specs.
In terms of functionality, the FS5 is the most well-equipped camera in the Film/Media Studies collection. It has all the benefits of a dedicated video camera – unlimited recording time, long battery life, dual media slots, built-in ND filters, robust audio options, tons of external controls – along with the features present on our newer hybrid cameras, such as 4K recording and slow motion options.
It also has a larger sensor than the other cameras in our collection: it’s an APS-C sensor, which has a 1.5x crop, compared to the 2x crop on our Micro Four Thirds cameras. That means it will do better in low light, create a shallower depth of field, and capture a wider field of view. I do want to stress that bigger sensors are not inherently better, but they do offer unique features.
In terms of lens options, the larger sensor and mount means that our Micro Four Thirds lens will not work with this camera. Our Nikon mount prime lenses can be used with an adapter, though. We also have a native Sony lens for the camera: an 18-105mm f/4 powered zoom lens.
Menus
Before we dig into the external controls and layout of the camera, let’s make sure the menu settings are dialed in. The menu is a modernized version of what was present on the AX2000, with sections for camera, rec/out, audio, display, TC/UB, network, and system settings.
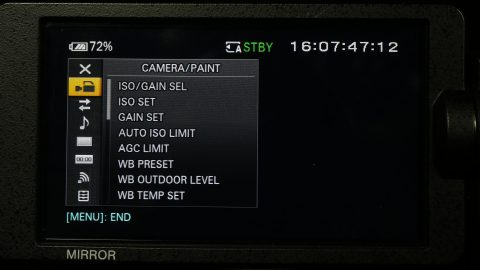
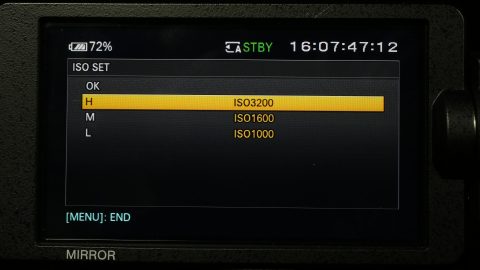
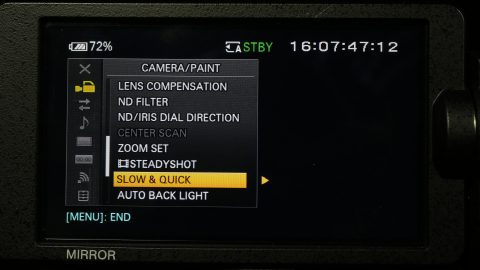
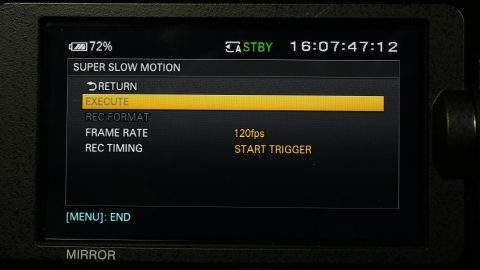
In the camera settings, you can define the ISO, white balance, ND, and other presets. Near the end of the camera section, you’ll find options for “Slow & Quick,” which is what this particular camera calls slow motion shooting. There are two options for slow motion: “S&Q Motion” and “Super Slow Motion.” Of these, the Super Slow Motion has a lot more options. You can choose 120, 240, 480, or 960 frames per second recording, as well as whether to trigger recording at the start or the end of the action. This functions very much like the High Frame Rate mode on the Sony RX10 II. Once you have the slow motion settings you want dialed in, there is a dedicated S&Q button on the side of the camera for entering that mode.
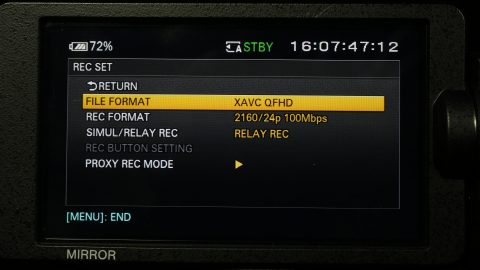
In the next section, Rec/Out, you can choose the frame rate, resolution, and video output settings. For 4K recording at 24 frames per second, go to the Rec Set option and choose the XAVC QFHD file format and the 2160/24p 100Mbps recording format. For HD recording, choose the XAVC HD file format and the 1080/24p 50Mbps recording format.
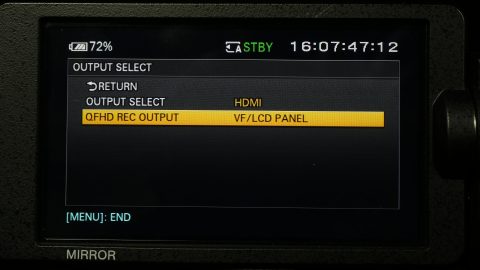
If you are using an external monitor with the camera, you may need to go into the Video Out options. Under Output Select, you can choose to output over HDMI or SDI. When you are recording in 4K, the camera is unable to output to multiple screens simultaneously during recording, so you can choose the external output or the camera’s built-in monitor under QFHD Rec Output.
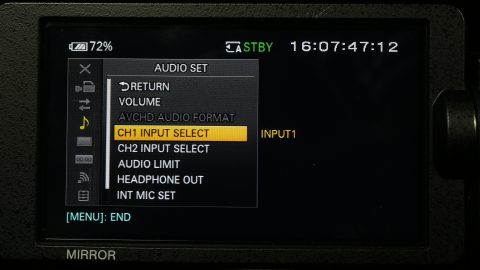
You’ll find the usual settings in the audio section. You should make sure that the “Ch1 Input select” and “Ch2 Input Select” are set appropriately. If you want to use the two XLR inputs on the camera, set Channel 1 to Input 1 and Channel 2 to Input 2. If you want to use the camera’s built-in microphone (which I would not recommend for serious work), you can set that there as well. You can also set both channels to record Input 1, which will give you the same microphone input twice with independently controllable levels. This is useful for creating an audio safety track – you could set one channel a few decibels lower to guard against the audio peaking.
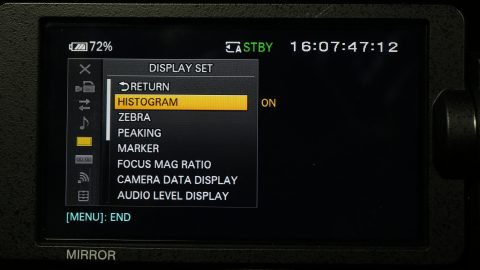
The display section contains options for the camera’s many exposure assist features, such as a histogram, peaking, and zebras. You can also toggle the audio display levels, framing guides, and other on screen information. One useful setting is the shutter display, which allows you to select shutter speed in fractions of a second (like a hybrid camera) or shutter angle. If you choose degree (shutter angle), you can leave the shutter setting at 180 and not worry about adjusting it when you switch frame rates.
The TC/UB section has options for outputting timecode, which you shouldn’t need to worry about for this class. You also shouldn’t need to make any changes to the network settings, which are used for wireless file transfers and streaming. In the system section, you can customize things such as the assignable buttons and dials. Near the end of the system menu is the media format option, which is used to format the SD cards.
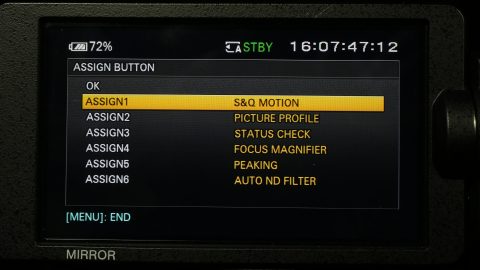
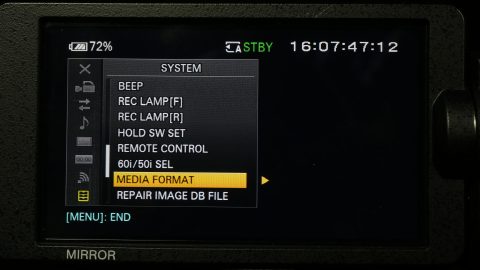
Camera Controls
On the side of the camera, you’ll find the usual plethora of physical external controls that you should expect on a high end dedicated video camera. There are preset switches for the ISO/gain and white balance and the button to set a custom white balance is on the front. Again, to set a custom white balance, point the camera a something white and hit the button. The presets for both ISO and white balance can be customized in the menus.
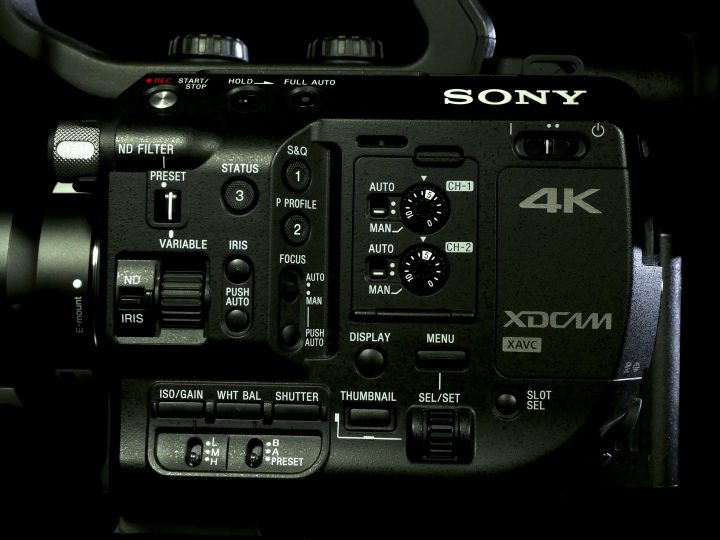
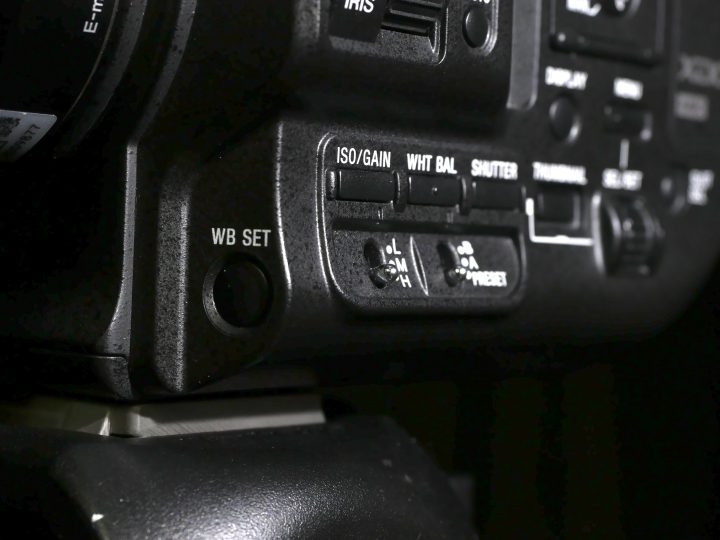
Also on the front is a dial for the build-in neutral density filters. The ND filters on the FS5 are pretty unique in that they are electronically controlled and can be set to preset levels or adjusted smoothly. To use presets, set the ND filter switch to preset; for finer control, set the switch to variable and make sure the ND/iris selector switch is on ND. You can then use the wheel next to the switch to smoothly adjust how dark the ND filter is. To change the aperture of a lens with electronic controls, flip the switch back to iris and use the same wheel.
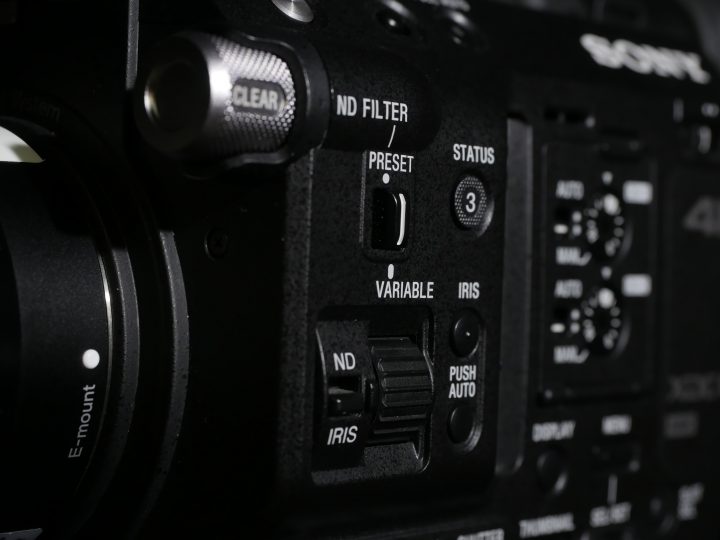
In addition to the various switches and dials, you should notice that there are buttons for ISO/gain, white balance, shutter, and iris. Pressing any of these will put that setting into its automatic mode; you’ll see an icon with an A next to the setting on the camera’s screen. When any setting is on automatic, the corresponding switch or dial won’t function. There is also a full auto button near the top that will put the ISO, white balance, shutter speed, and aperture on automatic. When the shutter speed is not set to automatic, it can be set by pressing the shutter button until the setting is highlighted on the screen, then adjusted using the SEL/SET dial.
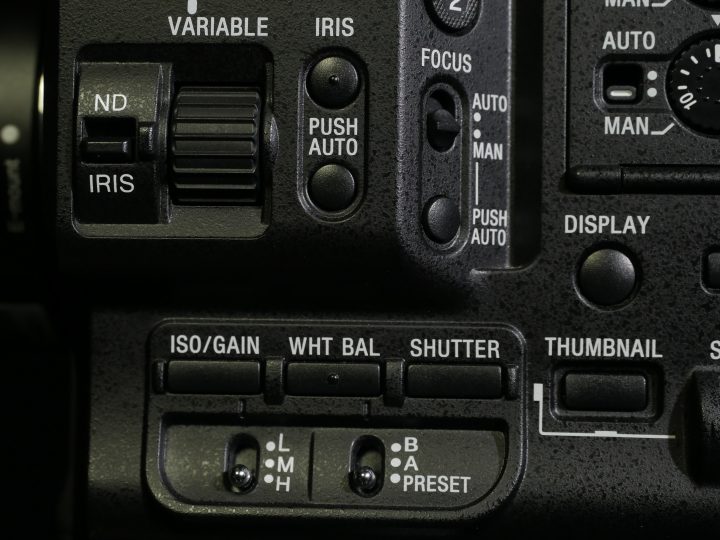
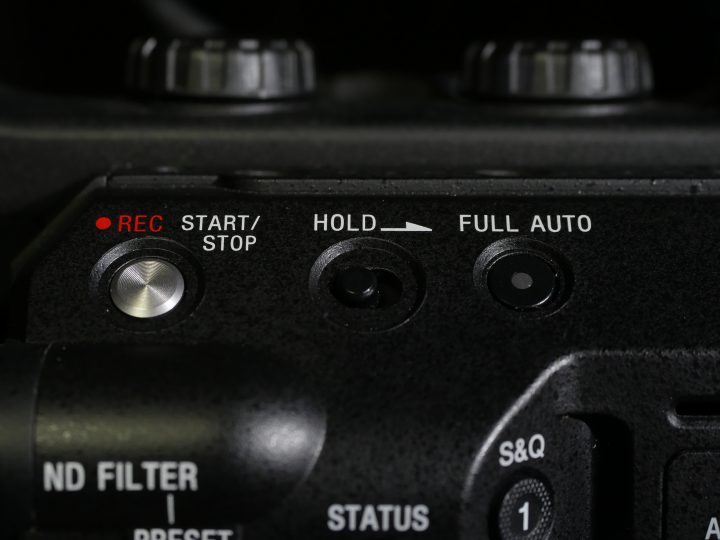
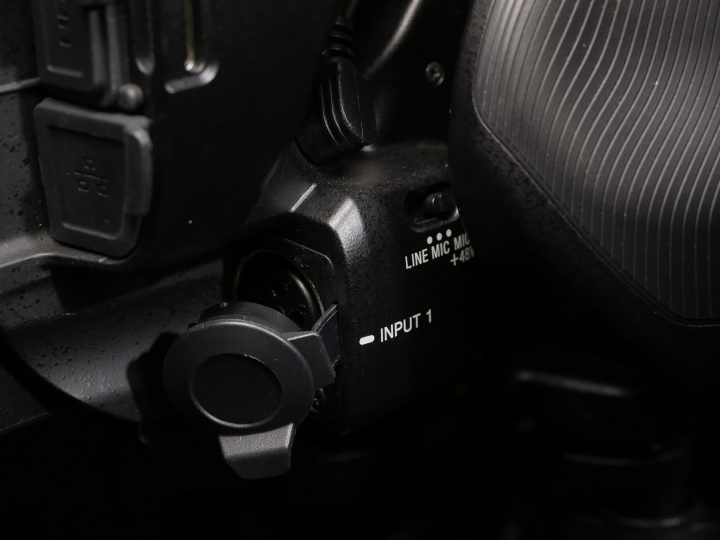
Other buttons on the side of the camera include toggles for the display, picture profiles, SD card slot, and slow motion mode. The audio level controls for the XLR inputs are behind a hinged door, although the line/mic/mic with phantom power switches are located next to the inputs themselves: one is on the top handle, the other is near the back of the camera, almost behind the side handle.
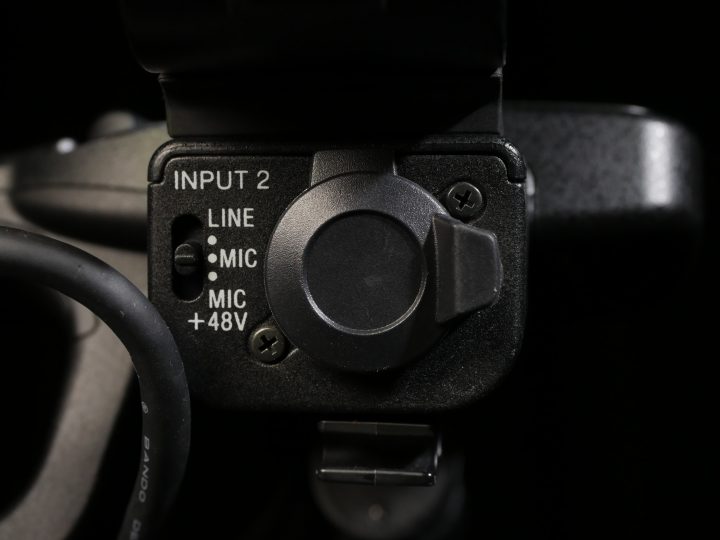
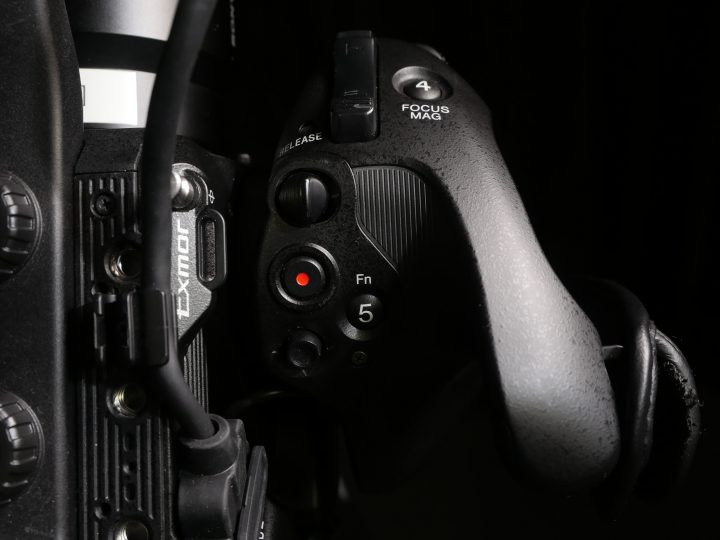
Speaking of the side handle, it provides a very solid grip for the camera and has lots of buttons that are conveniently located for single operators. There is a record button, focus magnification button, and a joystick for moving the focus magnifier. There is also a customizable button (Fn5), which we have set to focus peaking. There is a dial on the front of the handle for setting aperture, as well as a zoom rocker. The zoom rocker works with lenses that have powered zooms, such as our Sony 18-105mm f/4. There is a second zoom rocker on the top handle, along with another record button. The grip can be rotated using the release button.
Around the back of the camera are ports for SDI, HDMI, and ethernet. Along the other side of the back are the two SD card slots and the headphone port. Like other high-end video cameras, the FS5 has an open-backed battery compartment, which can accept batteries of different sizes and capacities.
Make no mistake: the FS5 is a complicated and sophisticated piece of professional-grade equipment. Between the various file formats, resolutions, frame rates, slow motion options, picture profiles, and customizable buttons, there are probably more settings on this camera than any other in our collection. It’s the kind of camera that you definitely need to familiarize yourself with before using.
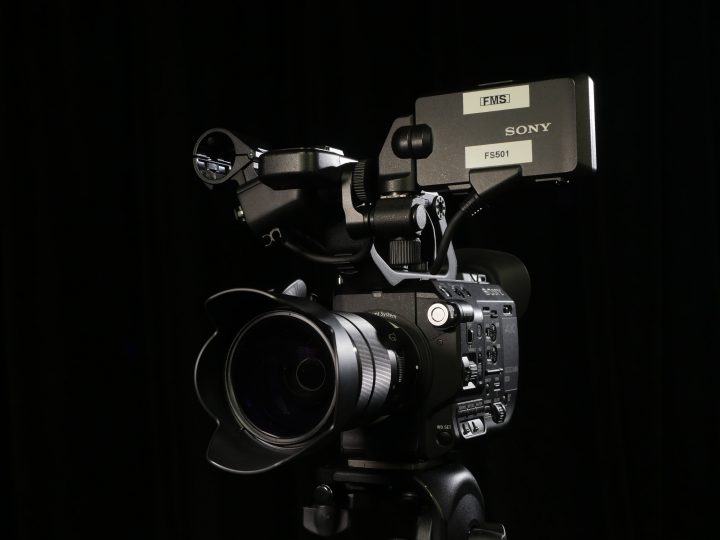
However (like most cameras of this type), once you know its layout, it becomes a very effective tool. It’s also a camera that can be physically customized for different shooting situations. The eye cup, side handle, top handle, and monitor can all be easily removed, creating a camera with a much smaller footprint. If you pair it with a lower capacity battery and a smaller lens, you suddenly have a camera small and light enough to use in confined spaces or even on a stabilizer.
Brought to You by StudioBinder
StudioBinder makes preproduction software, but they also have an impressive collection of tutorial videos online. Check out their videos on movement, blocking, and long takes below.
Long takes: https://youtu.be/h9AEYFYPYTM
Three Axis of Power!
We actually have several gimbals in our collection – each with different strengths and weaknesses. Here’s what we have and how to best use each one.
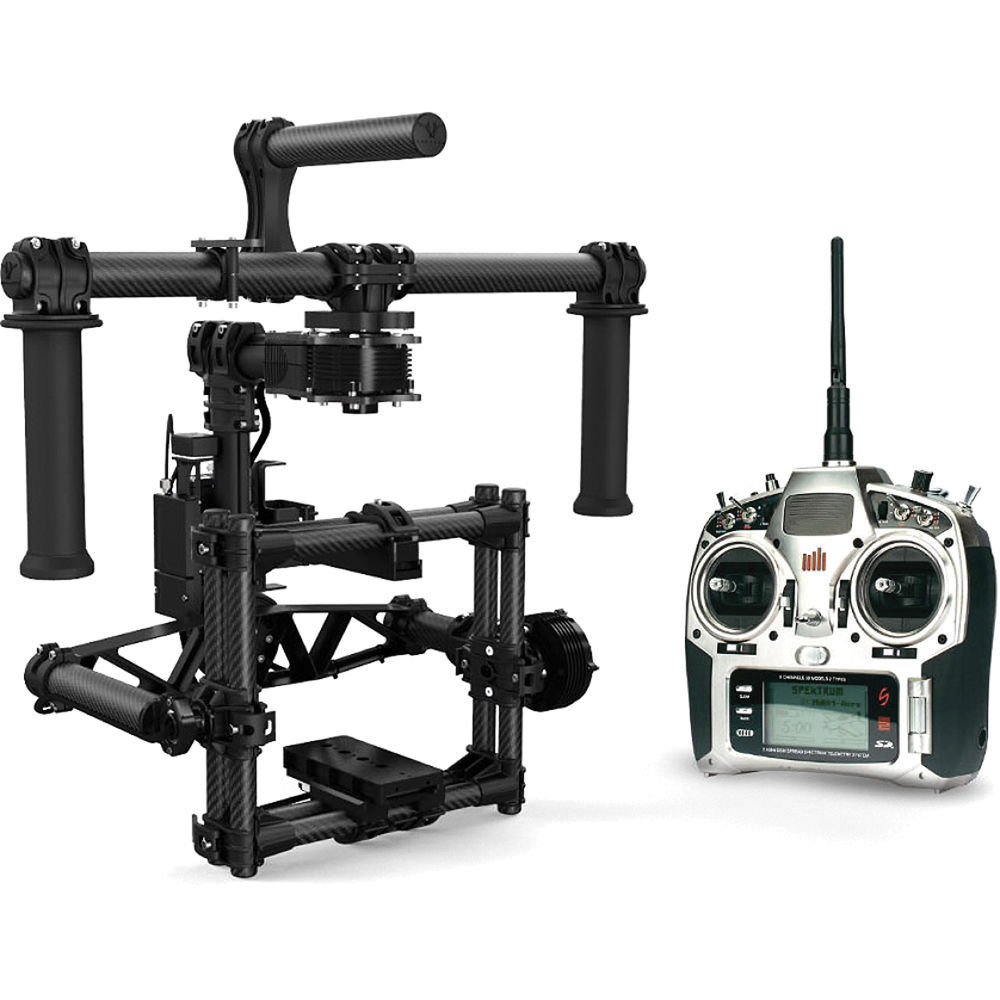
Movi M5 – The Movi M5 was one of the first high-quality gimbals on the market to achieve widespread use. It’s a two-handle gimbal made of carbon fiber and it can support hybrid cameras – but a larger camcorder will probably exceed the weight and size limits. It can also be controlled with a remote control, allowing for a two operator setup.
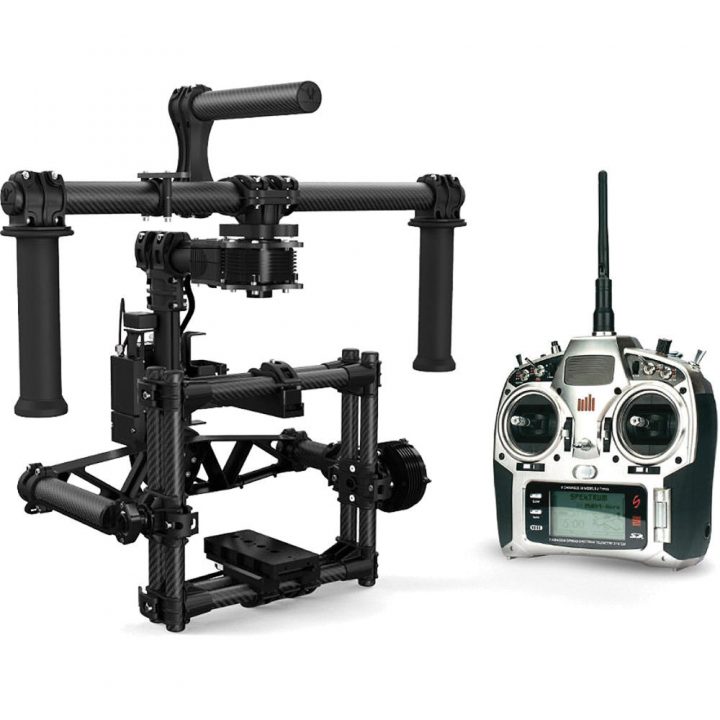
The camera mounts to the gimbal using a top and bottom plate. These slide into a “cage” of carbon fiber rods. With the camera mounted, it must be balanced. This is done by holding the gimbal so that only one axis can move and then adjusting the position of the camera so that it is as well-balanced as possible. On the Movi, adjustments are made by loosening thumb levers, sliding the rod clamps, and re-tightening.
This process is similar on every gimbal – the camera is mounted, then each axis is tested and adjusted until the camera is in a “neutral” position. If you twist the platform to any position, it should just “hang” there – if it swings quickly in one direction or the other, it isn’t properly balanced.
Balancing a gimbal takes practice – and it can seem complicated at first. Once you have a good grasp of the basic principles, however, the process goes fairly smoothly. I can only ensure you that it is infinitely simpler than trying to balance a camera on a Steadicam.
One thing you’ll need to keep in mind when using the M5 is that you can’t really set it down. You can place it on its custom stand, but it has no base of its own. Don’t forget the stand when using the M5. The stand is also a necessity for balancing.
The M5 is a very powerful filmmaking tool. However, as an older gimbal, it does have a few quirks. It uses very strange (somewhat volatile) batteries that must be connected using a flimsy wire – and only the red wire should be connected to the gimbal, not the white one. These batteries are charged using a proprietary system – both wires should be connected to the charger. Newer gimbals have much simpler power solutions. Also, while the tool-less adjustments are great, the process is still involves a lot of fiddling around and having to attach a top and bottom plate to the camera is a bit inconvenient. These issues aside, you can get stunning results with the M5 – it’s a professional-level piece of equipment.
Nebula 4000 – The Nebula 4000 was an early example of the single-handed gimbal. It operates on exactly the same principles as the M5 – three motors keeping a balanced camera level – but on a smaller scale. It has a pretty low weight limit: it works well with the BlackMagic Pocket or a GH4 with a lightweight lens, but anything heavier than that will be a struggle.
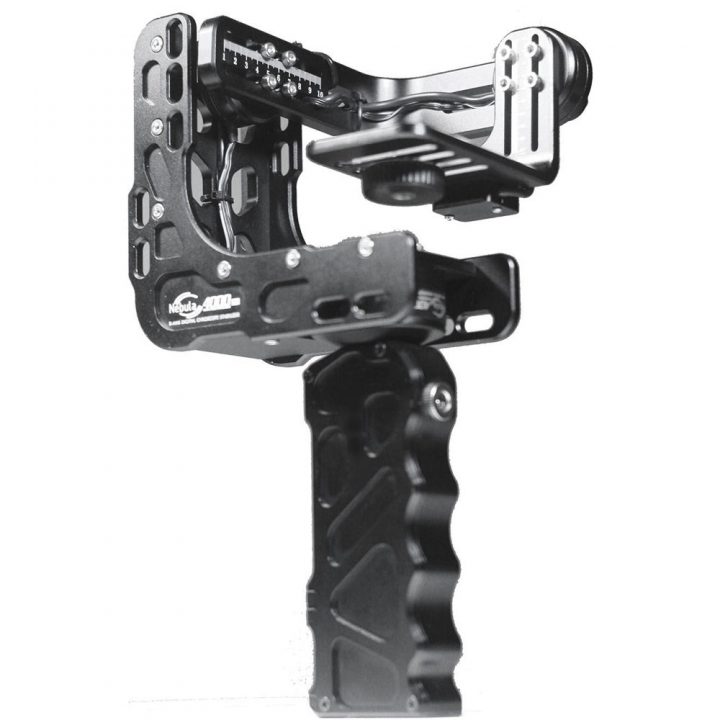
There are now a lot of single handed gimbals on the market, but the Nebula was pretty unusual when it was released. It was also less expensive than most gimbals on the market at the time. Professor Faden used it extensively on a research trip to Japan, where he had to capture footage quickly in a fairly unpredictable environment.
That being said, you should not use the Nebula 4000. It is extremely difficult to balance a camera on it – it uses several tiny hex screws that need to be individually loosened and re-tightened with a small Allen key. If you do manage to get the camera balanced, the gimbal’s firmware is flaky and prone to fail. The gimbal will sometimes shake or swing erratically. If you happen to bump the camera while the gimbal is running, it completely loses orientation.
I’ve included the Nebula 4000 in this list for the sake of completeness – and because it’s an interesting artifact of a still-developing technology. However, there are much better stabilization options available.
DJI Ronin S – The Ronin S is our newest gimbal. It has a similar form factor to the Nebula 4000 – it’s a single-handed gimbal designed for hybrid cameras – but it improves on that design in virtually every way.
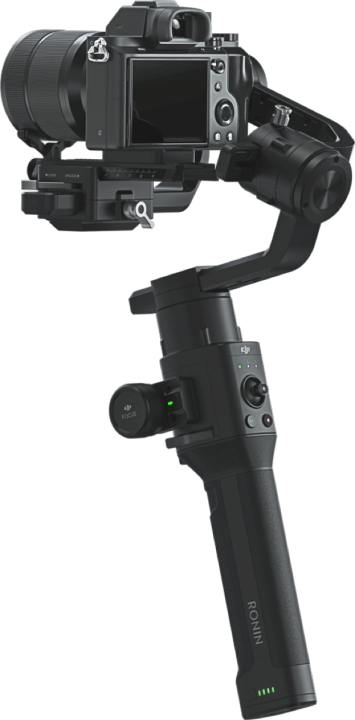
The Ronin S actually has the highest weight capacity of any of our gimbals – around seven pounds. That’s enough for a hybrid camera with a heavy lens or even a small cinema camera with a lightweight lens. The camera mounts to the gimbal using a Manfrotto-style tripod plate and balancing is fairly quick and easy using a few thumbscrews.
In terms of general design, there are two killer features on the Ronin-S. One is the rear motor arm, which is offset at an angle below the camera itself. This design allows you to easily see the rear screen of the camera when operating the gimbal. The other feature is a tripod base that can be folded up into an extended handle for the gimbal. The tripod base allows you to set the gimbal down between takes or make balancing adjustments. The extended handle is helpful for dealing with the weight of the gimbal and camera.
There are a lot of features on the Ronin S – there are three customizable modes, as well as a quick-follow “sport” mode. You can hold the trigger on the handle to lock the orientation in place, or press it twice to re-center everything. There are also various options in the DJI phone app, including motion time-lapse and pre-programmed repeatable moves. For a very quick overview, check out the video below.
DJI Osmo – The three gimbals listed above are all designed to be used with small-to-medium sized cameras and they all need to be carefully balanced before use. The DJI Osmo takes a slightly different approach: it’s a small camera permanently attached to a three-axis gimbal. That means that the unit never needs to be balanced and the camera can be directly controlled by the gimbal.
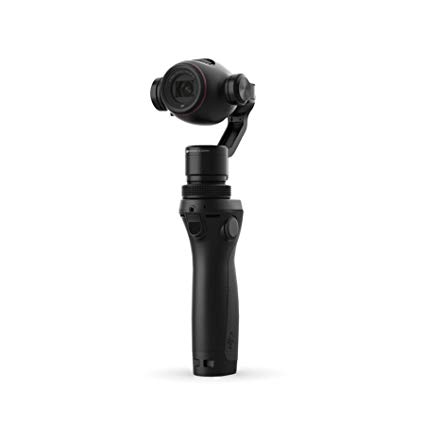
The camera on the Osmo has a wide angle lens that can be cropped in on slightly – it’s a lot like a high-end GoPro. The gimbal will point in whatever direction you aim it, but you can lock it into position with the trigger, just like the Ronin S. There’s also a joystick for making manual adjustments.
There’s no screen of any kind on the Osmo, which means that you need to pair it with your phone or a tablet in order to see what you’re filming. The phone app is also used to change exposure and recording settings on the camera. The Osmo connects to your phone via WiFi – the password is 12341234. You can find the full instruction manual for the Osmo at this link.
Once you do get into the camera settings, you’ll find that the Osmo has a ton of recording options, including 4K and a variety of slow motion settings.
Gimbal Tips
Gimbals are a ton of fun to use and they open up a lot of creative possibilities. However, it’s still important to be intentional with how you use them. Shots need to be blocked and composed thoughtfully to take full advantage of the unique perspective offered by gimbals. When a camera is locked on a track or a tripod, you are forced to work slowly and carefully. Gimbals let you improvise, moving the camera freely – but you will get the best results with a little planning. Here are some tips for getting great gimbal footage.
Going Steady
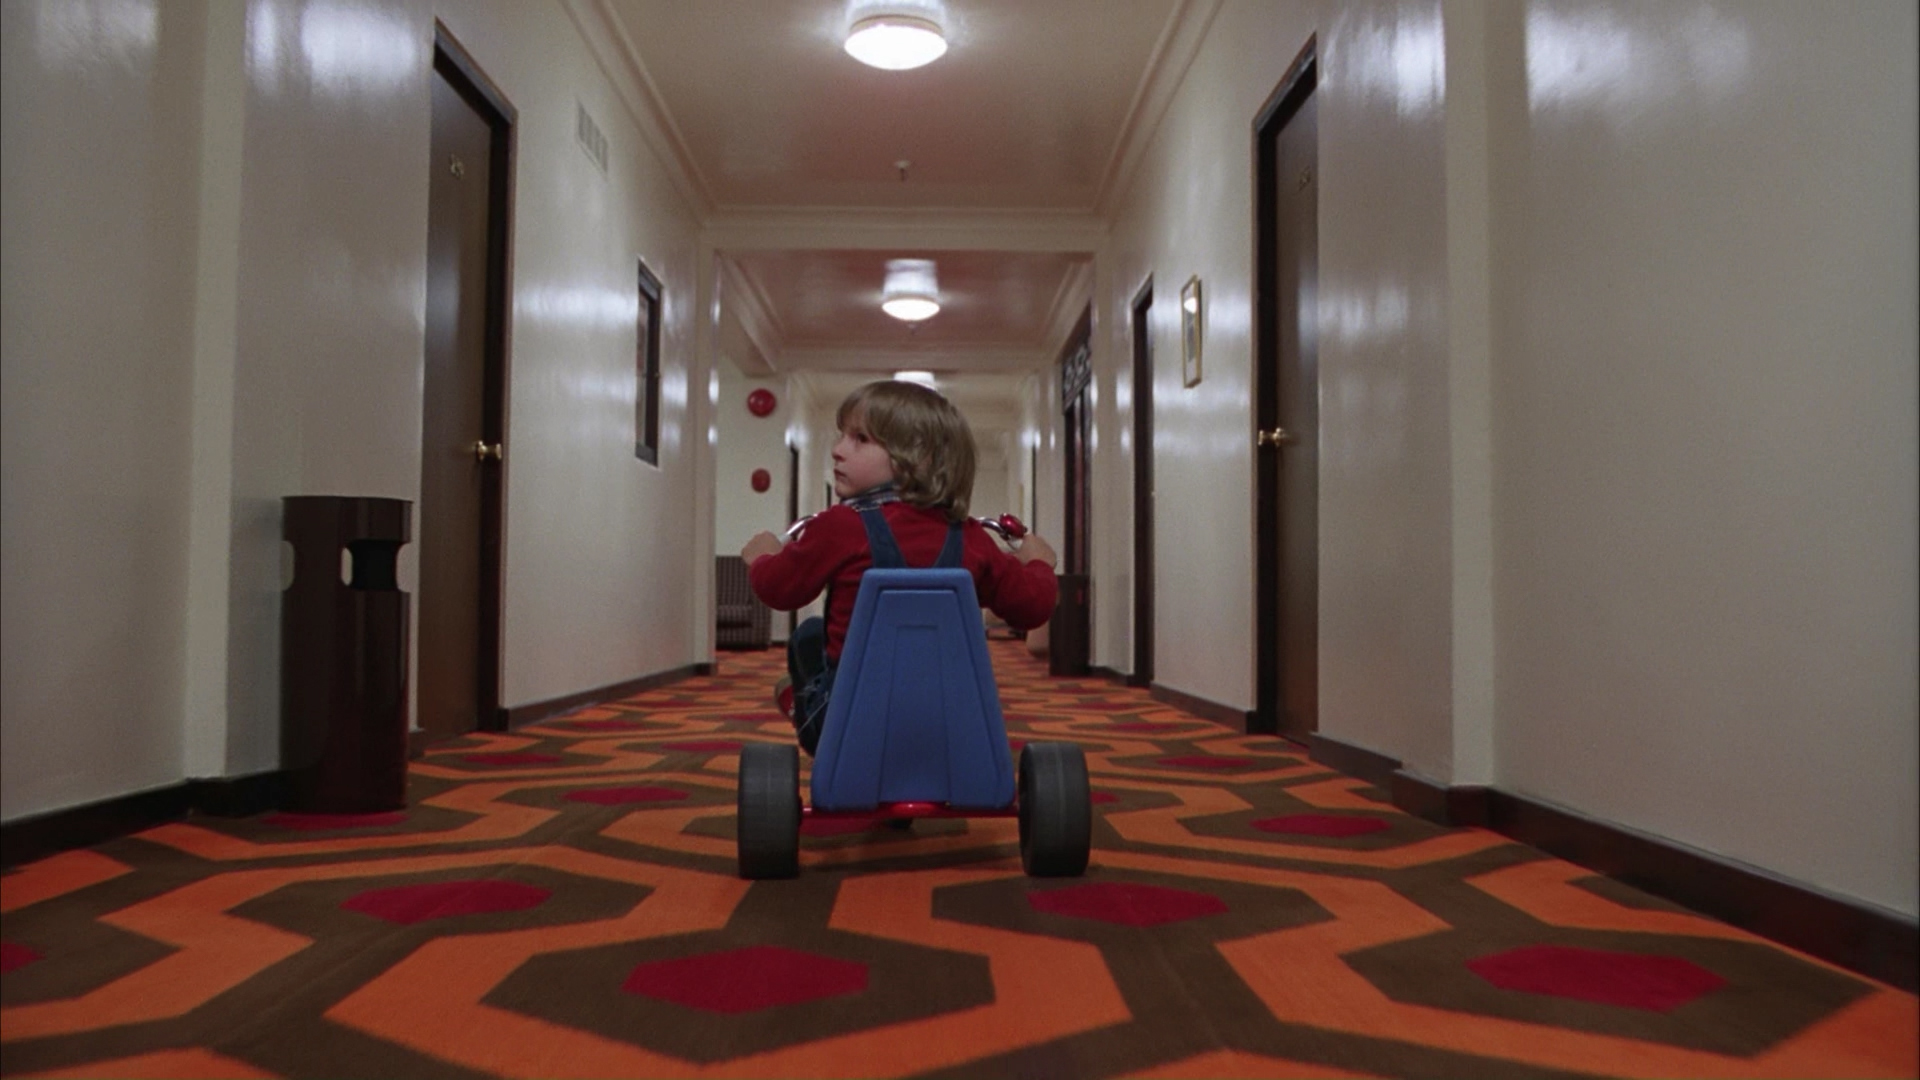
After decades of cinematography involving cameras on tripods, dollies, sliders, and cranes, the camera went mobile. Cinematographer Garrett Brown invented the Steadicam in the mid-1970s and it was popularized by two horror movies of the era: John Carpenter’s Halloween in 1978 and Stanley Kubrick’s The Shining in 1980.
The Steadicam is a mechanical counterweighted stabilization device that allows a camera operator to move with a camera – without the shakiness usually associated with handheld camerawork. The camera is mounted onto a platform on a weighted pole that can rotate along several different axis. That platform is suspended by a spring-loaded arm, which is attached to a reinforced vest. The key to the Steadicam’s effectiveness is balancing the camera on the platform and the tension of the springs in the arm. With everything dialed in correctly, the camera will “float” in front of the operator. A skilled Steadicam user can walk smoothly and adjust the orientation of the camera on the fly. This allows the camera to travel in ways that were impossible before –through doorways, down hallways, up and down stairs – in a smooth, cinematic way.
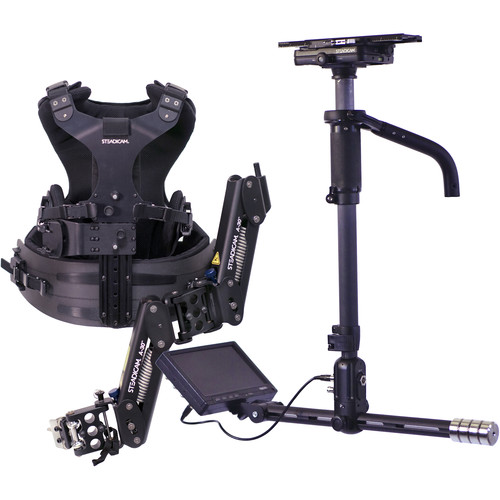
The following clip from The Shining is one of the classic examples of brilliant Steadicam work. Garrett Brown himself was heavily involved with the cinematography of the film, helping to create custom rigs for Kubrick’s complex shots. The Steadicam was used most famously to follow the character Danny as he explores the Overlook Hotel on his tricycle, but it was also used as a replacement for the kind of tracking shots that would normally be done on a dolly or slider. The “floating” camera is especially effective in The Shining precisely because it moves in ways that should be impossible – it gives the impression that we are seeing the film through the perspective of one of the hotel’s restless ghosts.
Halloween also used the Steadicam in an exciting new way, most notably in its opening sequence. Carpenter utilized the technique to give the camera the perspective of young Michael Myers as he commits his first grisly murders. We even see the child’s hands as he retrieves a knife. The camera work in this sequence isn’t nearly as smooth and “floaty” as that in The Shining, but it matches the gait of the child walking through the environment. This sort of smooth point-of-view cinematography was revolutionary in 1978 and would have been impossible before the invention of the Steadicam.
https://www.youtube.com/watch?v=nnWw060ygG8&t=77s
Here’s an interesting historical artifact: the 1978 test footage created for the opening sequence of Halloween. At the time, the Steadicam was known as the “Panaglide” and had only been used on three other films.
Steadicams changed the way the cinematographers create moving images. They were – and still are – used on features, commercials, television, and even broadcast journalism. However, there are limitations to what you can achieve with a Steadicam: they are heavy, awkward, and require a very skilled operator. When you operate a Steadicam, you need to walk smoothly and evenly and you have to manipulate the camera carefully. The process of balancing a camera on a Steadicam is also time-consuming – and failing to do so correctly will result in poor performance. These issues aside, the Steadicam completely transformed film movement – and paved the way for innovations to come.
Gimbal Revolution
About five years ago, a new technology began to emerge in the world of filmmaking: the three axis gimbal. A gimbal can be used to achieve many of the same shots that had been captured on a Steadicam – smooth running, transitions between locations, traveling up and down stairs – but they also opened up an entire realm of new possibilities.
A gimbal works by using three motors to keep a camera level along the pan, tilt, and roll axis. Larger gimbals generally suspend the camera in a sort of cage with a two-handle grip above. The camera can be “steered” using the handles, but the normal shakes associated with handheld work are smoothed out. A gimbal does not remove “up and down” motion, although a gimbal can be mounted to the spring arm of a Steadicam to help with this. The camera still needs to be balanced carefully in the gimbal – the better balanced it is, the less work the three motors have to do – but this process is generally faster and easier than balancing a Steadicam.
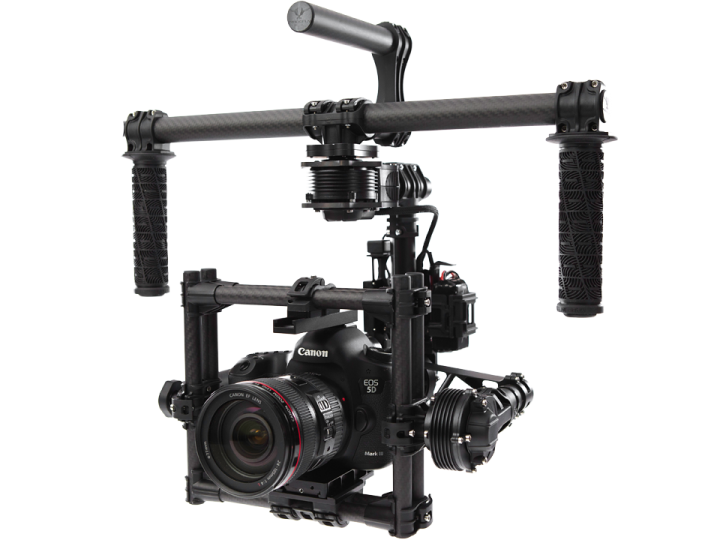
Gimbals allow creators to film smooth movement with a more compact device that is easier to use with less training. Because a gimbal is not physically attached to its operator, it can be passed from one person to another, or through spaces that would be otherwise inaccessible. On one shoot for the advanced production class, we passed a gimbal from an operator to a special rig on a small crane. Because they are electronic, many gimbals can also be operated remotely – one person can move the unit through a scene and another can point the camera in the right direction.
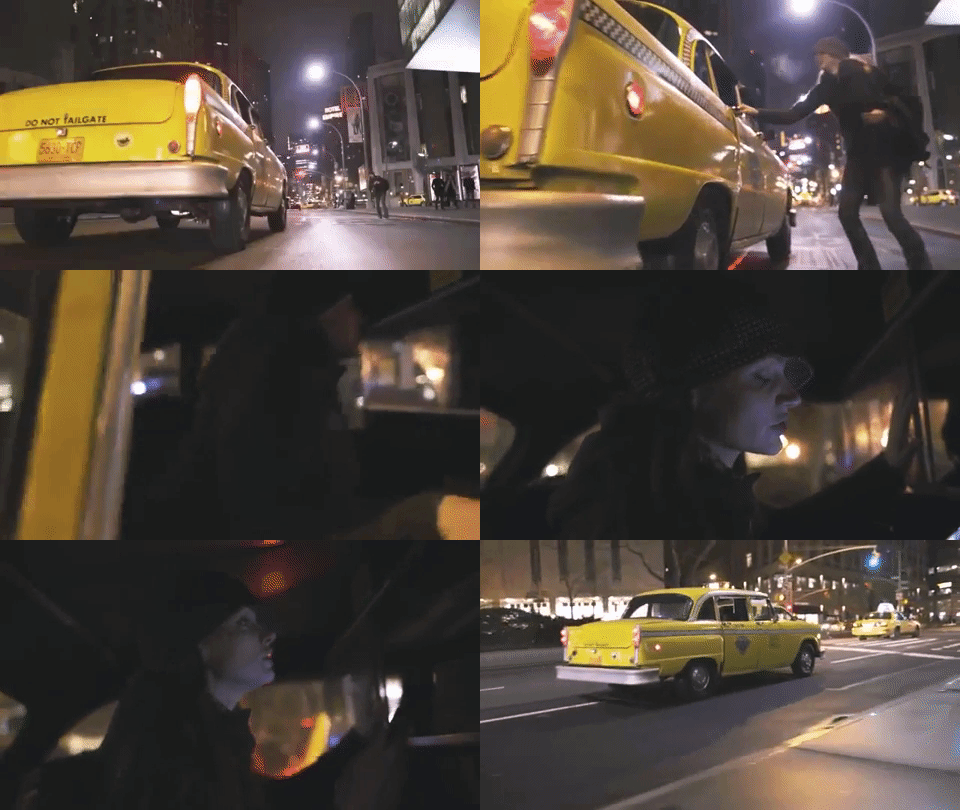
From the very beginning, filmmakers used gimbals to craft shots in dynamic new ways. The scene below was filmed by Vincent Laforet back in 2013 as part of a short film meant to show off the (then) new technology’s potential. To achieve the shot, a camera operator on roller blades chased a taxi, which the actor rushed into. As the car takes off, the operator holds onto the side and films through the window, then skates away backwards. A second operator assisted through a remote monitor. This kind of shot simply would not have been possible before the invention of the gimbal.
If you look at the behind-the-scenes materials for any major recent film, you’ll probably see gimbals all over the place. There are lots of examples in this featurette for Straight Outta Compton – in many of them, the camera is passed from one operator to another or from a rig of some kind to an operator.
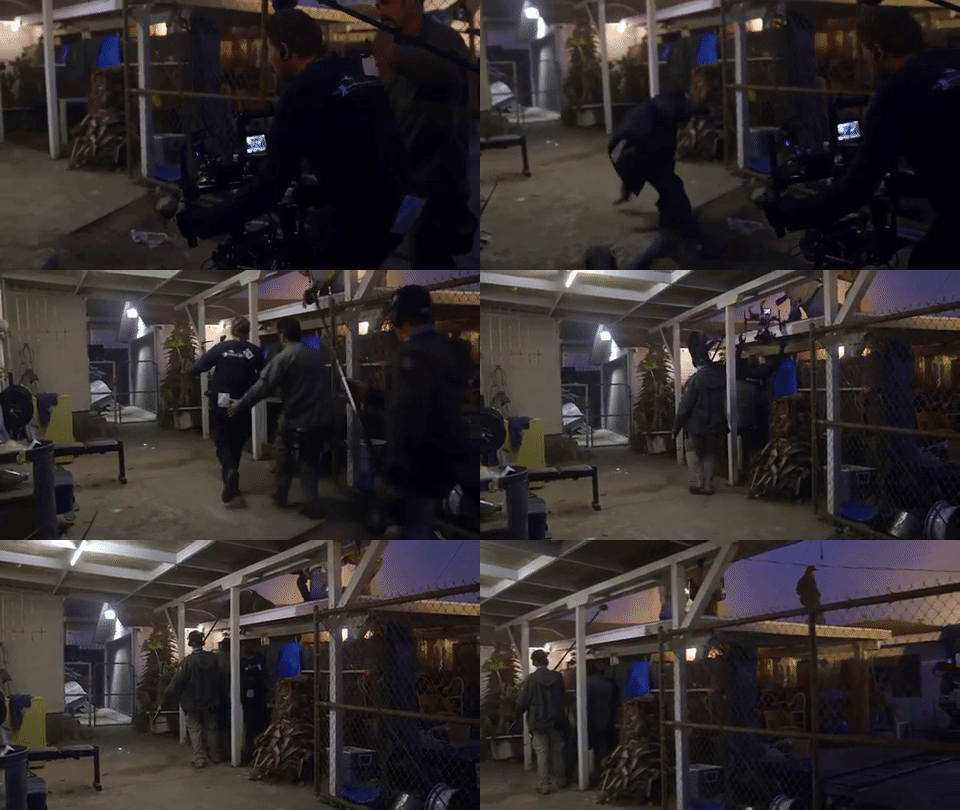
In the last few years, this technology has gotten cheaper, lighter, more capable, and much more widespread. The latest gimbal in our collection is the DJI Ronin S, a single-handed gimbal that can carry a payload of up to seven pounds. Check out the following promotional short film (and making-of video) to see what it can do.
What’s Next
I think that both gimbals and Steadicams will continue to be used for a long time. Gimbals in particular are starting to reach a stage of mainstream adoption that were never seen on their more expensive and complex mechanical ancestors. You can now buy a three axis gimbal for a cell phone for around a hundred dollars. However, Steadicams are still common on the sets of major productions – they can hold more weight and there are a lot of skilled Steadicam operators who can achieve amazing results with non-electronic stabilizers.
The next evolution of stabilization technology is taking place within the camera itself. We’ve had lenses with built-in image stabilization for a long time – it’s been used to take out the tiny jitters that come with handholding a camera, especially at a longer focal length. Image stabilization in the body of the camera works by actually moving the sensor to compensate for small movements. This is sometimes referred to as IBIS, or In-Body Image Stabilization. Sometimes, this is further enhanced electronically, by cropping in on the image slightly.
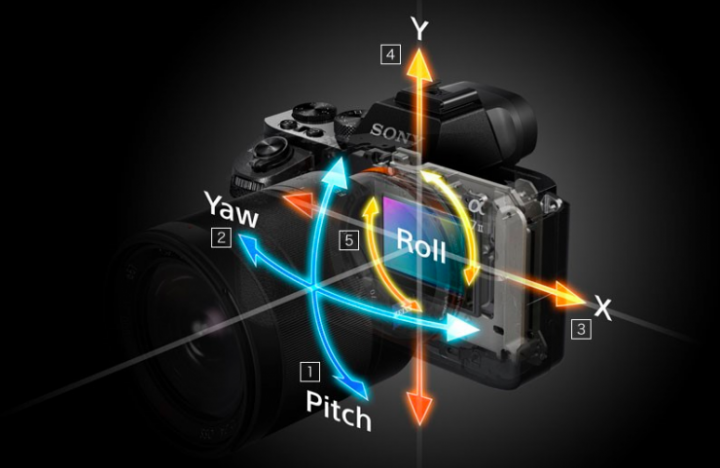
IBIS has improved the image stabilization capabilities of some cameras to the point that a gimbal is not always necessary. Panasonic, Fuji, and Sony are all using this technology and I think it will see more widespread adoption in the next few generations of hybrid cameras. The latest camera from GoPro uses a feature called HyperSmooth, which seems to be a combination of electronic and sensor stabilization, with some really remarkable results.
This technology is still developing, but it is very promising. Eventually, we may reach a point where completely smooth footage can be captured without any external stabilization – no gimbal, no Steadicam, not even a shoulder rig. I can only imagine the kind of impossible moves that we’ll be pulling off then.
Bonafide and Entirely Unfalsified
Here’s a sweet (and utterly ludicrous) animated history of the camera from the always-delightful Royal Ocean Film Society.
https://www.youtube.com/watch?v=zI1JzDFHVh4